There are many great reasons to start splitboarding at a ski resort before diving into the backcountry. Ski areas provide consistent conditions, comparatively minimal risks, and a fantastic chance to familiarize yourself with your gear, all of which have made uphilling at the ski resort an increasingly popular activity. Ultimately, splitboarding at the resort is great for dialing in the basics—like your fitness and skills—before heading into the backcountry.
Note: Every ski area has its own uphill policy, dictating everything from allowable hours to required routes, and regulations regarding everything from gear to pets. Make sure to check the ski area’s uphill policy before you go and follow the rules while you’re there.
Splitboarding Glossary
To grasp the basics of splitboarding, it is first helpful to understand the key vocabulary.
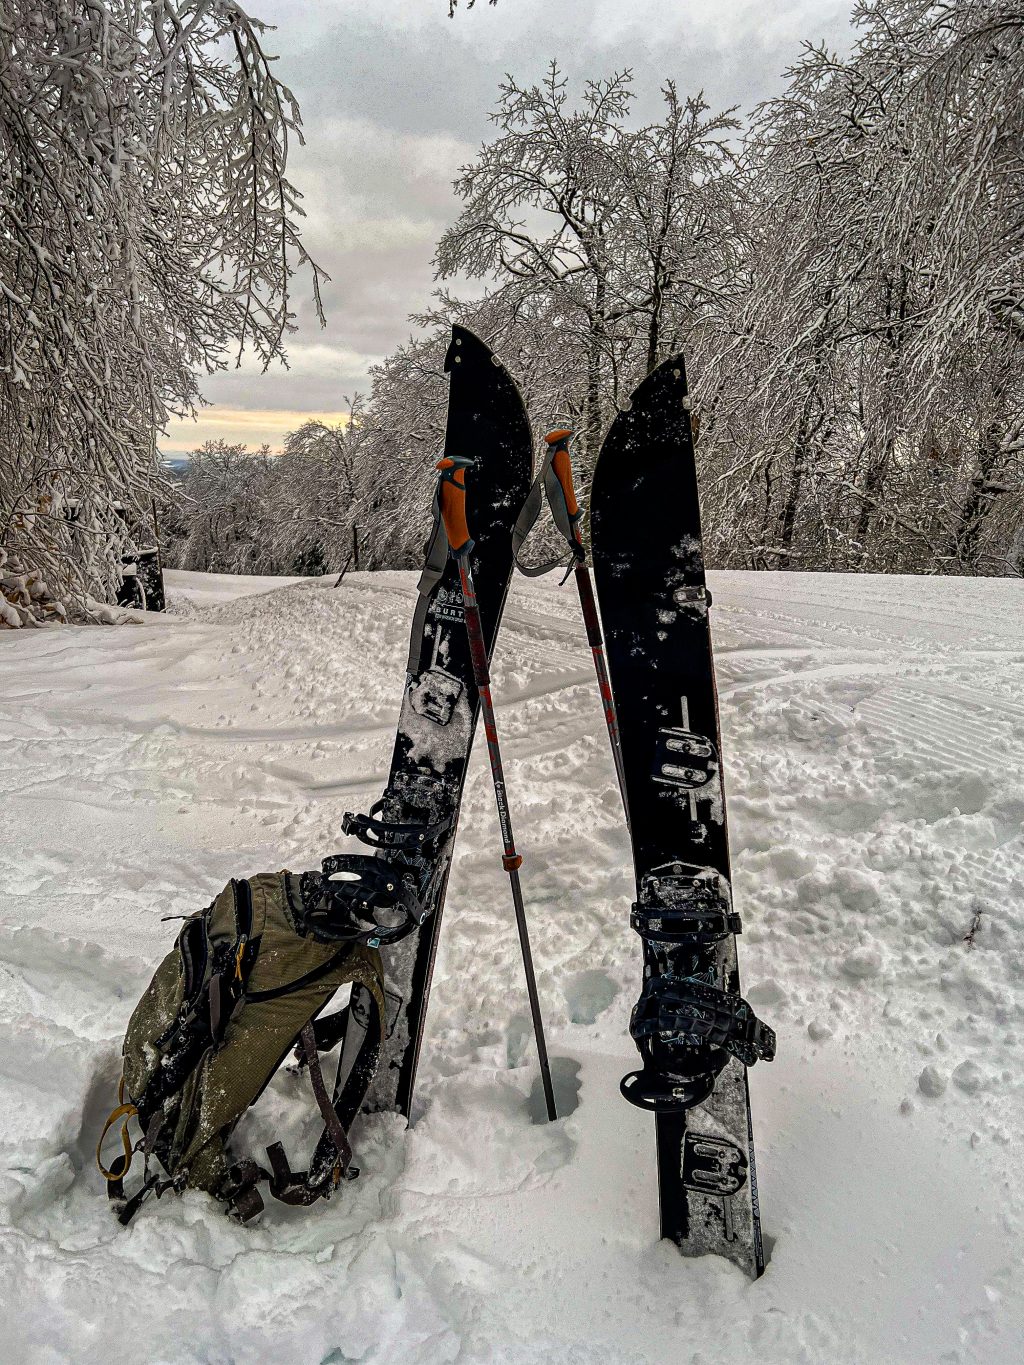
Splitboard: A snowboard that’s been cut in two down its middle—you can use each half independently like skis (for ascending) or together as a snowboard (for descending).
Splitboards are available from manufacturers, but you can also make one yourself by cutting an old snowboard in half and using a DIY split kit. DIY splits are a fun project and a cost-effective option, but in my experience they don’t perform as well on the firm conditions commonly encountered at East Coast resorts.
Pucks: These are used to attach snowboard bindings to the board and allow them to work for both touring and descending. Traditional snowboard bindings work with an adapter to attach to the pucks, while splitboard-specific bindings attach directly to the pucks.
Touring bracket: What bindings attach to when the board is in touring mode (split into two halves).
Split hooks: Hold the two halves of the board together and provide stiffness to the board when descending.
Tip clips: These are found at the tip and tail of the board and help keep the two halves of the board together when descending.
Climbing bar: These are wire-like devices used to climb steep slopes and reduce calf strain when ascending.
Practicing Splitboarding at Ski Areas
While uphilling at the resort is a lot of fun and a worthy activity in its own right, it’s also an awesome opportunity to hone your skills. A few specific things to work on include:
Converting the Board from Split to Solid
Practice taking your board apart and putting it together—going from halves to whole and moving bindings from touring to riding mode. Transitions are often the coldest part of a tour and the faster you get, the more comfortable you’ll stay. It’s also worth noting that it generally takes splitboarders longer to transition than skiers, who are generally not enthusiastic about waiting for splitboarders futzing around at transitions.
Taking Skins On and Off
Skins are very sticky and a magnet for everything from debris on the trail to wrappers in your pack. Learn how to get them on and off efficiently (without exposing them to dirt, grime, sticks, etc.) and how to store them—I prefer to fold them in quarters and store them in the bag they came in or, on super-cold days, inside my jacket.
Many adept skiers can take their skins on and off without removing their skis—making their transitions considerably quicker than splitboarders. The faster you get at getting your skins on and off, the more popular you’ll become with your two-planker friends.
Know How Your Poles Work
If you’re using collapsible poles, familiarize yourself with how they break down and the best place to store them—whether it’s inside or outside of your pack. If you’re practicing taking your poles apart before hitting the slopes, remember to do it with your gloves on. The buttons, clips, and locks found on many poles are surprisingly finicky to operate when wearing thick ski gloves.
Transitioning from Up to Down and Down to Up
This is where the rubber hits the road and practice really pays off. Figure out the most efficient method for unloading your pack, stripping/attaching your skins, converting your board, and repacking your bag. Routine is key, so find an order that works for both the uphill and downhill transitions and stick to it—this will help you avoid skipping any critical steps and riding away without an important piece of gear.
Plus—not sound like a broken record—it will also help prevent everyone in your party from waiting for you.
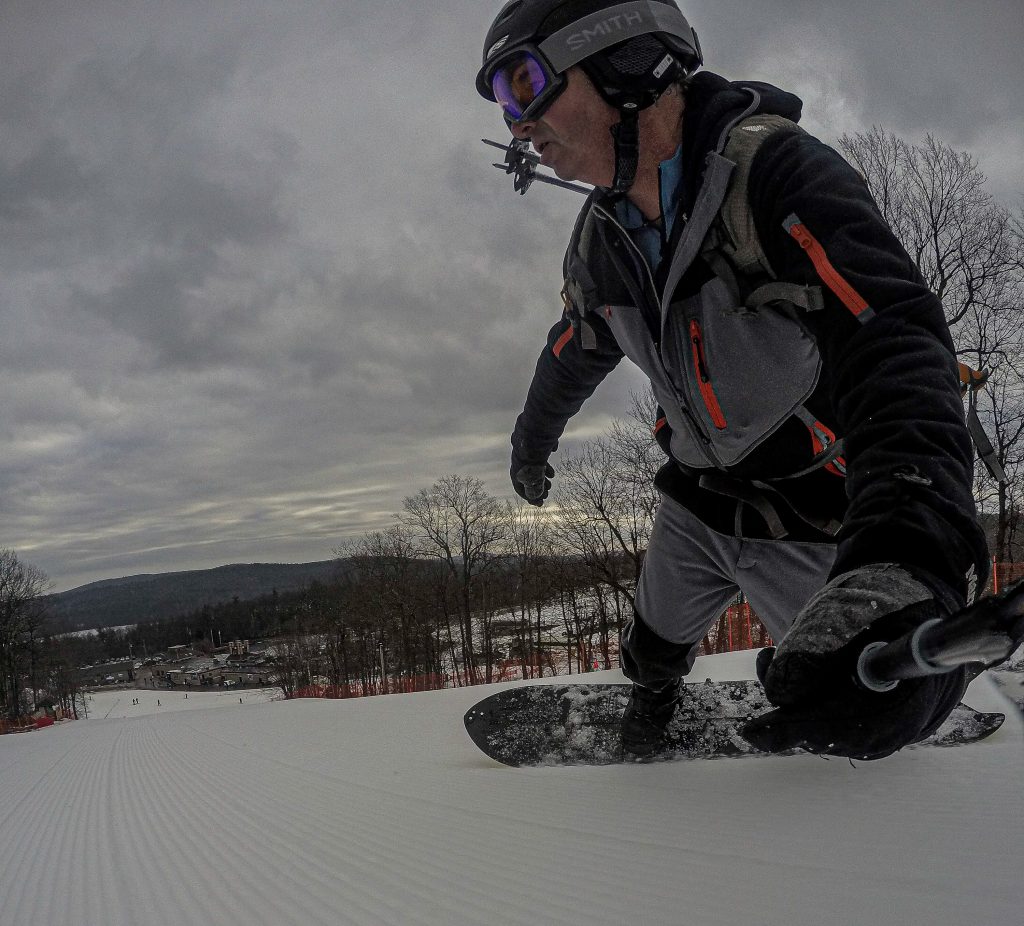
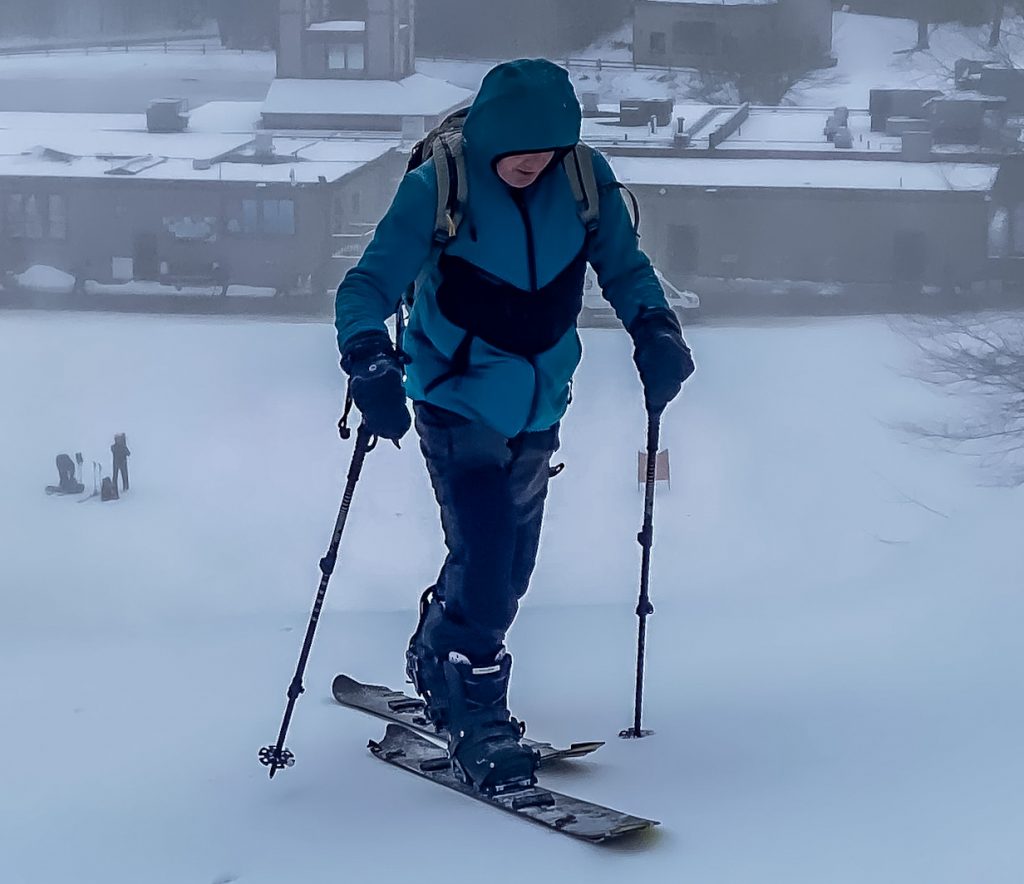
Skinning/Uphilling
When using your splitboard in touring mode, it’s a good idea to have its hooks and clips facing outward (away from each other). This prevents snags and helps avoid accidentally snapping one off.
The action of skinning is more like cross-country skiing than hiking. Try not to pick your feet up while skinning; rather, glide and pull (not push) the halves of the board forward. Find a sustainable pace and avoid pushing too hard—neither the ski area nor other uphillers are keen on you puking on the side of the trail.
If your splitboard has heel risers, play with them to learn what degree of slope you find them beneficial.
Splitboarding Gear
In addition to the splitboard-specific gear mentioned above, there is some other key gear you’ll want for skinning at the resort.
Boots: A number of splitboard-specific boots are available. That said, any high-quality snowboard boot will work for splitboarding.
Skins: Carpet-like strips of material that attach to the bottom of the split board that provide traction—they’re able to glide forward but not slide backward. Skins are attached to the two separate halves of the board for touring.
Poles: Most snowboarders aren’t accustomed to carrying ski poles, but splitboarders will want them for the ascent. The more packable the poles, the better. Bonus points if you can fit them in—rather than attach them to—your pack.
Helmet: A lightweight, touring-specific helmet is a nice luxury, but any ski/snowboard helmet will work.
Goggles: Protect your eyes from debris, cold, and glare by packing a pair of goggles for the descent.
Puffy jacket: A nice, warm, insulated jacket is a splitboarder’s best friend—it keeps you cozy everywhere from the ski area’s base to transitions to frosty descents.
Food and water: You burn a lot more energy earning your turns compared to riding the lift. Pack a water bottle (in an insulated sleeve or wrapped in your puffy) and some high-energy snacks to keep yourself fueled.
Lastly, you’ll need a pack to carry everything. Depending on how fancy your gear is and how efficient of a packer you are, you’ll need a pack ranging in size anywhere from mid-20 liters to low-40 liters. Ski- and snowboard-specific packs come with some handy features, like dedicated goggle pockets, special helmet carriers, and fabric designed to shed snow, however, a good daypack will work in most cases.
Consider adding a small first-aid kit, as well as a small repair kit, to your pack—splitboards have a lot of little parts, and they’re easy to misplace, especially when you’re rushing in the cold. Skinning at many ski areas is allowed only when the lifts aren’t spinning, which means ski patrol is likely unavailable in the event you need help.
The Golden Rule of Splitboarding
Splitboarding at the resort is a fantastic winter activity and a great way to build skills. Just remember to have fun, stay safe, and follow the ski area’s rules for uphilling.
Related Posts