Sometimes, partners are hard to come by. They’re out-of-town, or laid up with an injury, or maybe you just want to get a few laps in before or after work. Either way, you don’t need a partner to go climbing. That’s where the top-rope solo—a method of self-belay—comes in. With some practice and a couple shiny new pieces of gear, you can get up and running for some me time in no time.
Disclaimer: Climbing is dangerous and climbing alone is doubly so. As there is no partner to help safety check, special attention needs to be paid to every part of the process. Do your research, be prepared, and know when—and how—to back off when it doesn’t feel right. And, as always, the best way to build your skills is to seek qualified instruction.
What You Need
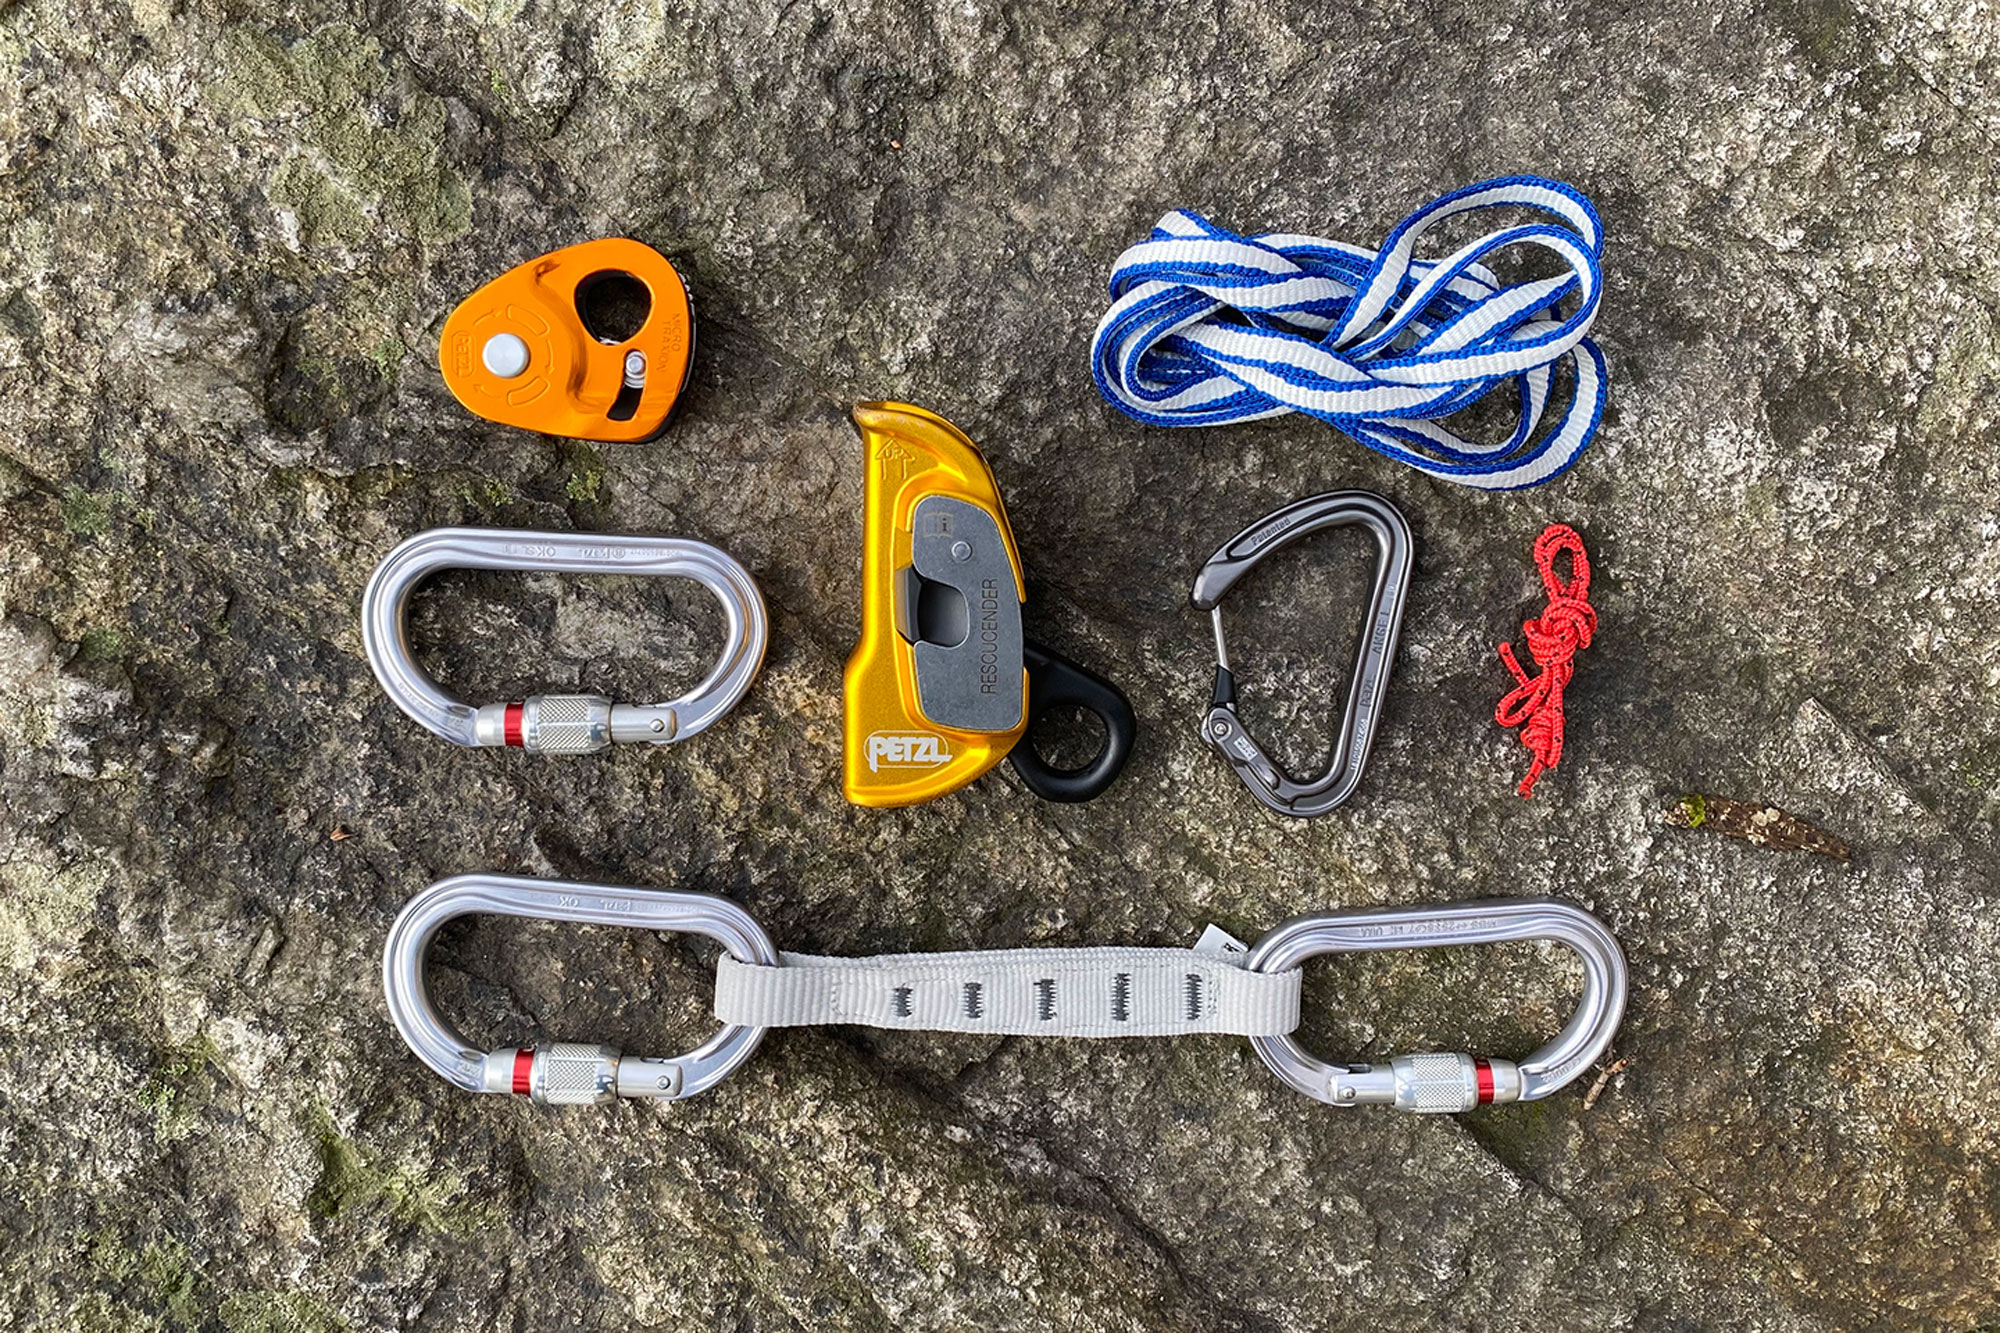
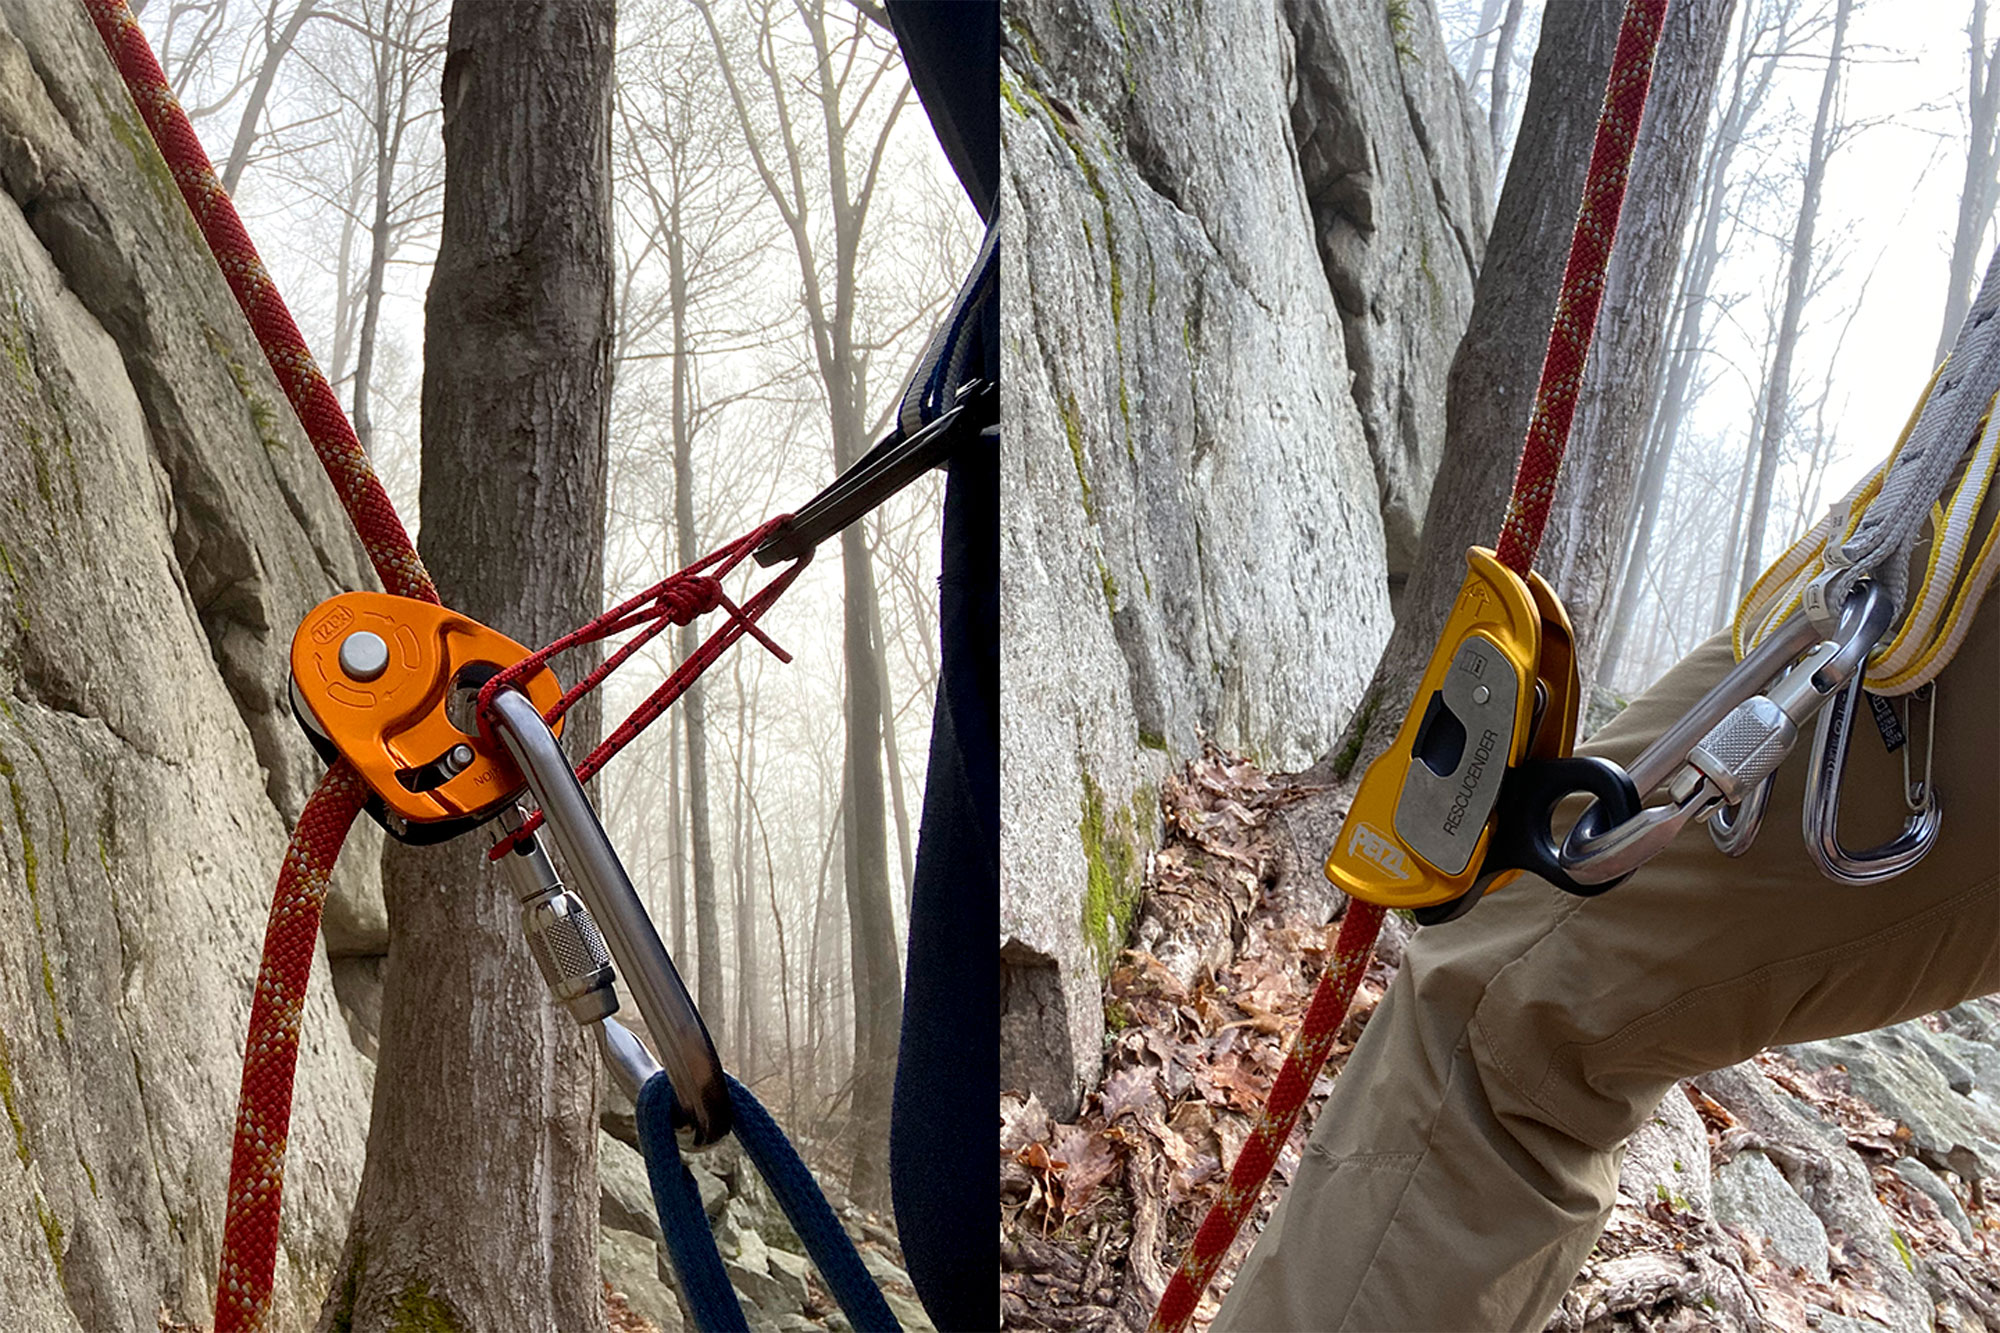
You probably already have most of what you need to top-rope solo, with the notable exception of a progress capture pulley, a rope clamp, or a shunt. The set-up pictured above includes the following:
- Petzl Express Quickdraw
- 3x Petzl OK Screw Lock Carabiners
- Petzl Ange L Carabiner
- Petzl Micro Traxion
- Petzl Rescucender Rope Clamp
- Black Diamond 10mm x 120cm Dynex Runner
- 30cm Sterling 3mm Accessory Cord tied into a loop with a double-fisherman’s knot
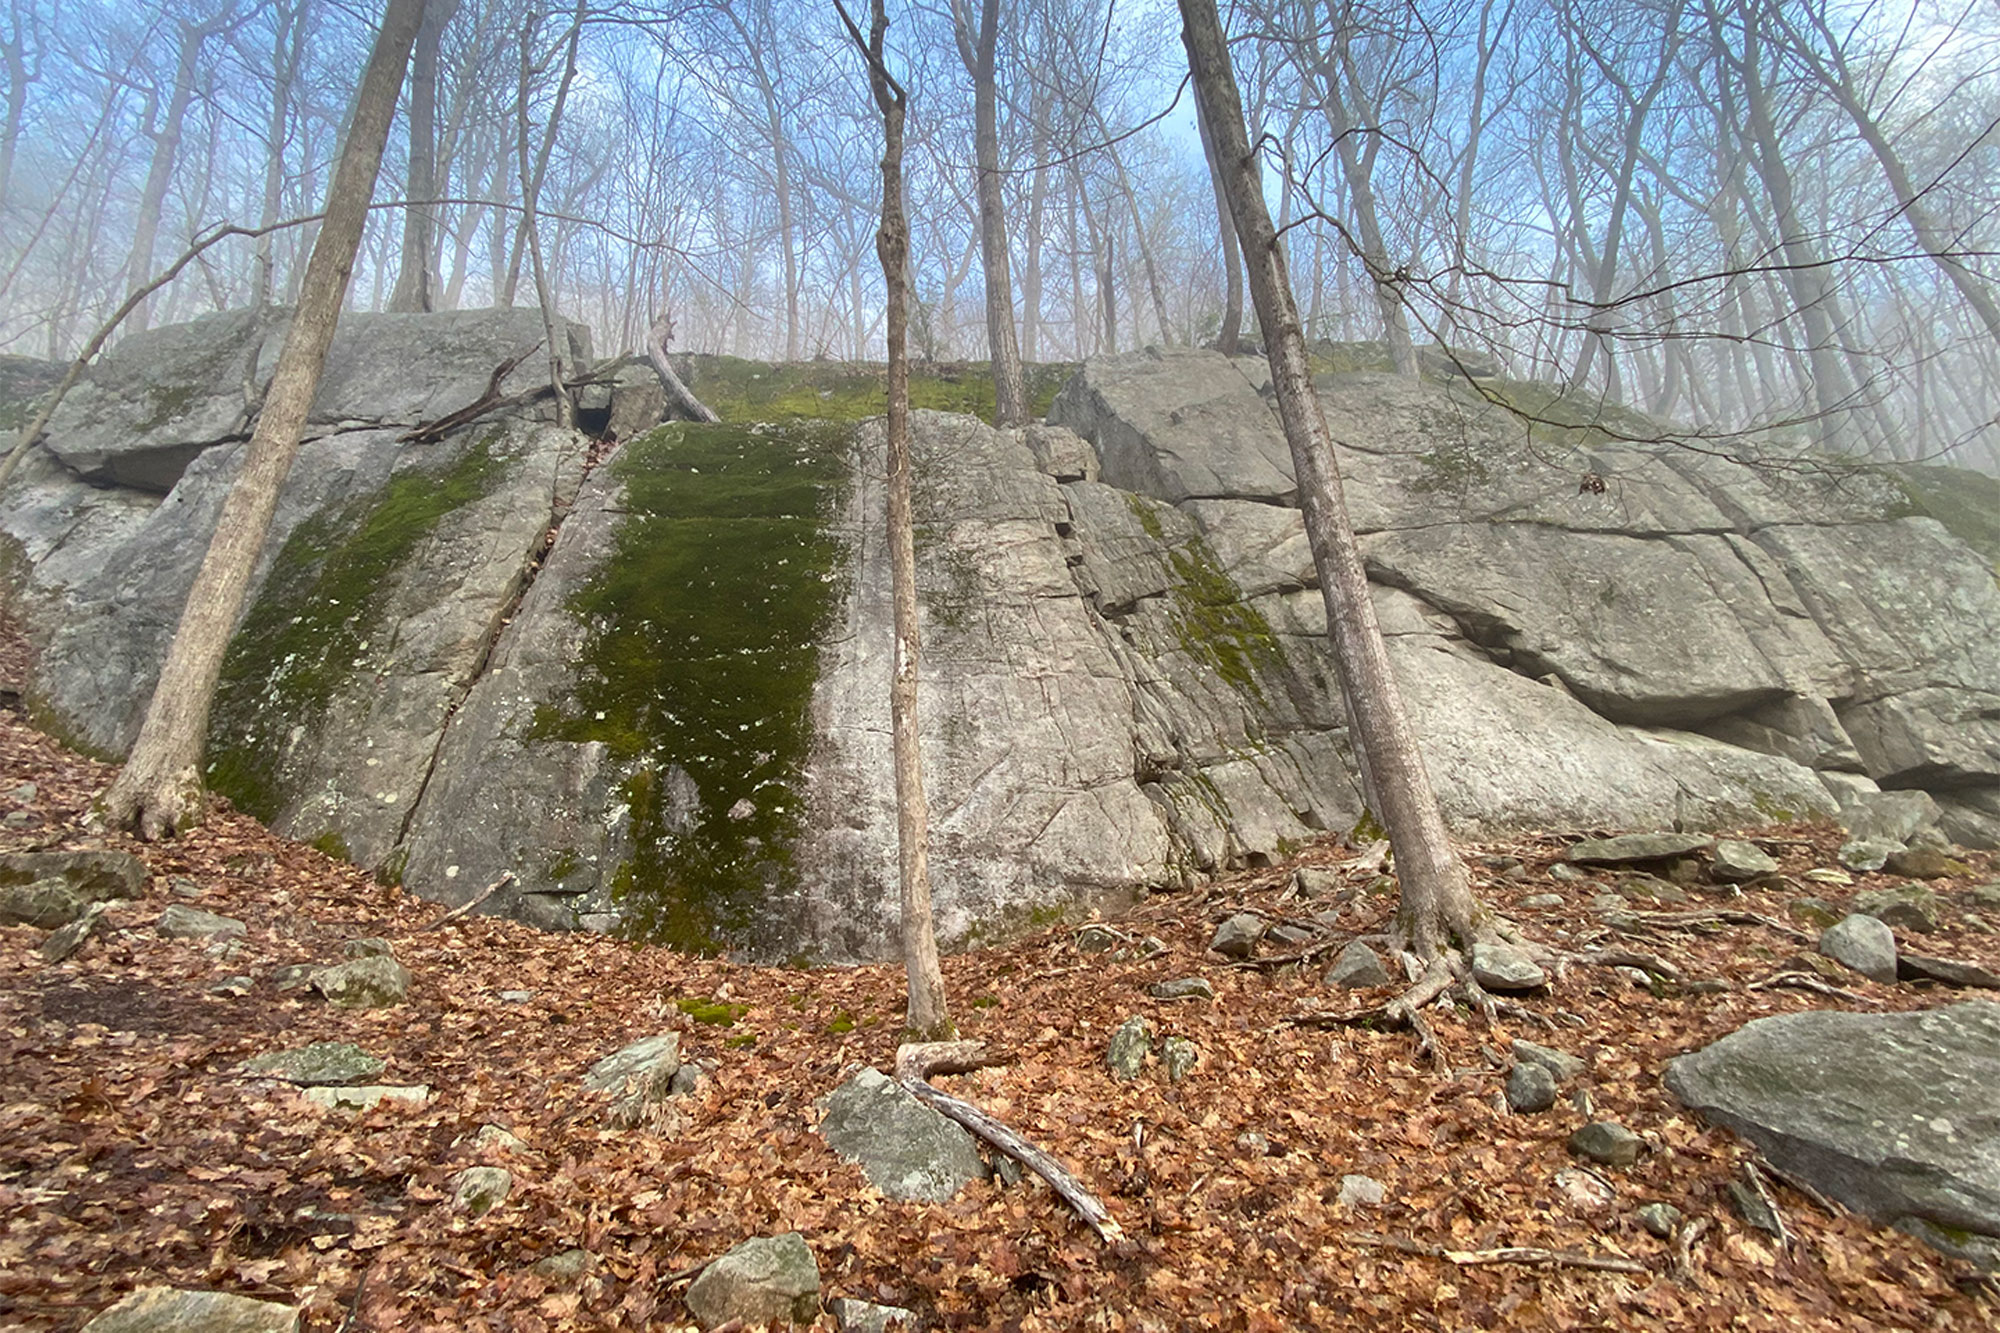
Step 1: Pick Your Spot
First thing’s first, you need to pick your spot. One qualification jumps out above all others: you need a cliff with a walk-up. Any areas that don’t have a walk-up or some kind of easy top-out access are non-starters. For now, you can rule out multi-pitch routes in the same breath—keep it simple and stick to single pitch routes until you’ve built up plenty of experience with the system.
It’s also worth seeking out easier routes to begin with. You can totally climb hard on a top-rope solo rig, but it may not be the best idea if you’re new to the system. Dial it back a bit at first and focus on reps and technique while getting used to the nuances.
Finally, an area with a concentration of routes accessible by one anchor is the jackpot. Bring a handful of cams and draws for directionals and you’re set.
Step 2: Build an Anchor and Fix Your Rope
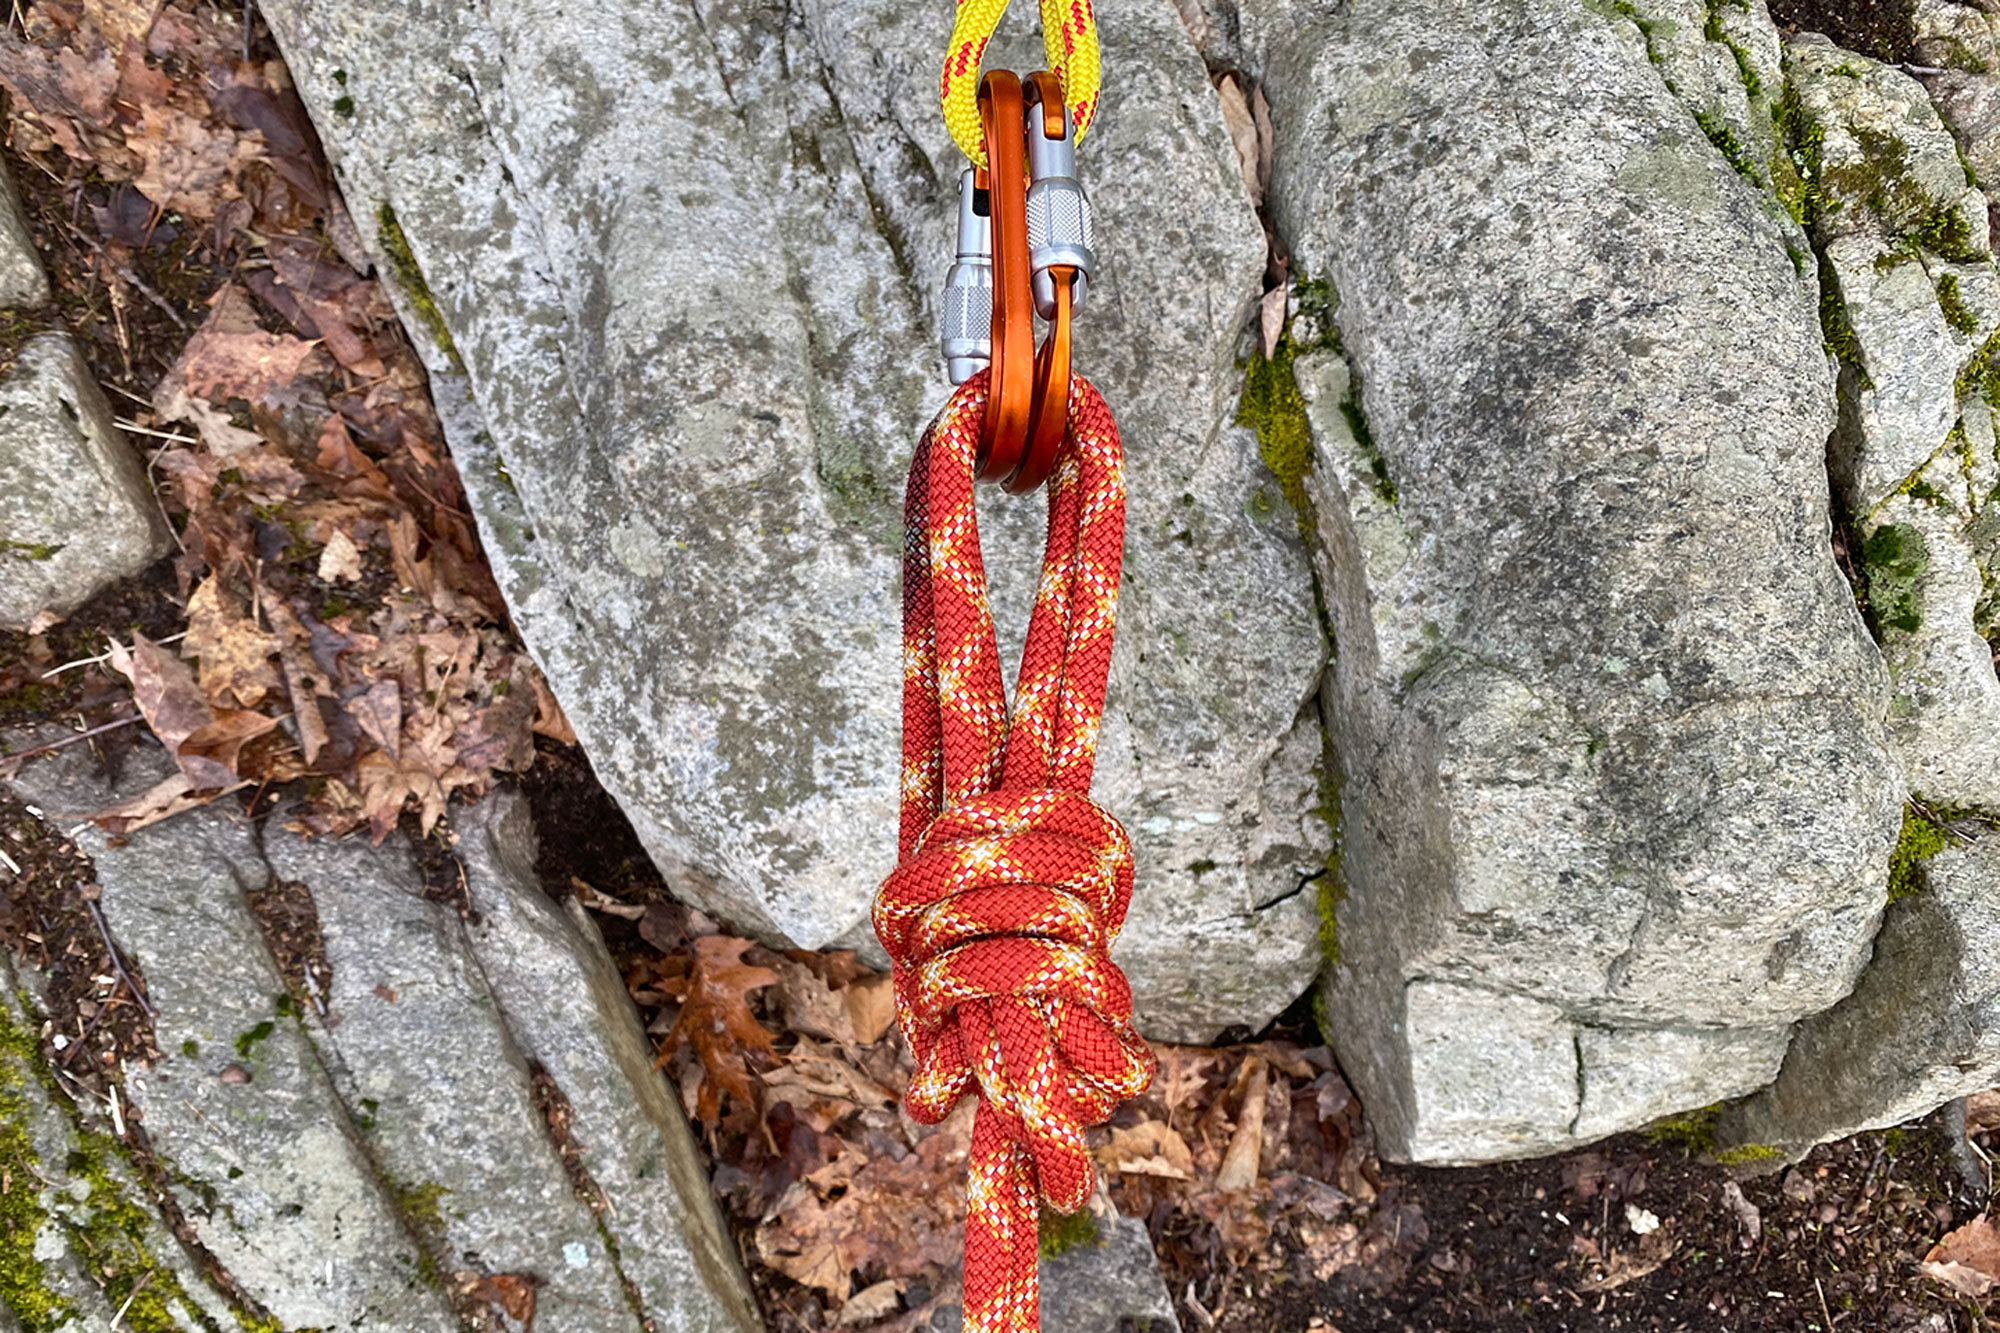
Once you’ve got your route picked out, you need to build an anchor. This follows pretty much the same process as it would if you were top-roping with a partner: find your bolts, gear placements, or natural features and build yourself something bomber.
The next step is to fix your rope. Find the middle-marker, tie a knot—a BFK or a figure-eight-on-a-bight is sufficient—clip it through both of your opposite-and-opposed carabiners, and lock them.
Close the system by tying a barrel knot on the end each strand and either rappel or walk-off to the base of the climb. From there, pull the rope tight and tie both strands off with an overhand-on-a-bight just slightly off the ground. Clip this knot to your pack or a water bottle or something with a little weight, so that it’s hanging on the rope, just off the ground. The rope needs to have a bit of tension on it for the progress capture devices to function properly—and you’re ready to roll.
Step 3: Attach Yourself to the Rope
Now comes the interesting part: attaching yourself to the rope. There are a few ways to do this, but the method of record is to use two devices of different types—a primary and a backup—on a single strand. The “different types” note is an important one to underscore here: you’re using two devices for redundancy, and the backup device should function in a different way so as not to potentially compound the failure of the primary.
Primary Device
As you climb, your primary device should be as far up the rope as possible so as to avoid putting unnecessary force on it in the event of a fall. This is where your double-length sling, non-locking carabiner, and that bit of accessory cord come in handy.
Holding the sling in both hands, twist it once to make an “x” with a loop on either side. Put your arms through each of the loops and pass it over your head. Clip both of the loops together on your chest with the carabiner.
Next, clip one of your oval lockers to your belay loop along with the accessory cord. Load your primary device and test it. Ensure it’s loaded correctly—you want it to slide up smoothly and stop if pulled down. In this case, the primary device is a Micro Traxion progress capture pulley—the camming unit in the Micro Traxion is toothed so, obviously, the teeth should point down. Clip it to the locker on your belay loop, next to the accessory cord.
Now, pass one end of the accessory cord around the primary device—between you and the rope and clip it back into the same locker. Pull the cord from the middle, and clip it to the non-locking carabiner at your chest. The length of the cord may require some adjustment to properly fit—the elasticity available in a length of shock cord is also a popular option here.
The chest sling and accessory cord are not meant to absorb any major force in the top-rope solo system, but do perform two important functions: they keep the device as high on the rope as possible, and the keep it—and its carabiner—oriented correctly.
Note: A toothed camming device like the Micro Traxion can wear on your rope when weighted. You may prefer to use a non-toothed progress capture pulley, like the Petzl BASIC Ascender or the Petzl Shunt Rappel Backup for your primary device.
Backup Device
If you’re leading with a toothed device, your backup device should be smooth. It should also be extended a bit so it doesn’t crowd—and accidentally compromise—the primary device.
Put your remaining two oval lockers on the dogbone and clip one end to your belay loop. The other should attach to your backup device—in this case the Rescucender. Lock both carabiners and load the rope, testing to ensure it’s feeding and arresting in the correct directions.
Note: You can load your backup device with either strand of rope. Using the same strand as the primary device, however, will free up the second strand to function exclusively as a bail out.
Step 4: Climb
There’s not much to this part that’s unique to top-rope soloing but to be aware of both devices at all times. That, and climbing with all the extra gear between you and the wall may take some getting used to.
Step 5: Escaping the System
At some point, what goes up must come down, and whether you’ve topped out or taken a fall, you’re going to need to escape the system.
Topping-out
The easier of the two. Once you’ve completed your climb and reached the anchor, clip into it with a sling or personal anchor system. Neither device should be weighted at this point, so simply disengage the primary and the backup and rack them. If you’re rappelling, ger that set up, unclip your sling or PAS, and rap on down as you would normally. If you’re walking down, get to a safe spot, unclip your sling or PAS, and descend on foot.
Escaping a Weighted Device
Escaping a weighted device is a bit more complex. Say you’re free-hanging after falling off of an overhanging route. Or, maybe, you’re TR soloing some ice and have dropped far enough to have left a tool out-of-reach in the process. Or, maybe you’re just pumped out and are ready to call it a day. Whatever the case may be, continuing to climb isn’t an option, and you need to switch from up to down.
Before you do anything, tie a catastrophe knot in both strands. Next, load your rappel device above the knot but below your primary and backup devices—you can use either or both strands for this. Clip it to your belay loop and lock it.
Now, you need to unweight and disengage the primary device. Do this but tying a prusik, loading a third device (like the Petzl Tibloc), or disengaging and reloading the backup device above the primary device on either strand. Regardless of which tool you choose to use, you will need an additional locking carabiner and sling—in this case those are a Petzl Attaché Carabiner and a Black Diamond 10mm x 240cm Dynex Runner.
Once you’ve tied your prusik or loaded your device, clip it with the locker and create a foot loop with the sling. Lock the carabiner and test the device to ensure it holds. Step up into the foot loop high enough to unweight your primary device. Disengage and rack it. If you haven’t reused your backup device for the foot loop, disengage and rack that as well.
Keeping your weight on the foot loop, pull out the slack in your rappel device. Keeping your brake hand below the rappel device, shift your weight onto it. Finally, break down your foot loop set-up, rack it, untie your catastrophe knot and rappel as you normally would.
Some Parting Thoughts
Climbing alone is a very different experience than climbing with a partner and, beyond acquiring the necessary gear and learning how to use it properly, figuring out the mental game is incredibly important. The spooky gets a little spookier when you’re on your own, and without the checks of a partner, it’s easy to get inside your own head. With a slow start, a gradual build, and many, many reps, climbing alone can be a meditative, restorative activity—as well as a great way to get out when no one else can.