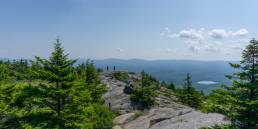
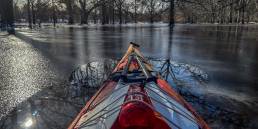
There are few things as exciting as being on the verge of spring after a New England winter. April is when I find myself daydreaming of new routes in the summer sun or my favorite trails that I haven’t visited since winter rolled in. As summer approaches, I count the days until I can shed my winter layers while the trails shed their snow and ice. Now is the time to focus on training so that you have the capacity to enjoy the process of getting to those first few peaks, and there are a few exercises that will get you there.
Traditionally, preparing for hiking season might consist of reading new gear reviews and trip planning by blocking off weekends in the calendar. As anyone who enjoys time spent on trails knows, there’s usually a moment on that first big climb that you wish it felt a little easier. Walking at two miles per hour, a woman weighing 120 to 125 pounds burns 160 calories per hour on level ground, but 407 calories per hour while hiking up a 20% incline. With a 22-pound backpack, that figure jumps to 490 calories per hour—a three-fold increase in energy expenditure, according to research published by American Fitness. The body adapts quickly to new stimuli, so incorporating preseason training now will make those first few outings that much more enjoyable. These are the best exercises to try to get ready for spring:
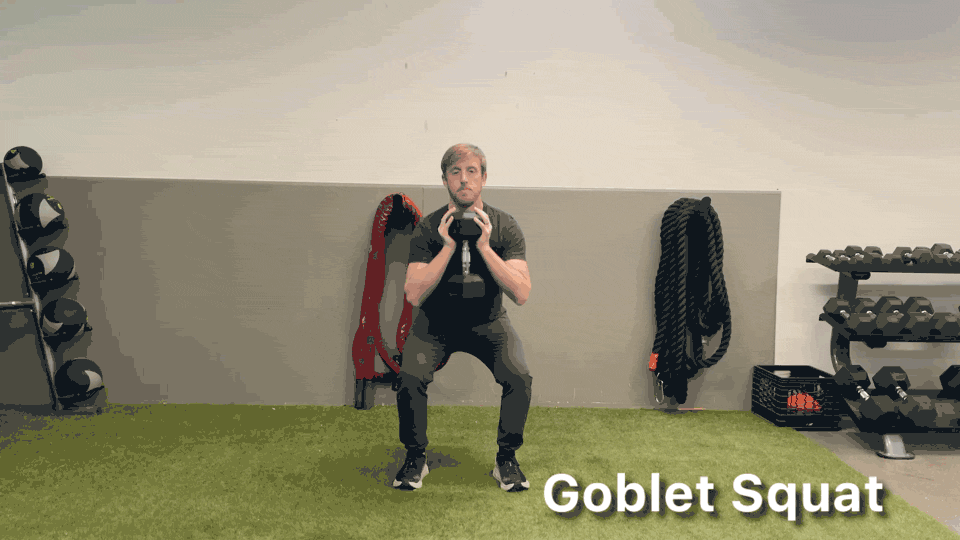
1. Goblet Squat
Stand with feet slightly wider than hips apart with weight held in both hands in front of your chest. With core engaged and eyes forward, press your hips back while bending at the knees while keeping the weight close to the body and chest tall. Once hips are parallel to the ground or just below the knees press through your heels to return to starting position.
Why: Front loaded squats are effective in targeting the quadriceps, core, and upper back muscles. They can be used in a variety of ways in a workout as a warmup or for someone just learning to squat. They also offer flexibility due to only needing a single weight that can be held in front of your chest. This means if you are camping or hiking, these can easily be done with objects other than a dumbbell or kettlebell, like a rock or water jug.
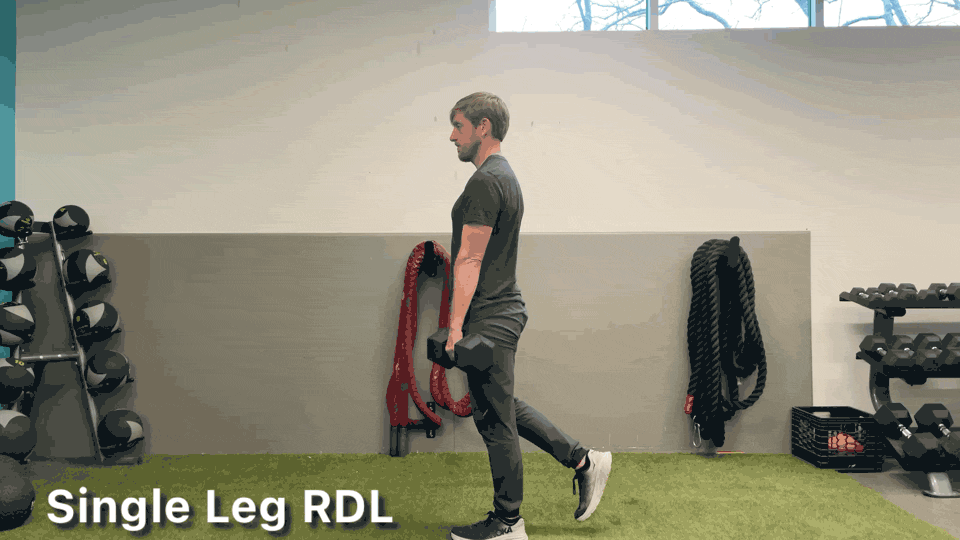
2. Single Leg Romanian Deadlift
Stand with your feet shoulder width apart and knees slightly bent and raise one leg off the floor. Flex the knee on your standing leg 10-15% to help activate the glutes. Without changing the bend in your knee, keep your back naturally arched and begin hinging at your hips and lowering your torso until it’s almost parallel to the floor. Pause at the bottom, then squeeze your glutes while thrusting your hips forward, and raise your torso back to the starting position. Start with no weight at first and when comfortable with the movement add weight. The key to this movement is hinging at the hips as you progress through the movement.
Why: Where the emphasis of the goblet squat is on the anterior plane, the single leg RDL has a posterior chain emphasis. While there is a strength focus to this movement, it is also working on improving balance and coordination which are essential when moving over uneven terrain.
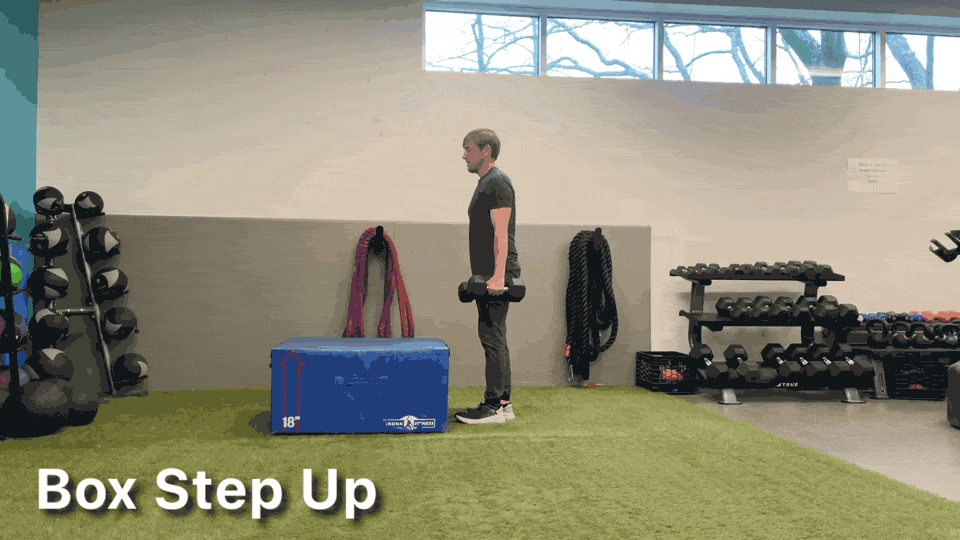
3. Box Step Up
Place one foot on top of the box or an object you can safely step up onto with one foot on the ground. Shift your weight into the heel of your foot that is on the box and begin driving through that front heel. Extend your leg completely straight while bringing hips forward before bringing the opposite foot onto the box. Focus on a slow and controlled descent back to the starting position.
Why: This movement targets the quadriceps and glutes and mimics the primary movement when hiking steep terrain. Again, there is versatility in this movement as it can be done with or without weight and you can use your pack filled with your gear and rock to perform this movement outside the gym.
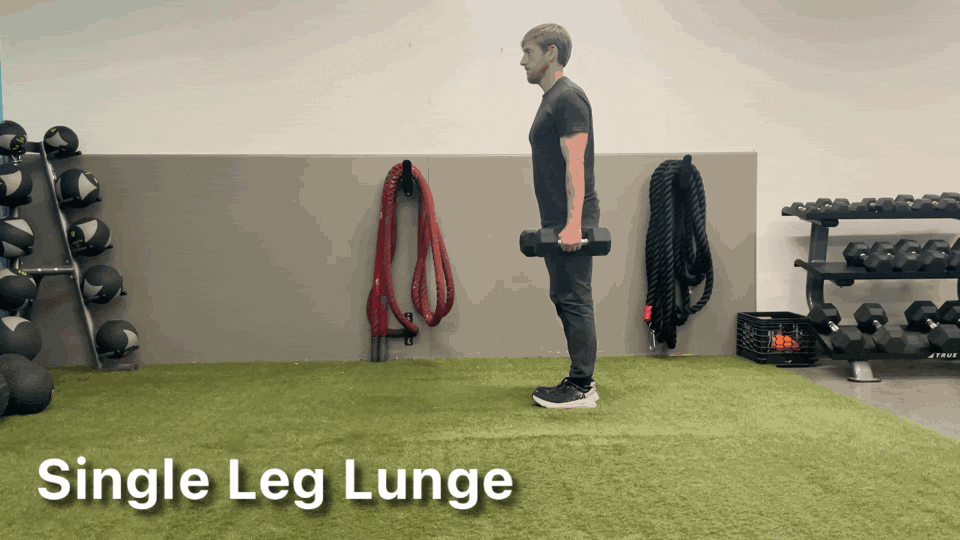
4. Single Leg Lunge
Place one foot in front while the other foot is behind you and elevated with toes resting on either a bench or chair (whatever you have available). Keep 90 degree flexion in knee and hip. Drop back knee to floor and front knee to 90 degree = 1 rep, stand and repeat.
Why: Lunges help build leg, hip and core strength and are a versatile movement that can be completed with or without weight basically anywhere.
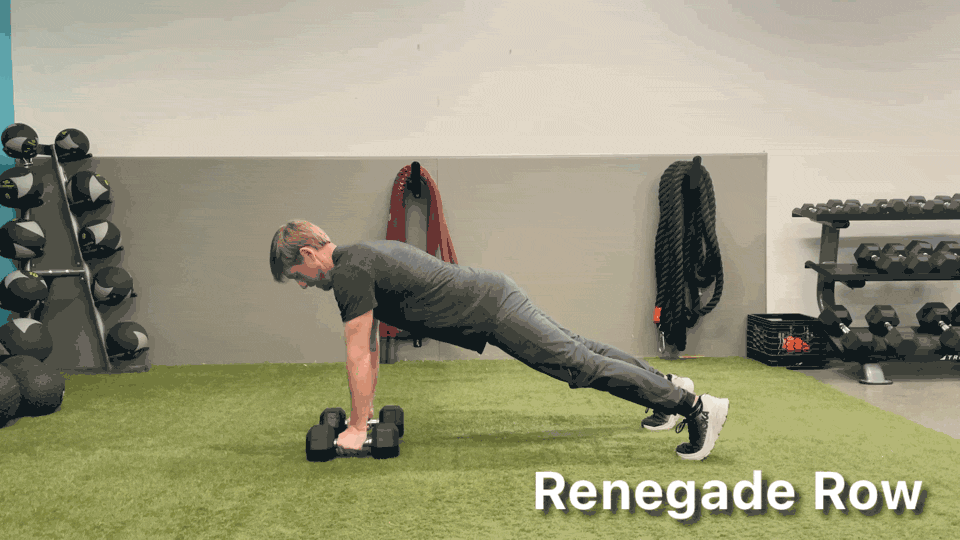
5. Renegade Row
Enter a pushup position from either toes or from knees with your hands on a set of dumbbells. Feet should be wider than shoulder width apart. Shoulders should be directly over your wrists. When starting the dumbbell row focus on driving elbow back towards lower ribs. Engage core throughout the rowing movement while keeping hips and shoulders square to the ground.
Why: The upper body is used throughout hiking as we use our core and back to balance and carry a load, and our hands and arms when reaching and pulling while scrambling. This movement helps develop rotational core strength while improving balance and coordination.
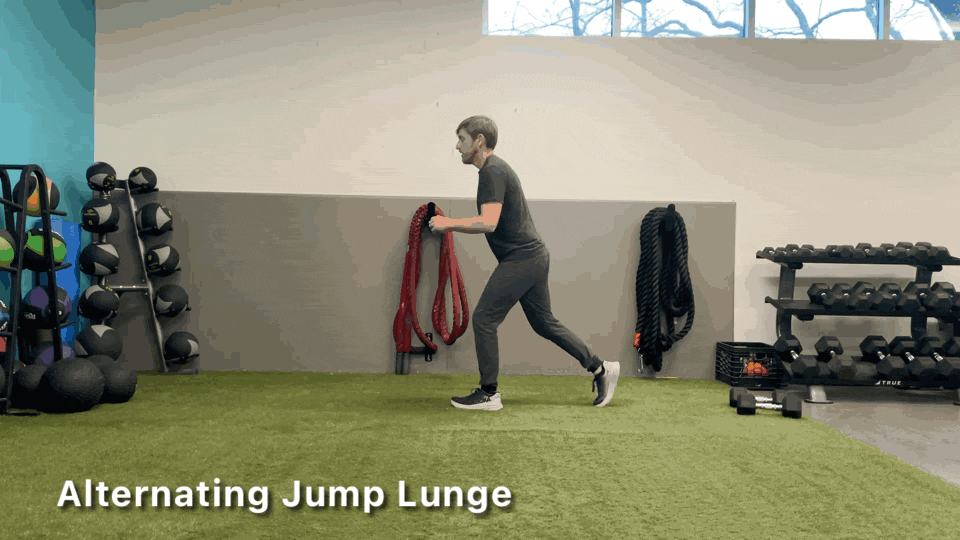
6. Alternating Jump Lunge
Movement: Stand with one leg forward and one leg back with hands either on hips or in opposite position to your legs to help counterbalance. Prepare to jump by bending front knee while contracting core and leaning slightly forward. Explode out from this position, pushing from both feet propelling yourself upward. During the jump you will then switch leg positions so that the rear leg is the leg you are now landing in front on while switching the arm positions in the same manner. Think soft balanced landing by allowing your hips and knees to bend to absorb the landing.
Why: Plyometrics for hikers and trail runners are extremely effective in training the body to absorb decelerating forces in a controlled manner. Think back to a time where you needed to jump down from one rock to another and the effort that takes. Additionally, plyometrics can be done with bodyweight alone and a little goes a long way (sets/reps).
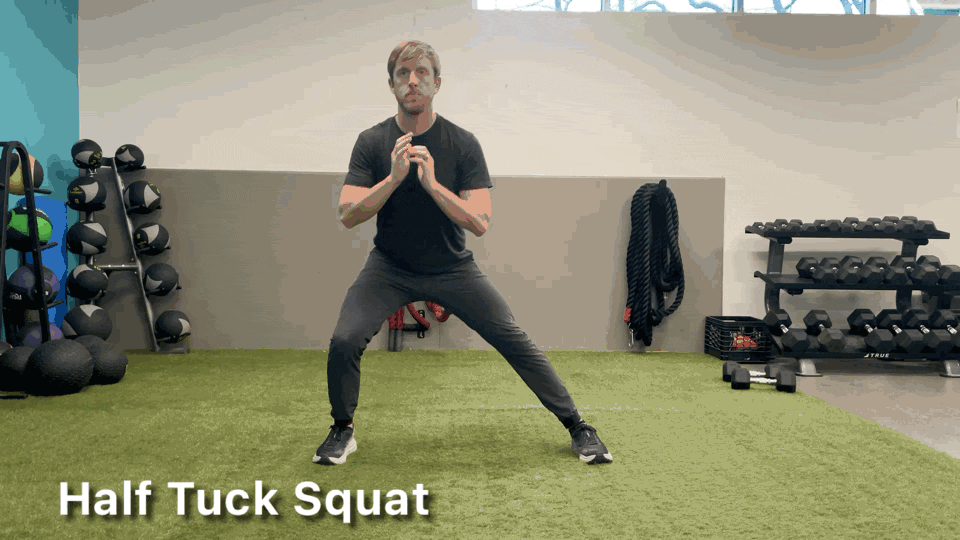
7. Half Tuck Squat
Take a wide stance with toes pointing forward while keeping one leg straight but not locked out. Then lower tailbone so that you enter a tuck position to a depth that feels comfortable and then push out of the position while activating the adductors back to the starting position.
Why: This movement targets the adductors, quadriceps and hamstrings, and it is a great movement to engage the glutes which are responsible for supporting both the bodyweight and the load of a backpack and have greater activation when hiking steep terrain.
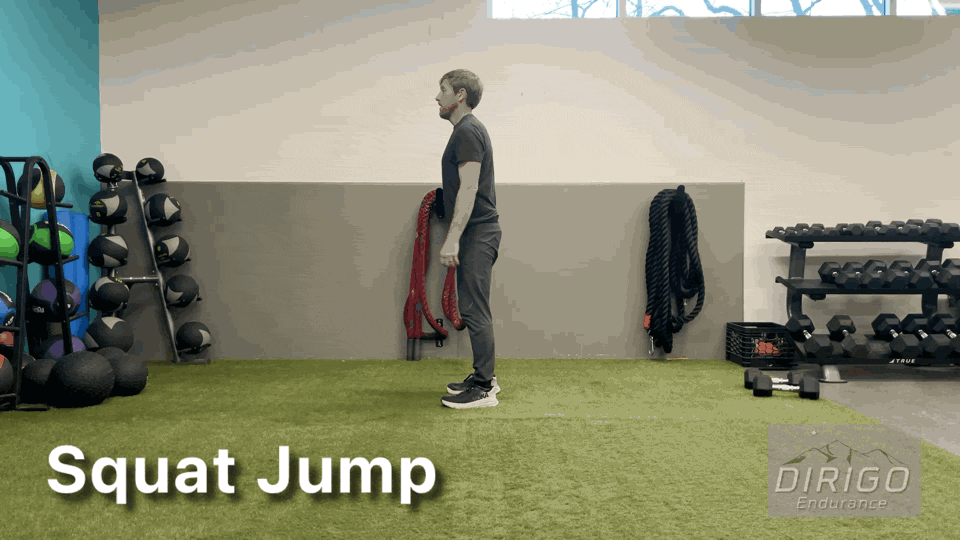
8. Squat Jumps
Feet parallel with toes pointed forward slightly wider than shoulder width apart. Lower hips sitting back into a squat position to a depth that feels comfortable with hands at side or out in front to help balance. Drive up in an explosive movement where legs should almost be straight at the highest point of the movement keeping core tight throughout while landing on the balls of your feet.
Why: Similar to the Alternating Jump Lunge, Squat Jumps are plyometrics which help your body absorb the impact of descents.
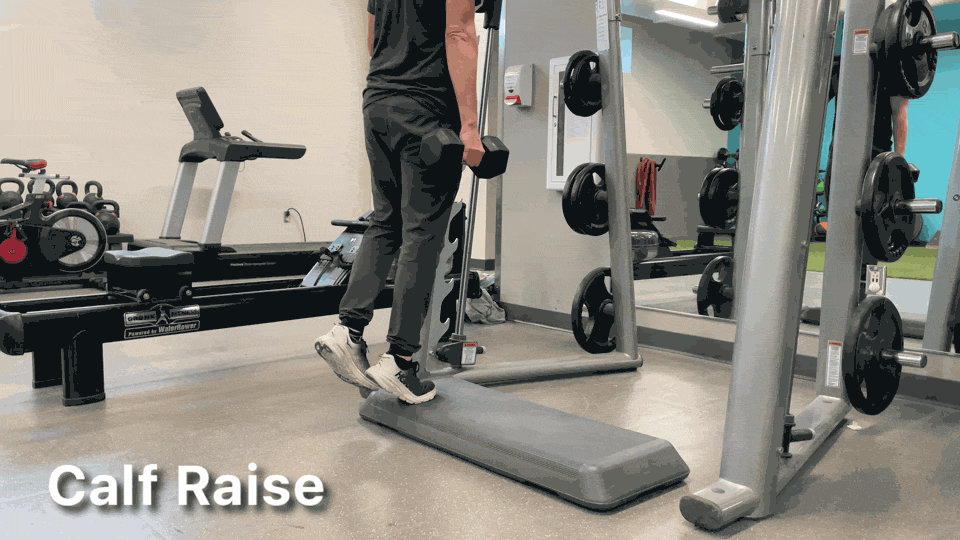
9. Calf Raises
Raise your heels off the ground, keeping knees extended but not locked out with a hold of 1-2 seconds before lowering your heels back to the ground.
Why: The standing calf raise targets the gastrocnemius this movement can also be done in a seated position to place the focus on the soleus. It is important to train both of these muscles as ignoring the soleus can result in reduced muscular endurance after difficult hikes leaving you sore for days.
Building a Trail Specific Workout
Now that you have a handful of effective movements that will have you primed for the trails, it’s time to put them together to build an effective hiking focused strength workout. Spending a half or full day on trails will require less effort if you focus on developing your aerobic capacity and aerobic focused work can make for an effective warm up for your strength work.
Example Day:
30-60 minutes of aerobic activity (aerobic zone is from 40% to 85% of maximum heart rate) that can be achieved through brisk walking (with or without weighted pack), easy running, or spinning on a bike. Spend the first and last 10 to 15 minutes warming up and cooling down from the effort you plan to maintain within the aerobic zone.
Hiker Strength Workout:
- Alternating Jump Lunges: 3-6 sets of 2-5 repetitions
- Renegade Rows: 3 sets of 8-10 reps each arm
- Half Tuck Squat: 3 sets of 6-10 reps each leg
- Calf Raises: 3 sets of 12-15 reps