


Take on one of the Northeast’s most stunning ridgelines while tagging two of New Hampshire’s ten tallest mountains.
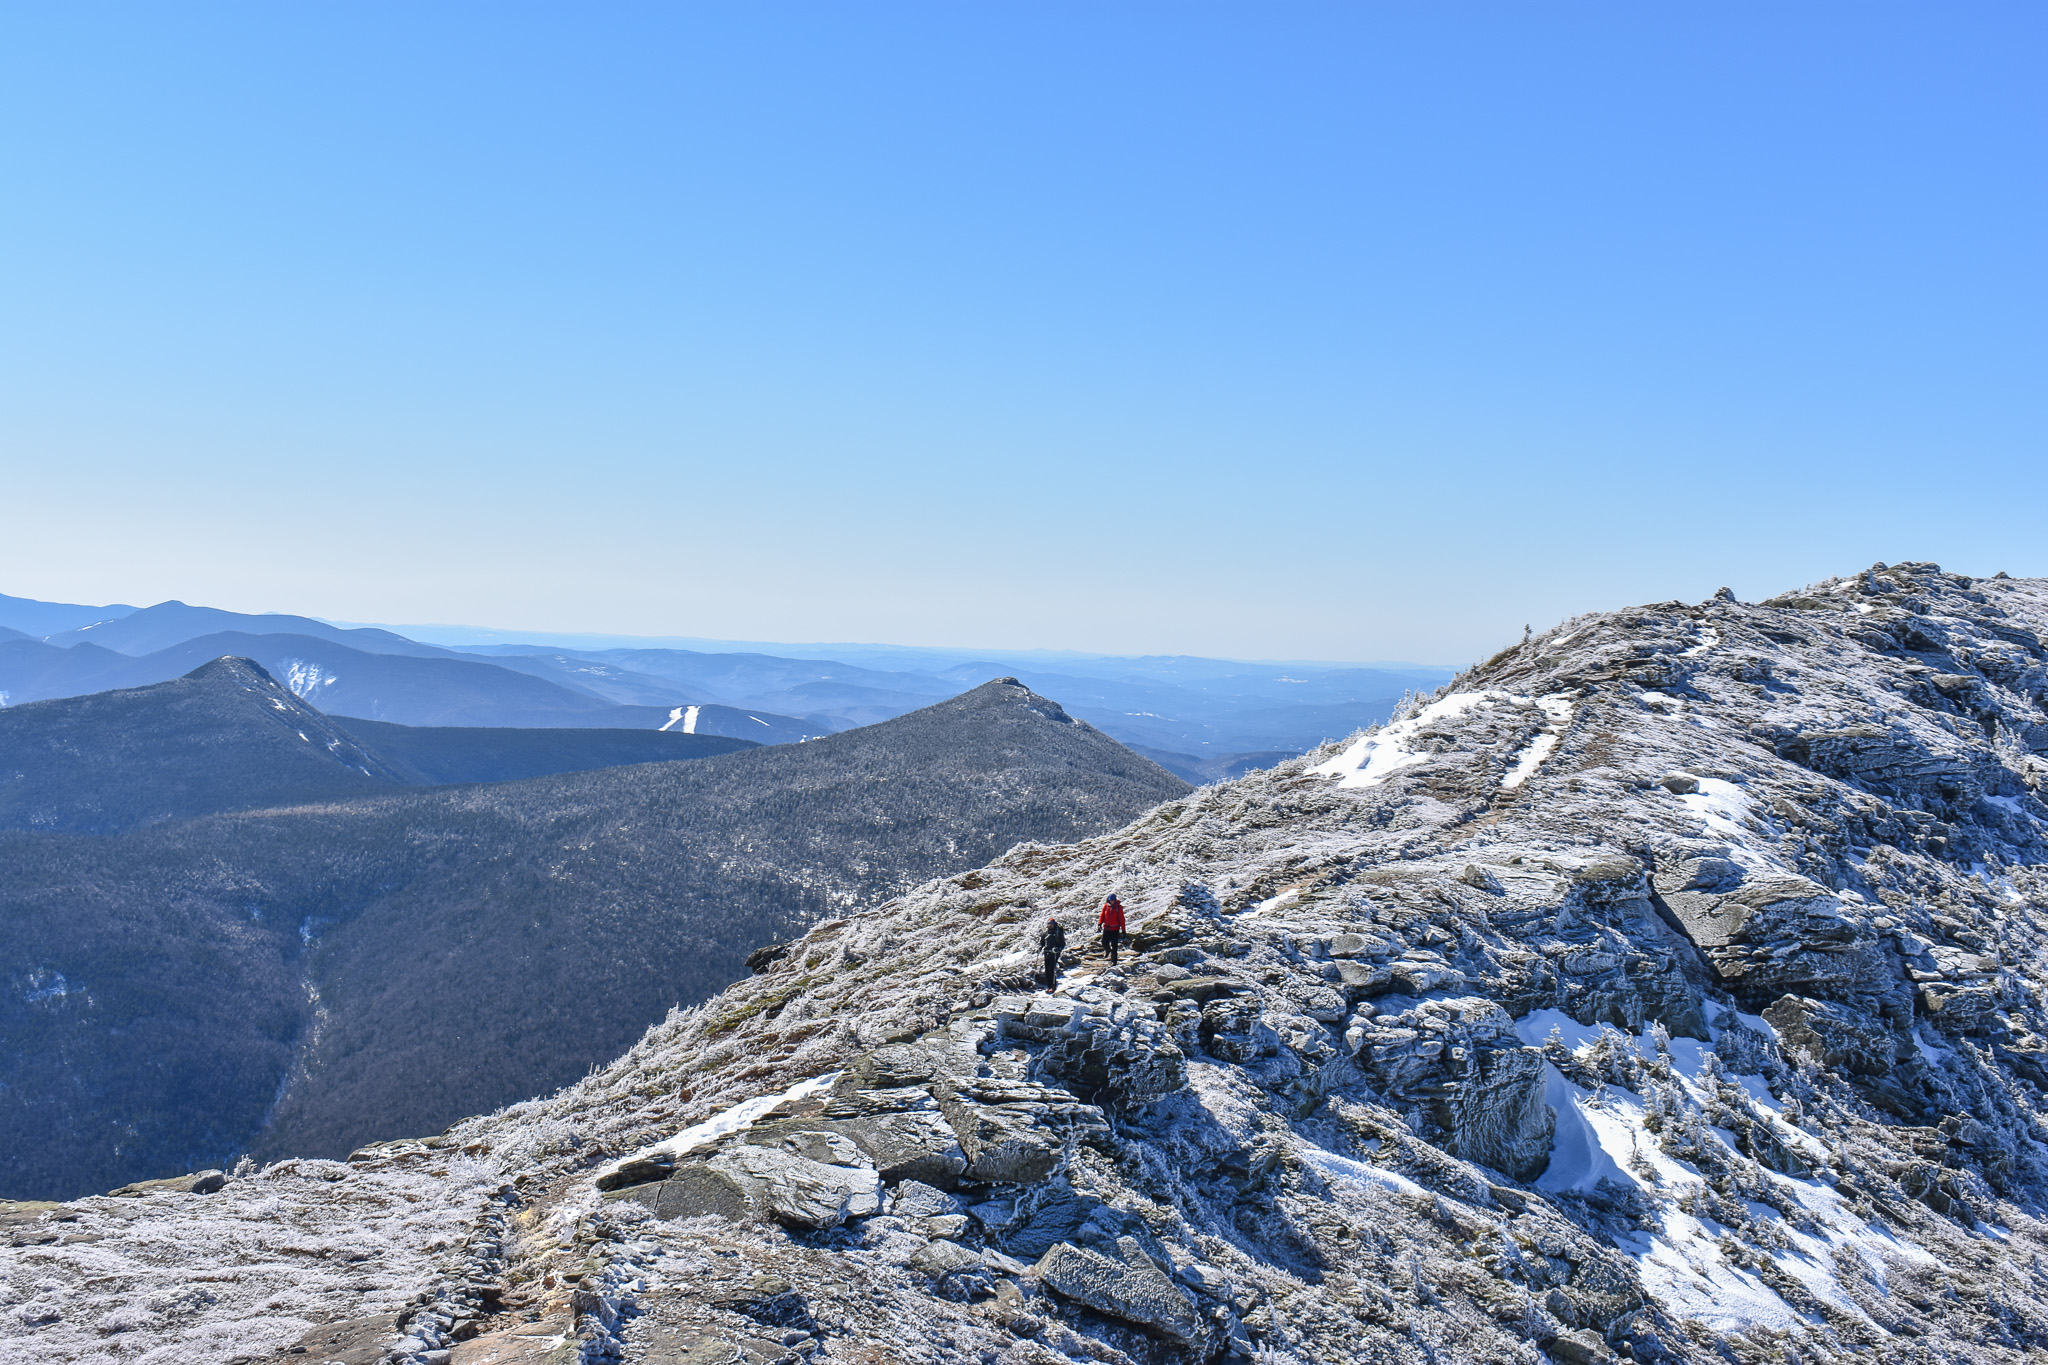
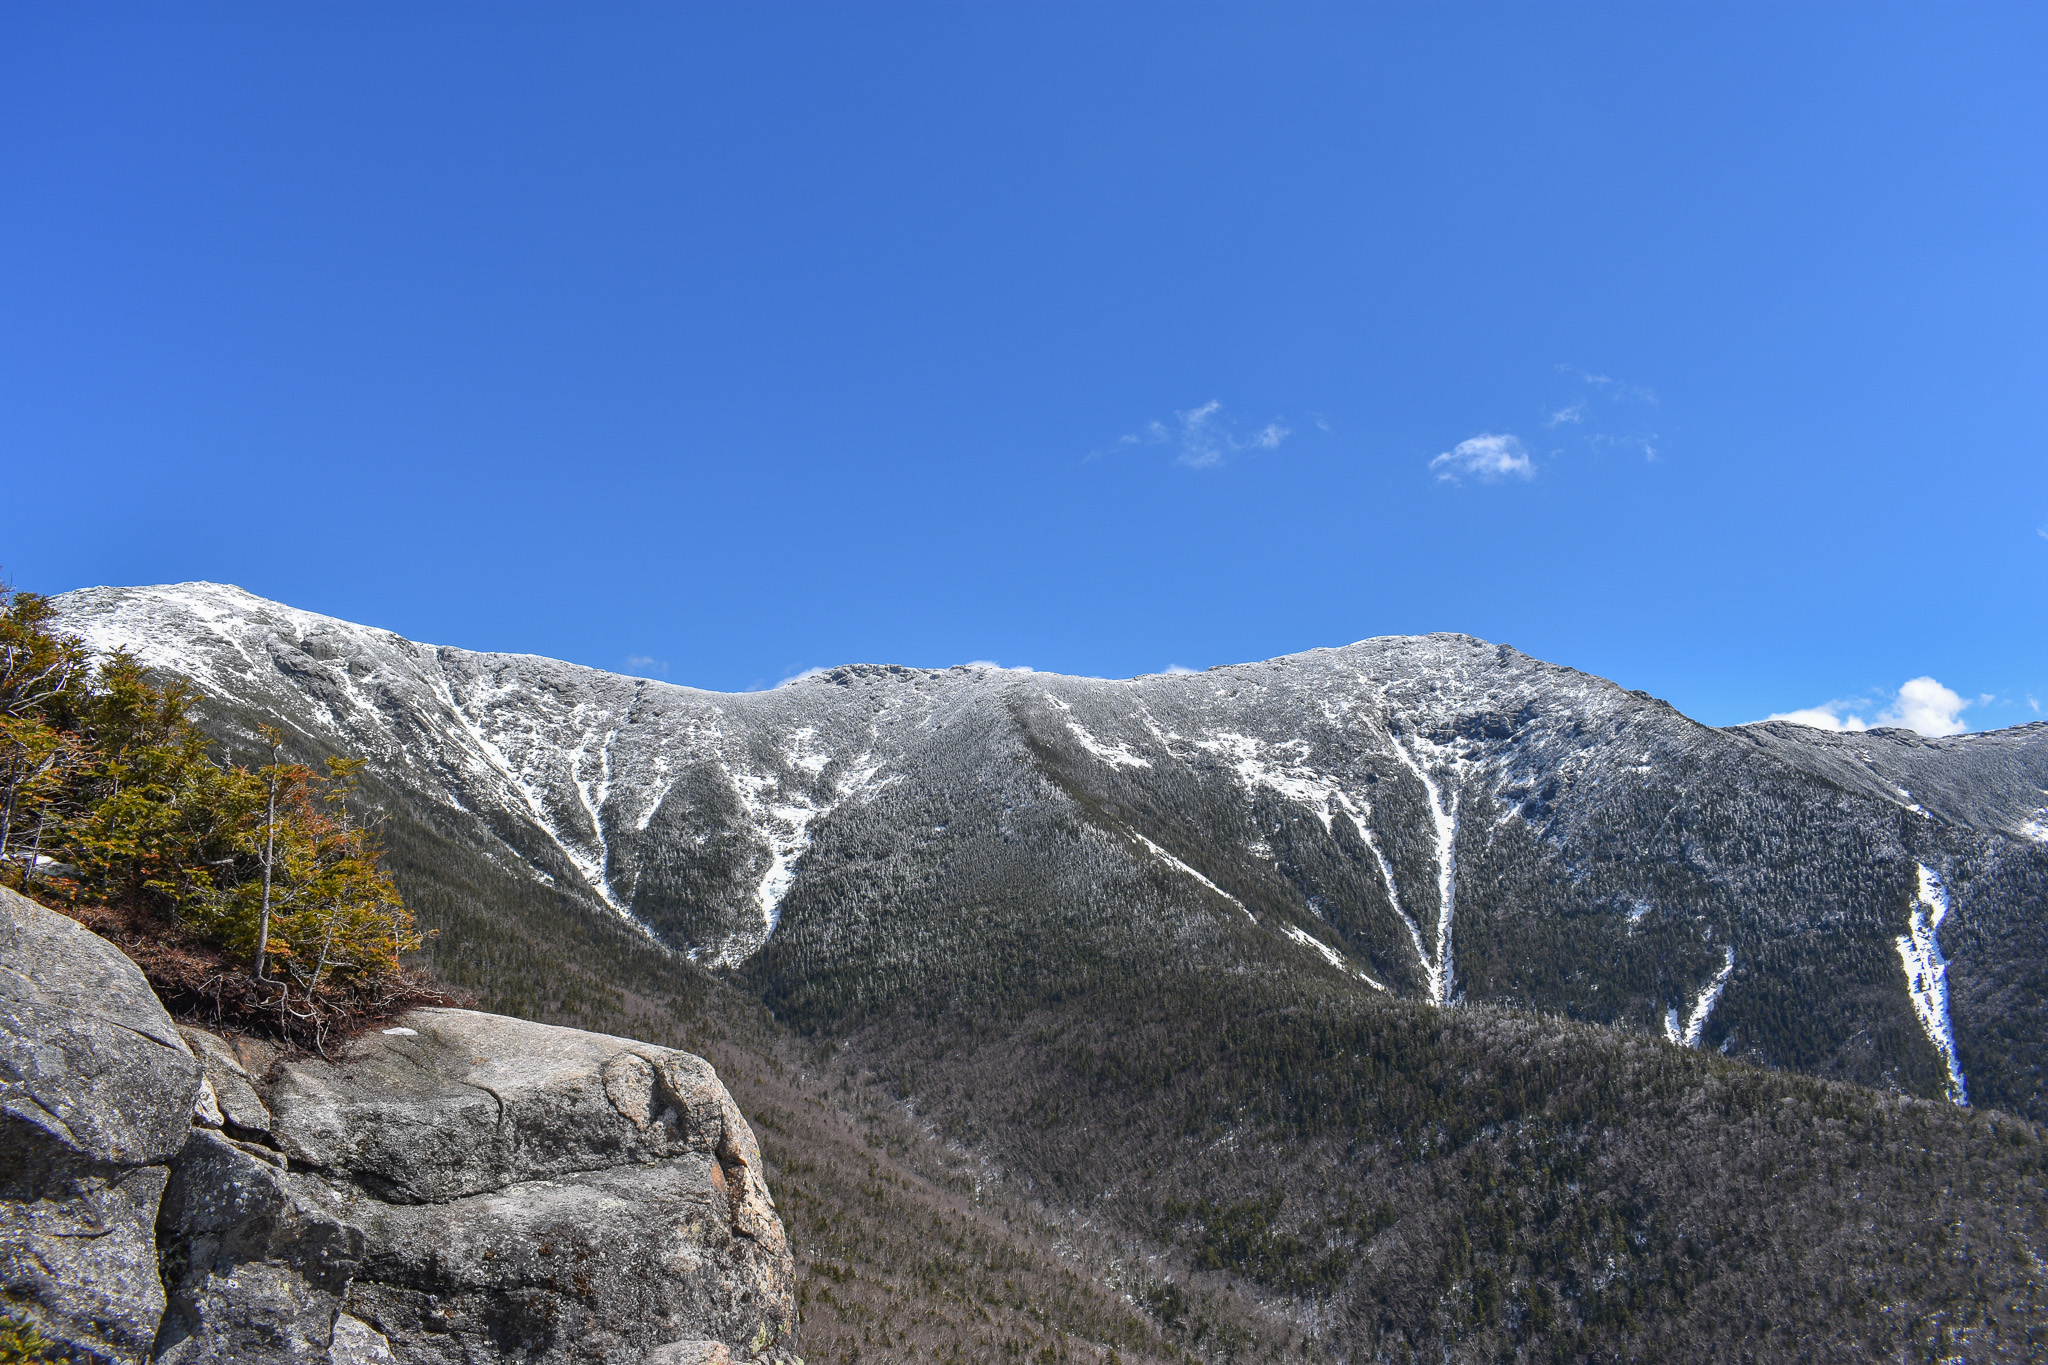
This classic winter mountaineering adventure delivers moderate climbing, crosses one of the White Mountains’ most prominent features (Franconia Ridge), and features a roughly 1.5-mile above-treeline ridge run between Mount Haystack and Mount Lafayette. With 360-degree views of the White Mountains from the ridge, it’s one of the most beautiful hikes in the Northeast, and with a large section of hiking above treeline, it’s also one of the most exposed winter hikes in the region—making it a fantastic winter test piece.
Quick Facts
Distance: 9 miles round-trip
Time to Complete: 1 day
Difficulty: ★★★★
Scenery: ★★★★★
Turn-By-Turn
Most hike Franconia Ridge as a loop, beginning and ending at the Falling Waters and Old Bridle Path trailhead and parking lot on Interstate 93N in Franconia Notch State Park.
Hikers driving north on I-93 will find the parking lot just after the exit for The Basin Trailhead. Hikers coming from the other direction should park in the Lafayette Place Campground parking lot and use the tunnel that goes under I-93 to access the lot and trailhead.
The trailhead is opposite the entrance to the parking lot, climbing a short paved incline to an outhouse and then becoming dirt as it heads into the woods.
Hikers take notice, this ultra-classic hike is super-popular on weekends and holidays—get there early to find a parking spot.
Time to Split
Just 0.2 miles in, hikers will come to the trail junction of the Falling Waters Trail (FWT) and the Old Bridle Path (OBP). The loop is best done counterclockwise, hiking up the Falling Waters Trail and descending the Old Bridle Path. The FWT, which veers right at the junction, gets extremely icy in winter and is much easier to go up than down. Plus, the various waterfalls are more scenic on the approach, as well as more easily overcome with fresh legs early in the day.
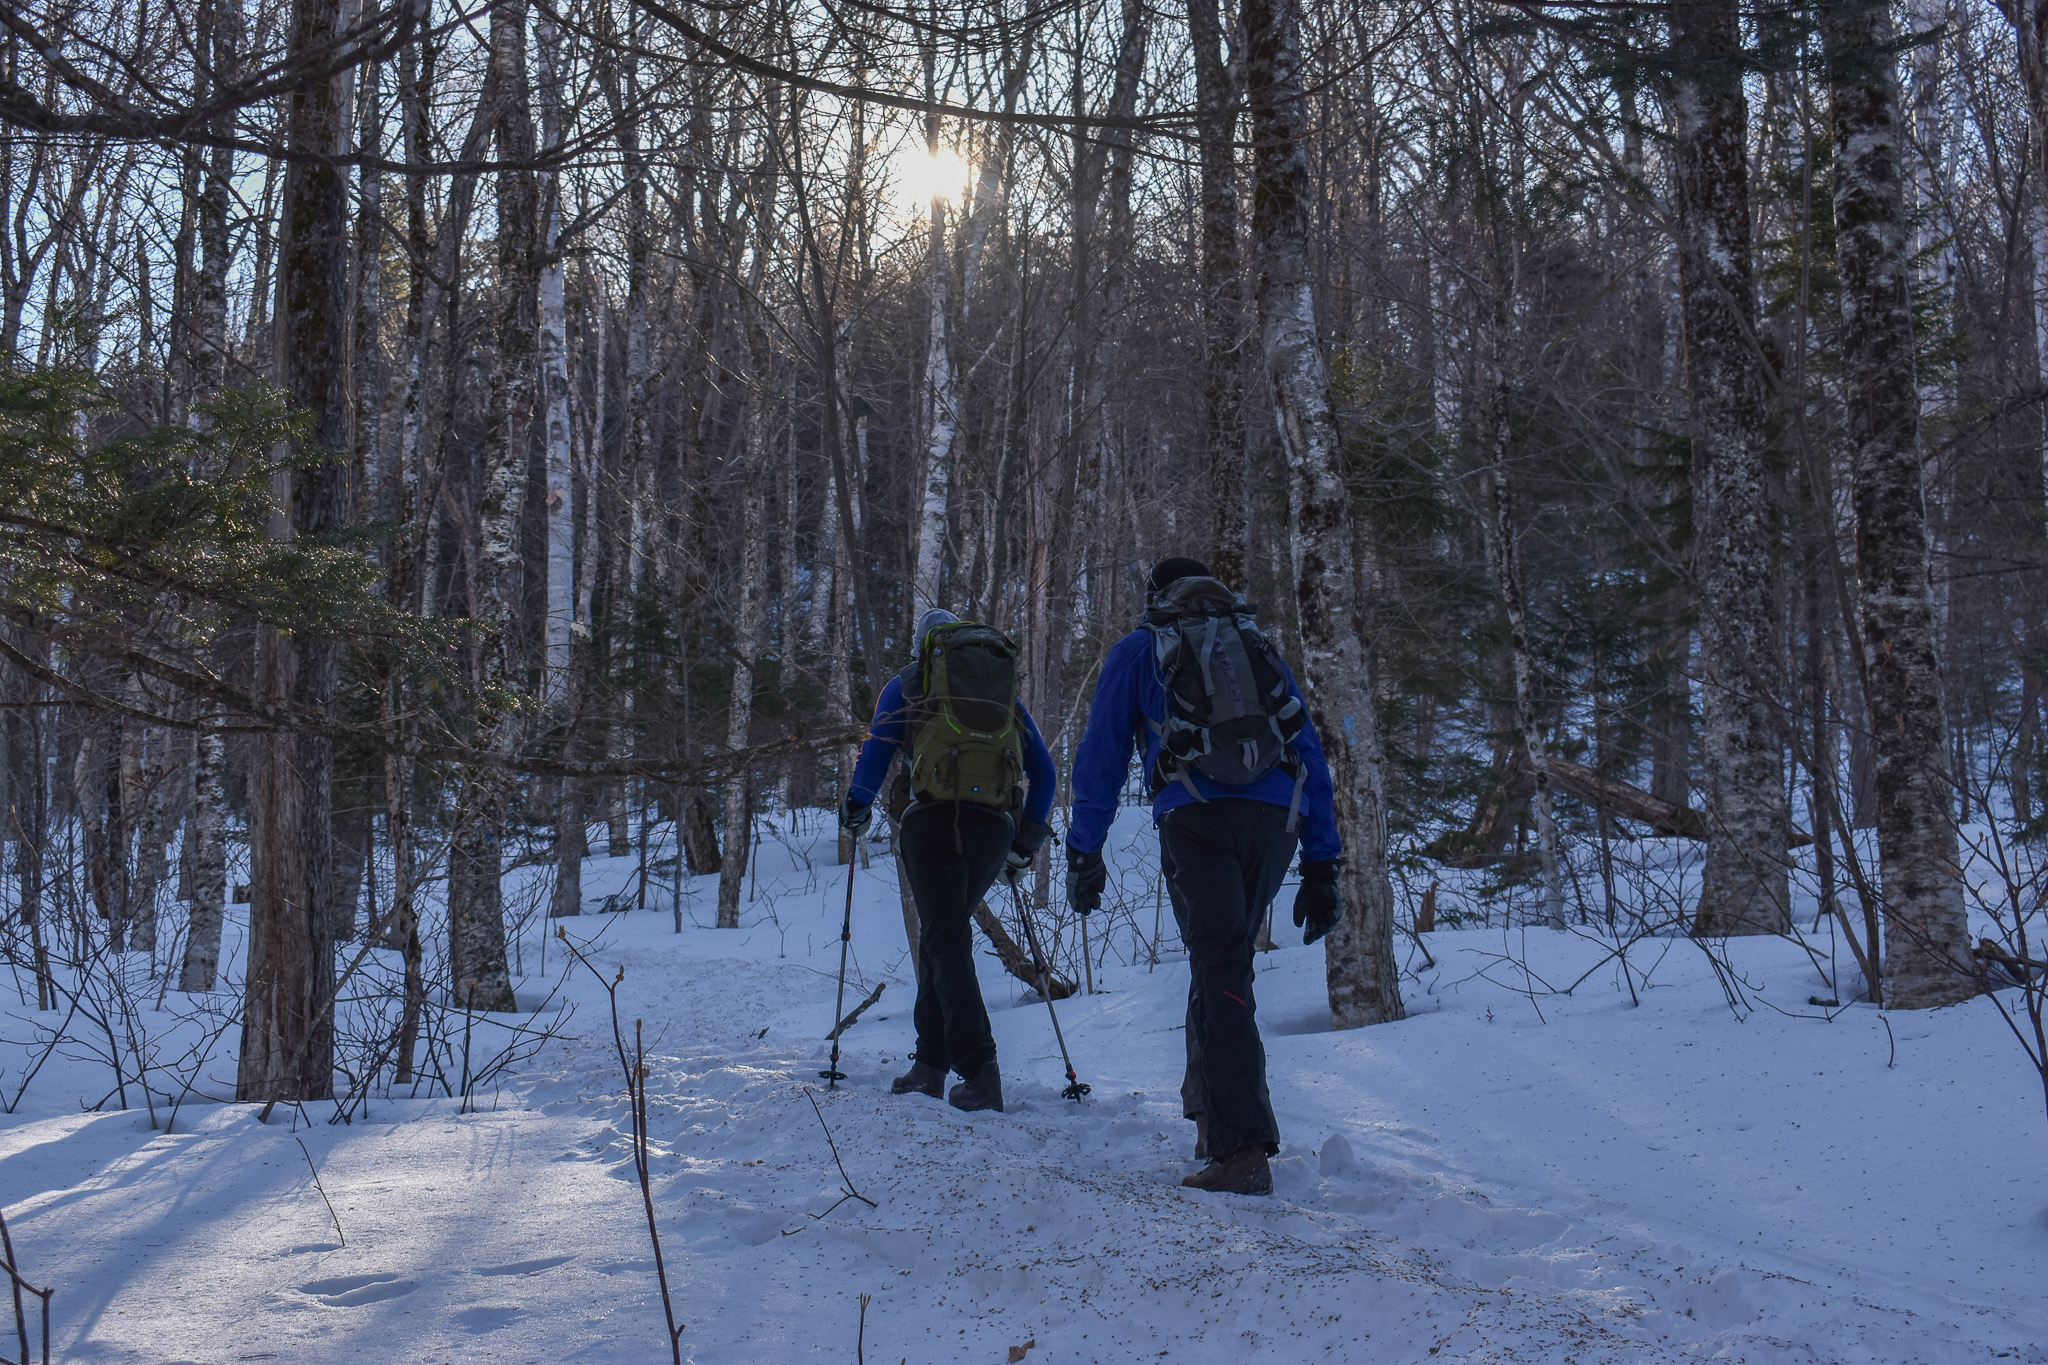
Following Falling Waters
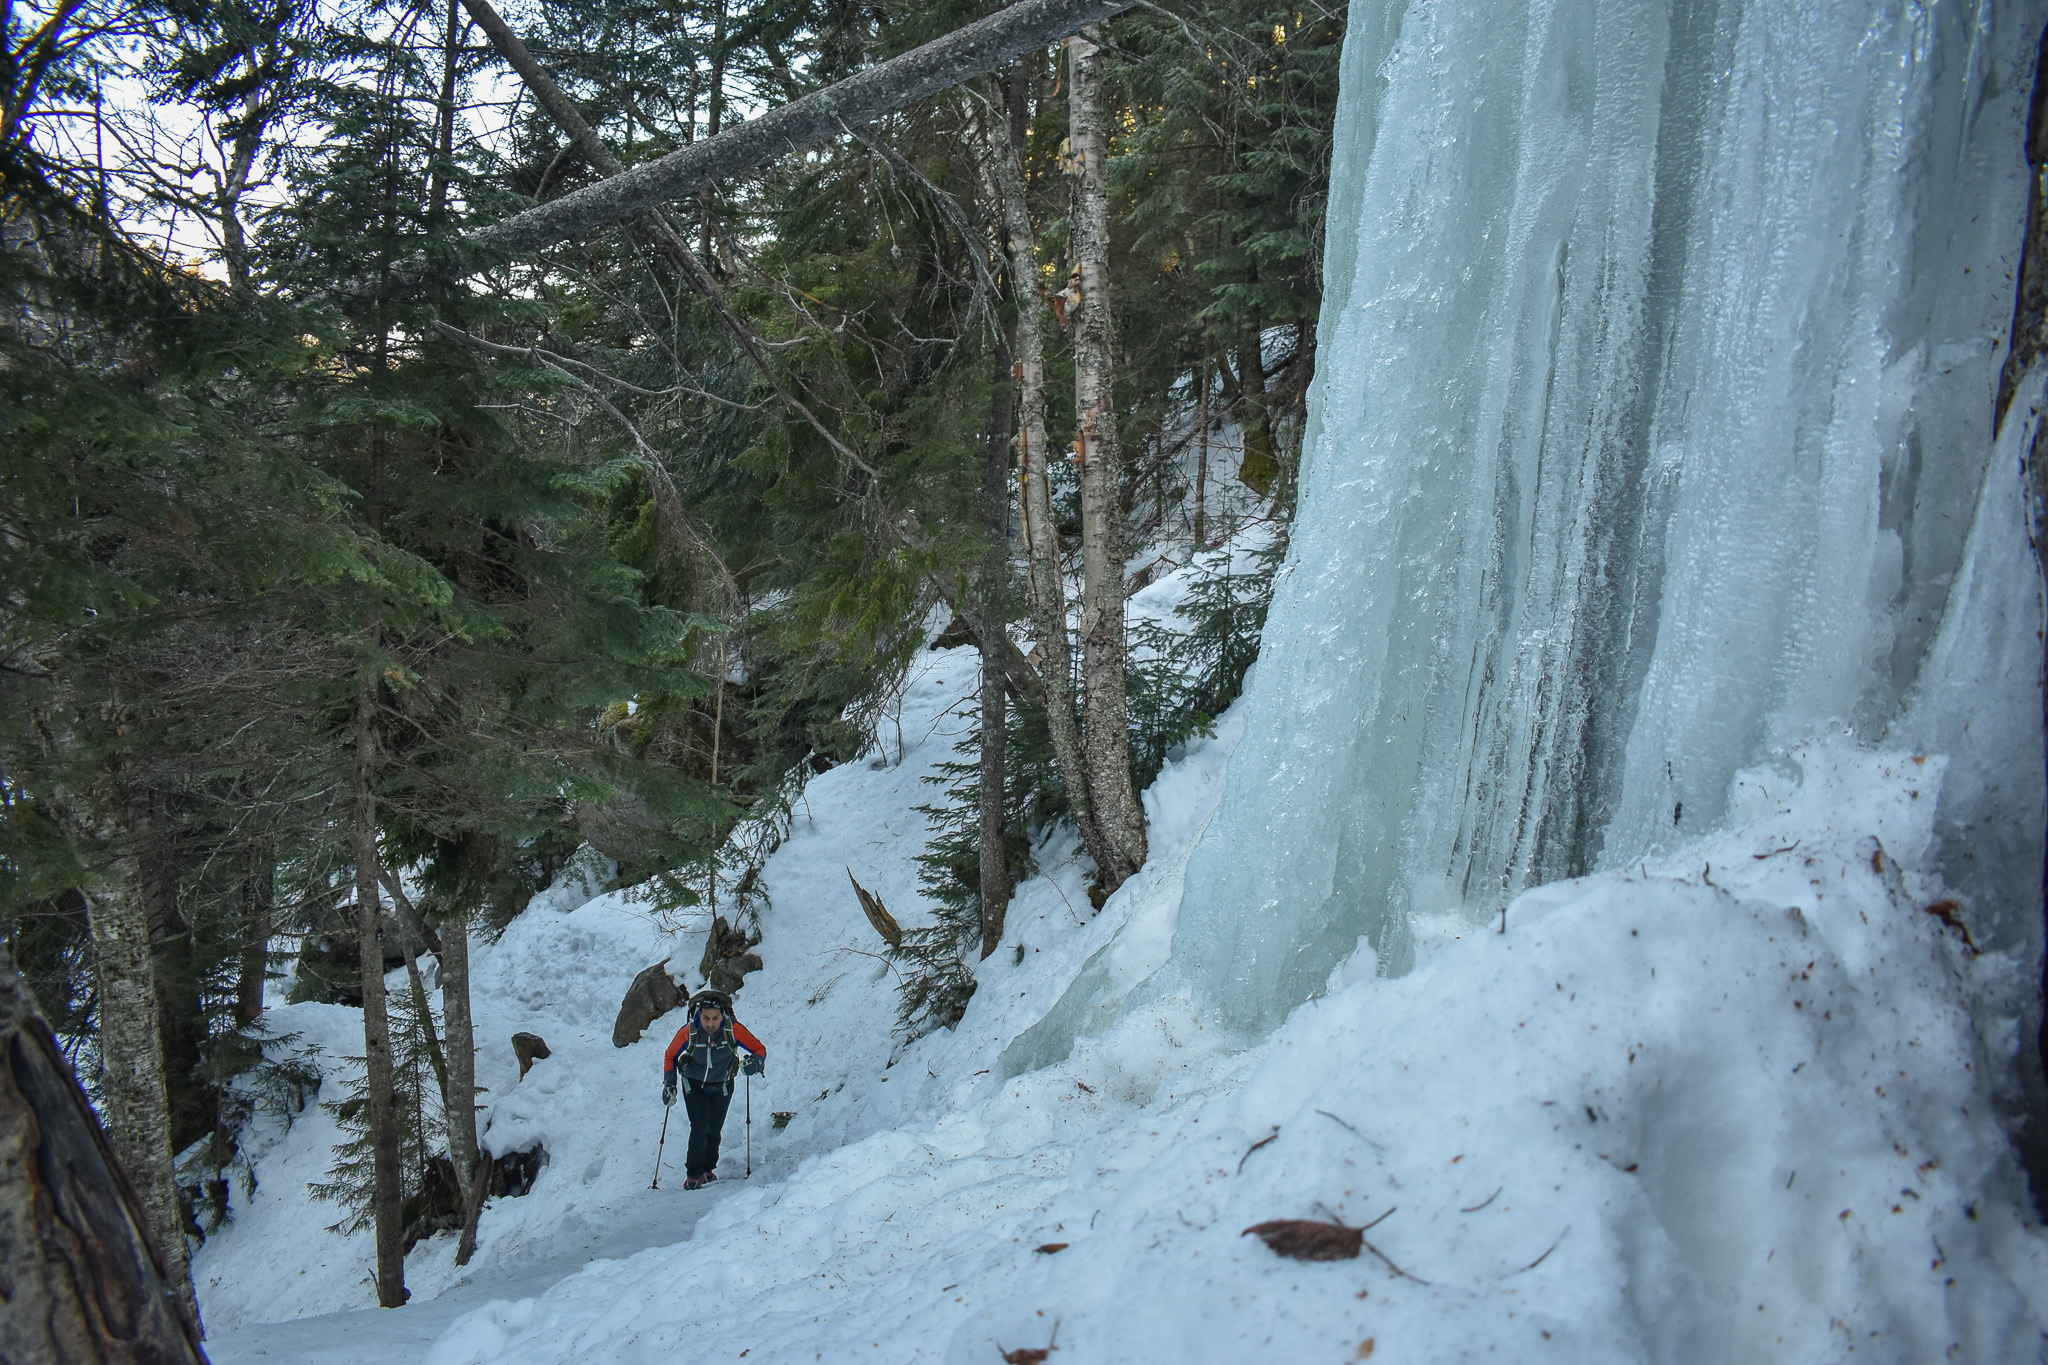
From the junction, the FWT heads southeast on a moderate track until it reaches Dry Brook. From there, the trail intermittently steepens and poses some small technical challenges as it crisscrosses the icy stream climbing under, around, and over a series of semi-frozen waterfalls. Between the water and ice, the footing along here is often slick and you’ll probably want at least a set of MICROspikes and a pair of trekking poles for negotiating the potentially treacherous terrain. Take care not to slip or plunge a foot into the brook.
Eventually, the trail leaves the brook and begins a series of long, gradual switchbacks up toward Shining Rock. As the trail moves away from the brook, the short, steep, and technical sections dissipate and the terrain and grade become more moderate and consistent—especially once the snow on the ground is packed and covering the ordinarily rocky and rooty terrain.
Shining Rock
After 2.5 miles, the Falling Waters Trail reaches a junction with a short spur trail that heads downhill to Shining Rock, a large granite slab on the flanks of Little Haystack Mountain that is visible from Interstate 93. If you have time (remember, darkness comes early in the winter) consider the brief detour.
The Shining Rock junction is also a great place to refuel, add an extra layer and traction devices (if you haven’t already), and get your above-treeline gear ready (balaclava, warmer gloves, goggles, etc.). From the junction, continue upward on the FWT, which steepens and gradually becomes more exposed to the weather for the final 0.5-mile push to the 4,760-foot summit of Little Haystack.
Little Haystack
Shortly after departing the junction for Shining Rock, hikers will push past treeline to the rocky and icy landscape that is the summit of Little Haystack Mountain. Although Little Haystack isn’t one of the 48 New Hampshire 4,000-footers (it’s technically a sub-peak of Mount Lincoln, the next stop on the journey across Franconia Ridge), it’s an awesome summit with fantastic views. Find the hard-to-miss summit cairn, then head north on the Franconia Ridge Trail toward Mount Lincoln.
Mount Lincoln
From Little Haystack, it’s 0.7 miles to Mount Lincoln’s summit. The path is easy to follow and, at first, quite moderate. Then it begins to climb on rockier terrain, cresting an ego-deflating false summit, all the while offering fantastic views in every direction (but also fully exposing you to the wind and weather).
Once you get to the summit of the 5,089-foot Mount Lincoln, the first of two New Hampshire 4,000-footers on the traverse, take a moment—or more, if the weather allows—to soak in the dramatic landscape and fantastic perspective. From here you get views in all directions, with the Kinsmans, Lonesome Lake, and Cannon Cliff to the west and the Pemigewasset Wilderness to the east. To the south, the pyramid-like tops of Mount Liberty and Mount Flume dominate the view, while to the north lies your next objective: the summit of Mount Lafayette.
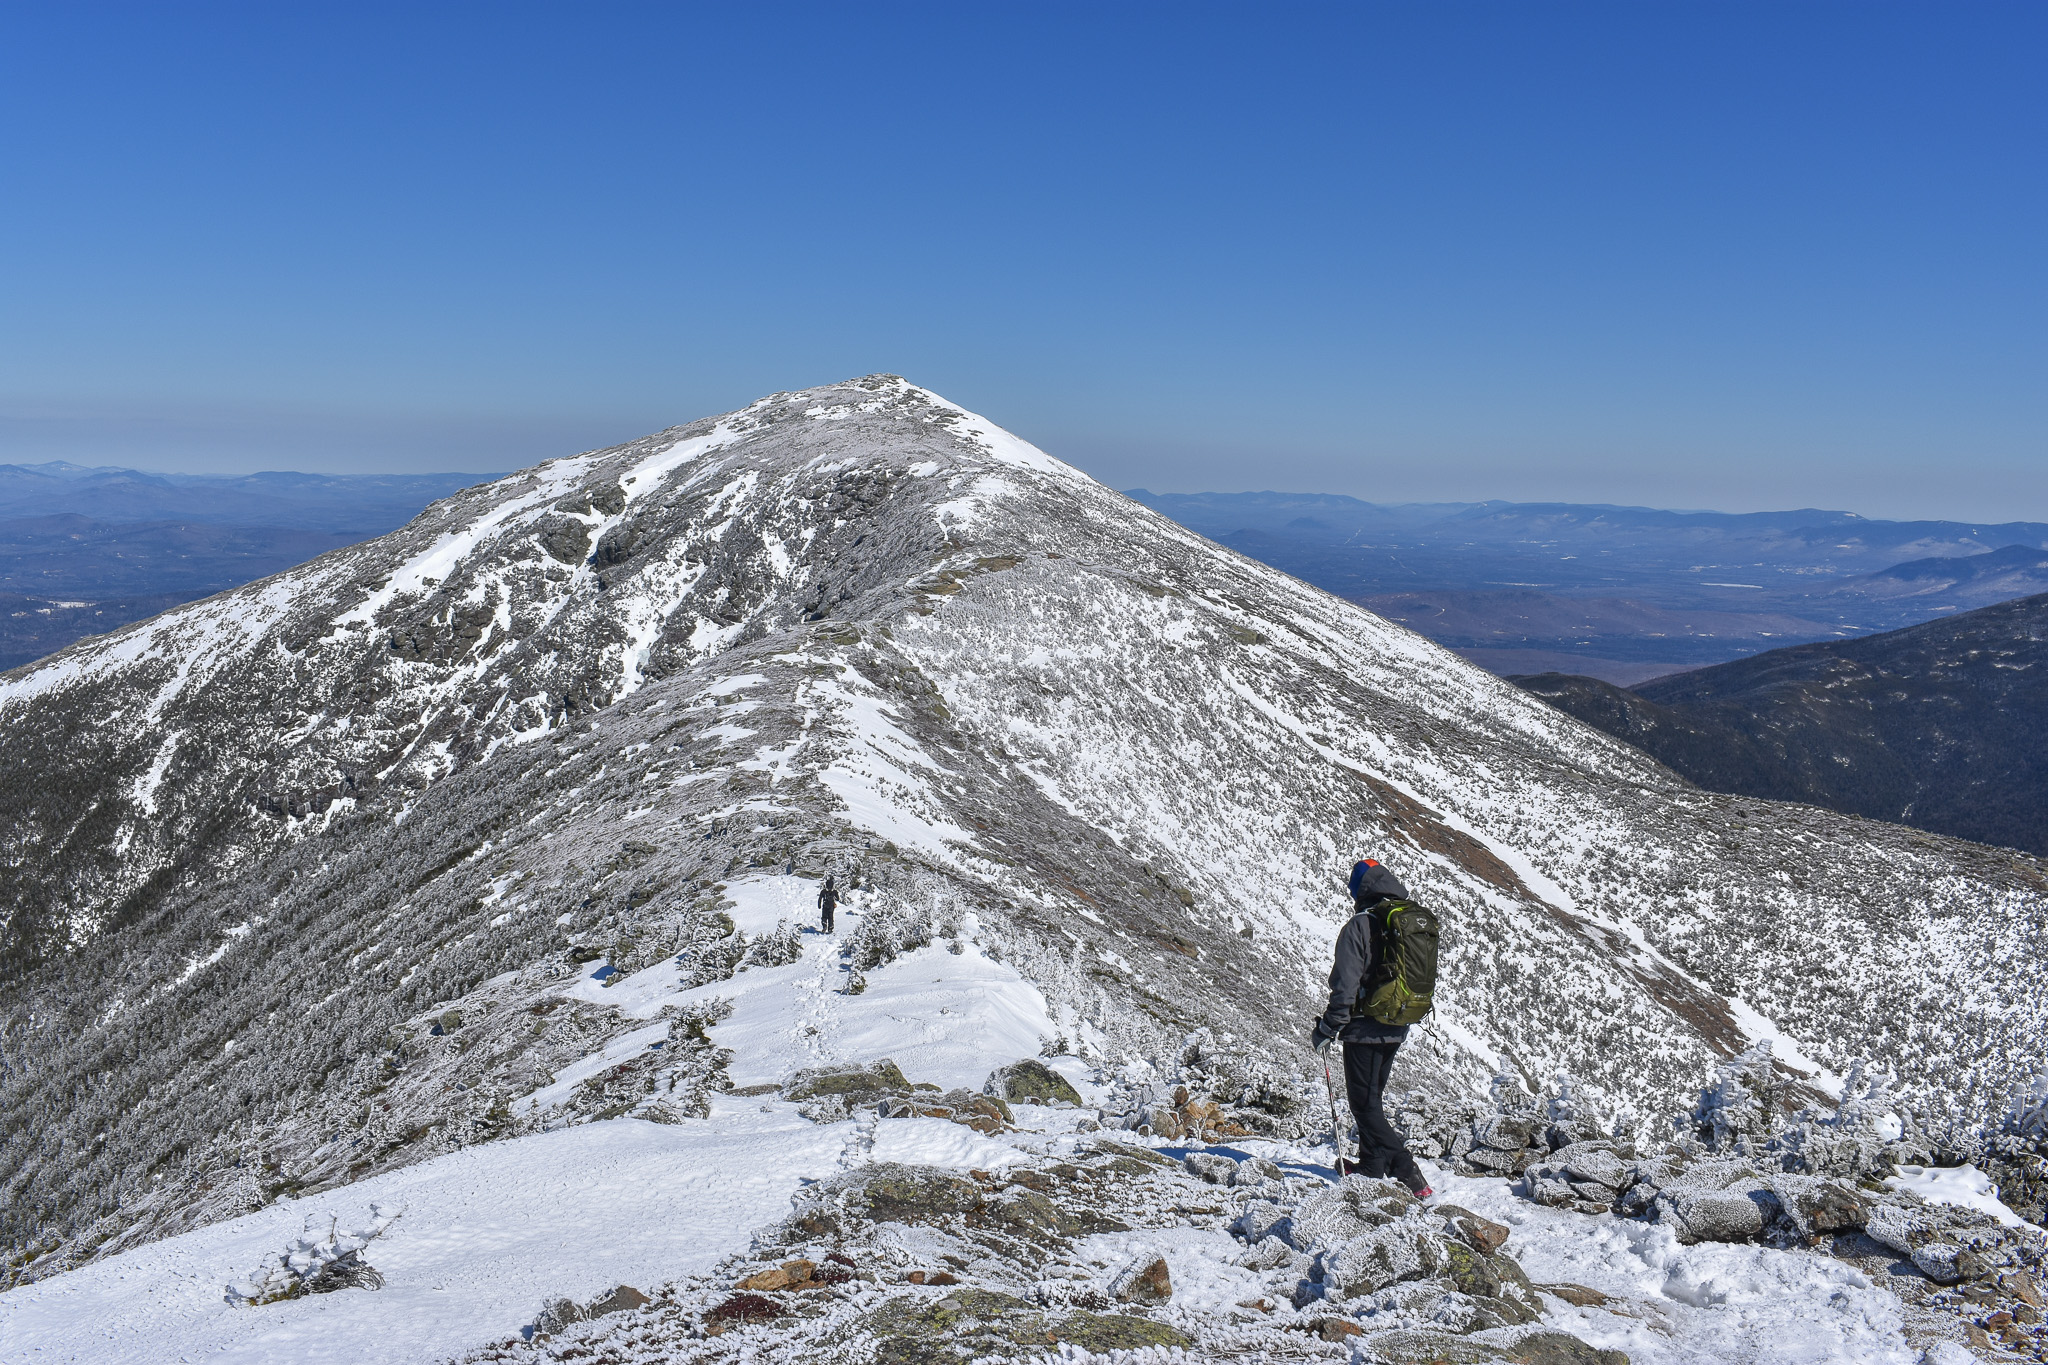
Mount Lafayette
Standing 1 mile away on the Franconia Ridge is the day’s high point, the 5,260-foot summit of Mount Lafayette. To get there, you’ll give up much of the elevation you’ve gained since Little Haystack, descending rocky, slabby terrain similar to what you’ve just ascended. The saddle has a scrubby pine grove, which provides a brief respite from the weather on less-optimal days. Beware that snow can build up in the trees, making this section more difficult and slower than you may have expected.
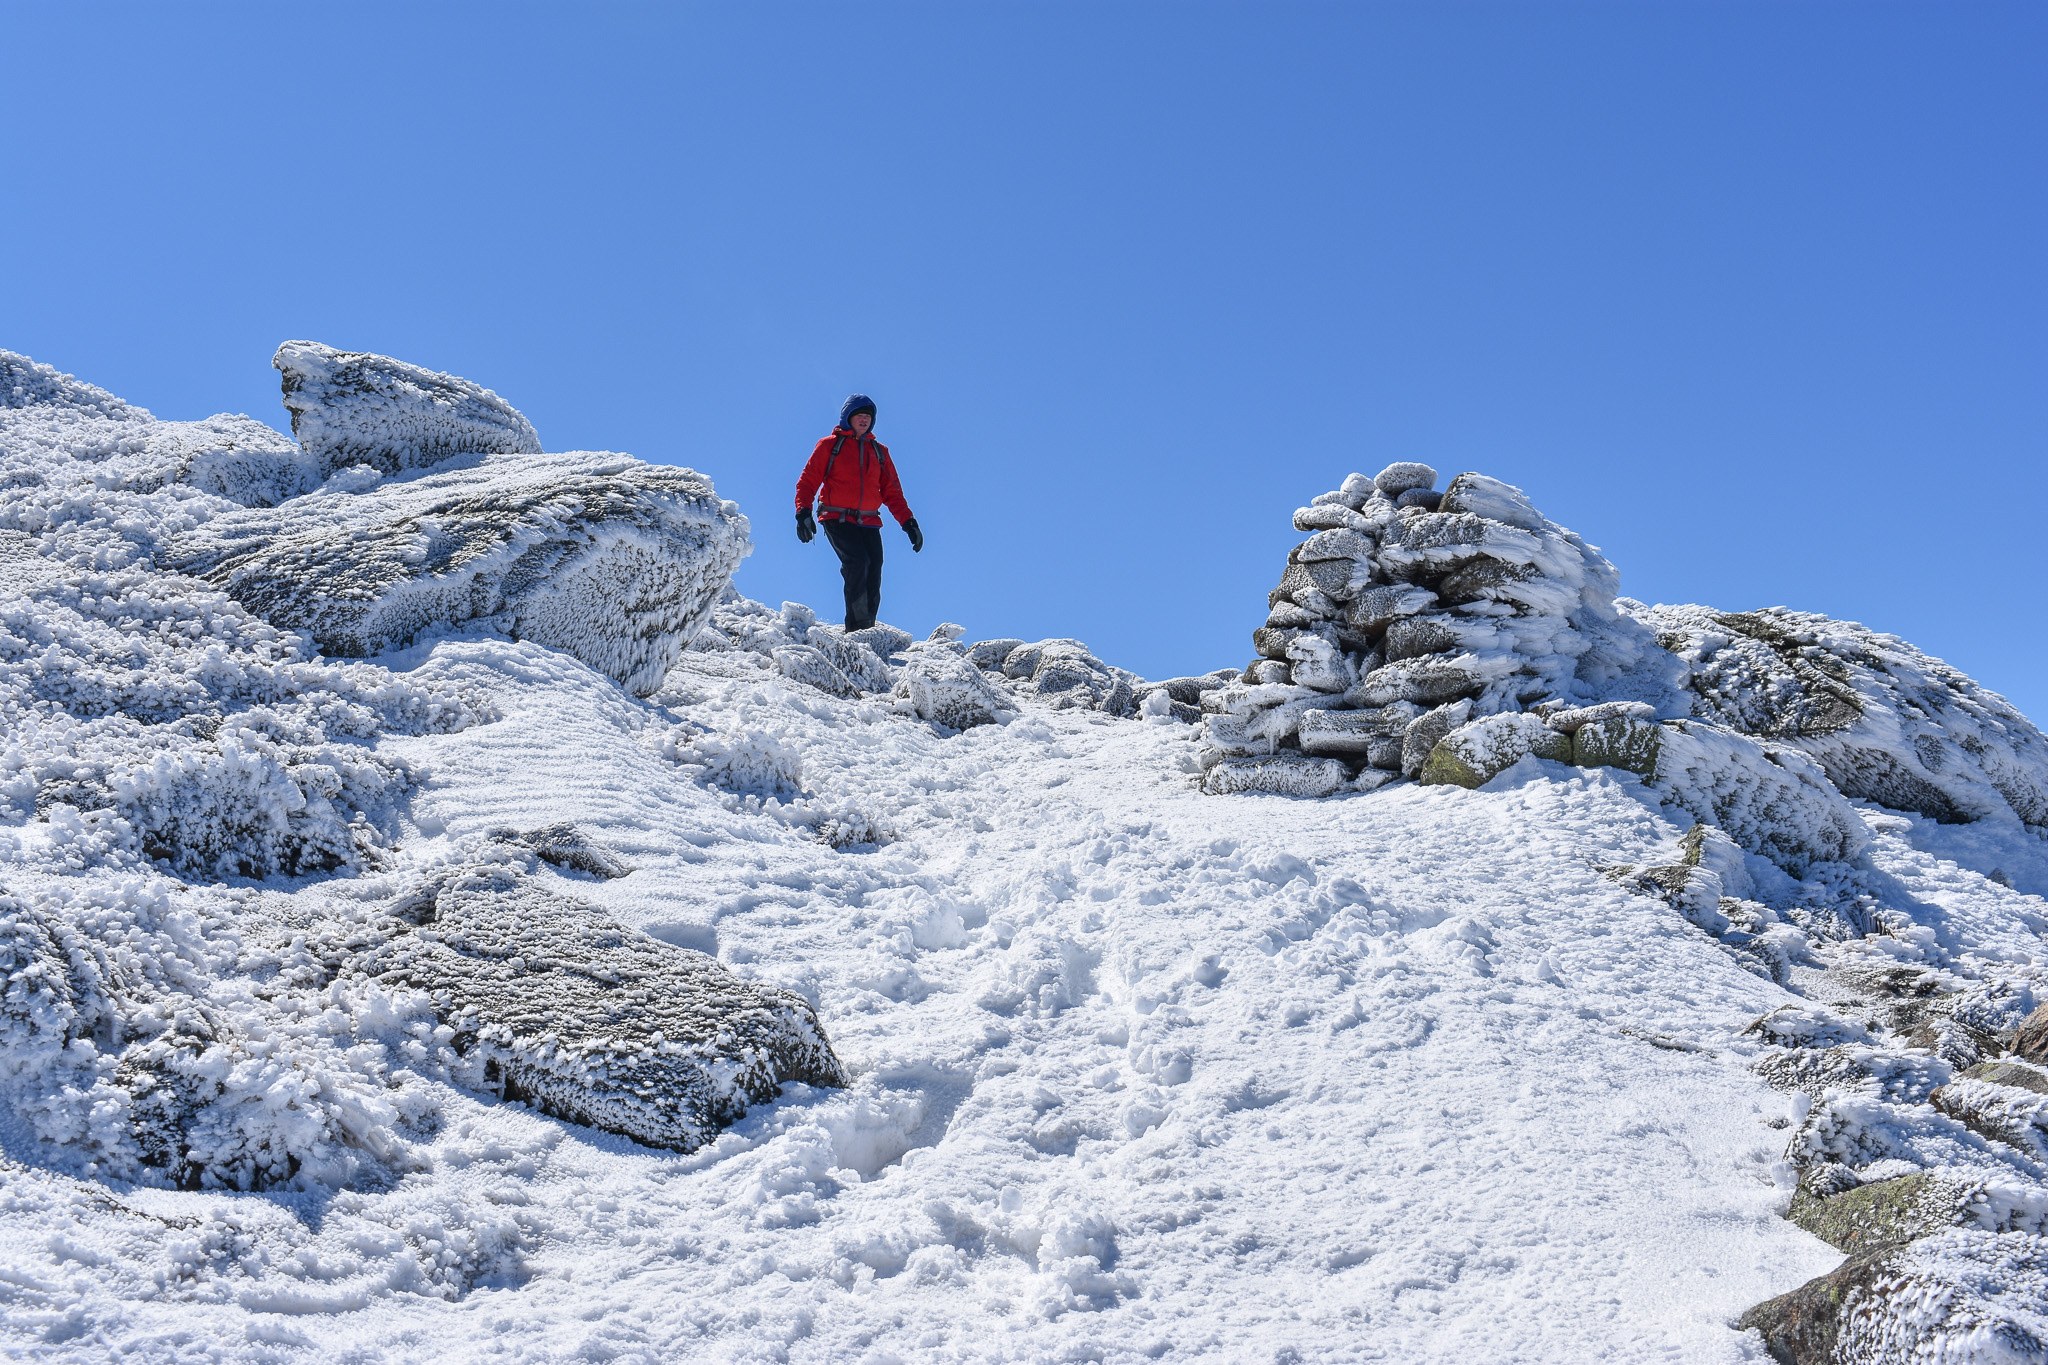
From the trees, the Franconia Ridge Trail makes a sharp ascent—the steepest section of trail since the climb from Shining Rock to Little Haystack—to Mount Lafayette’s summit. Relatively straightforward, the climb does contain a few slabby sections and rock outcroppings that warrant your full attention before gaining the summit.

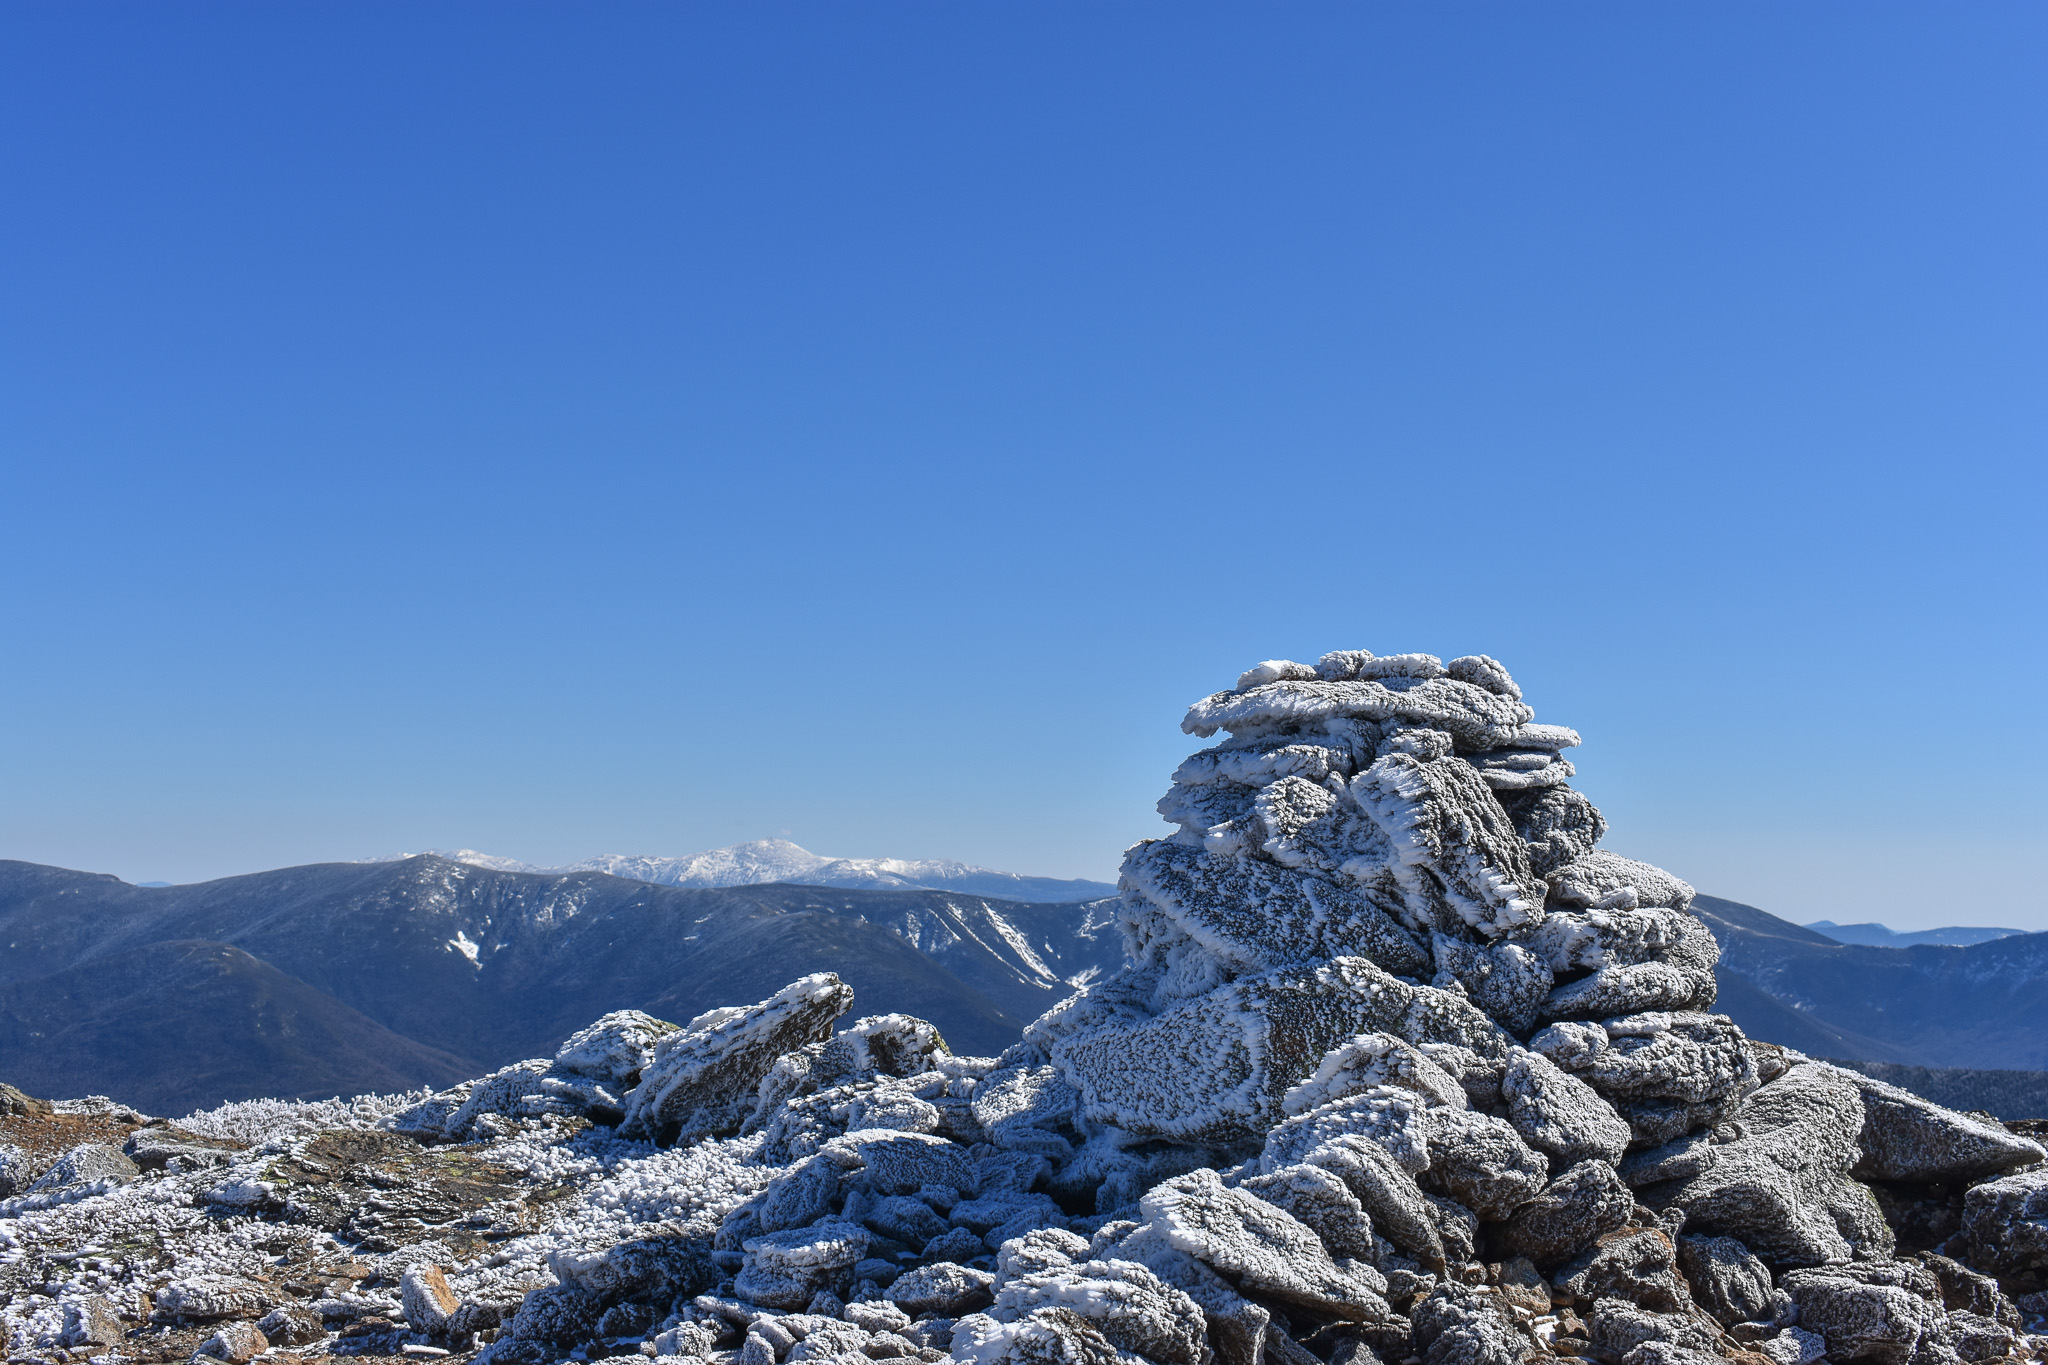
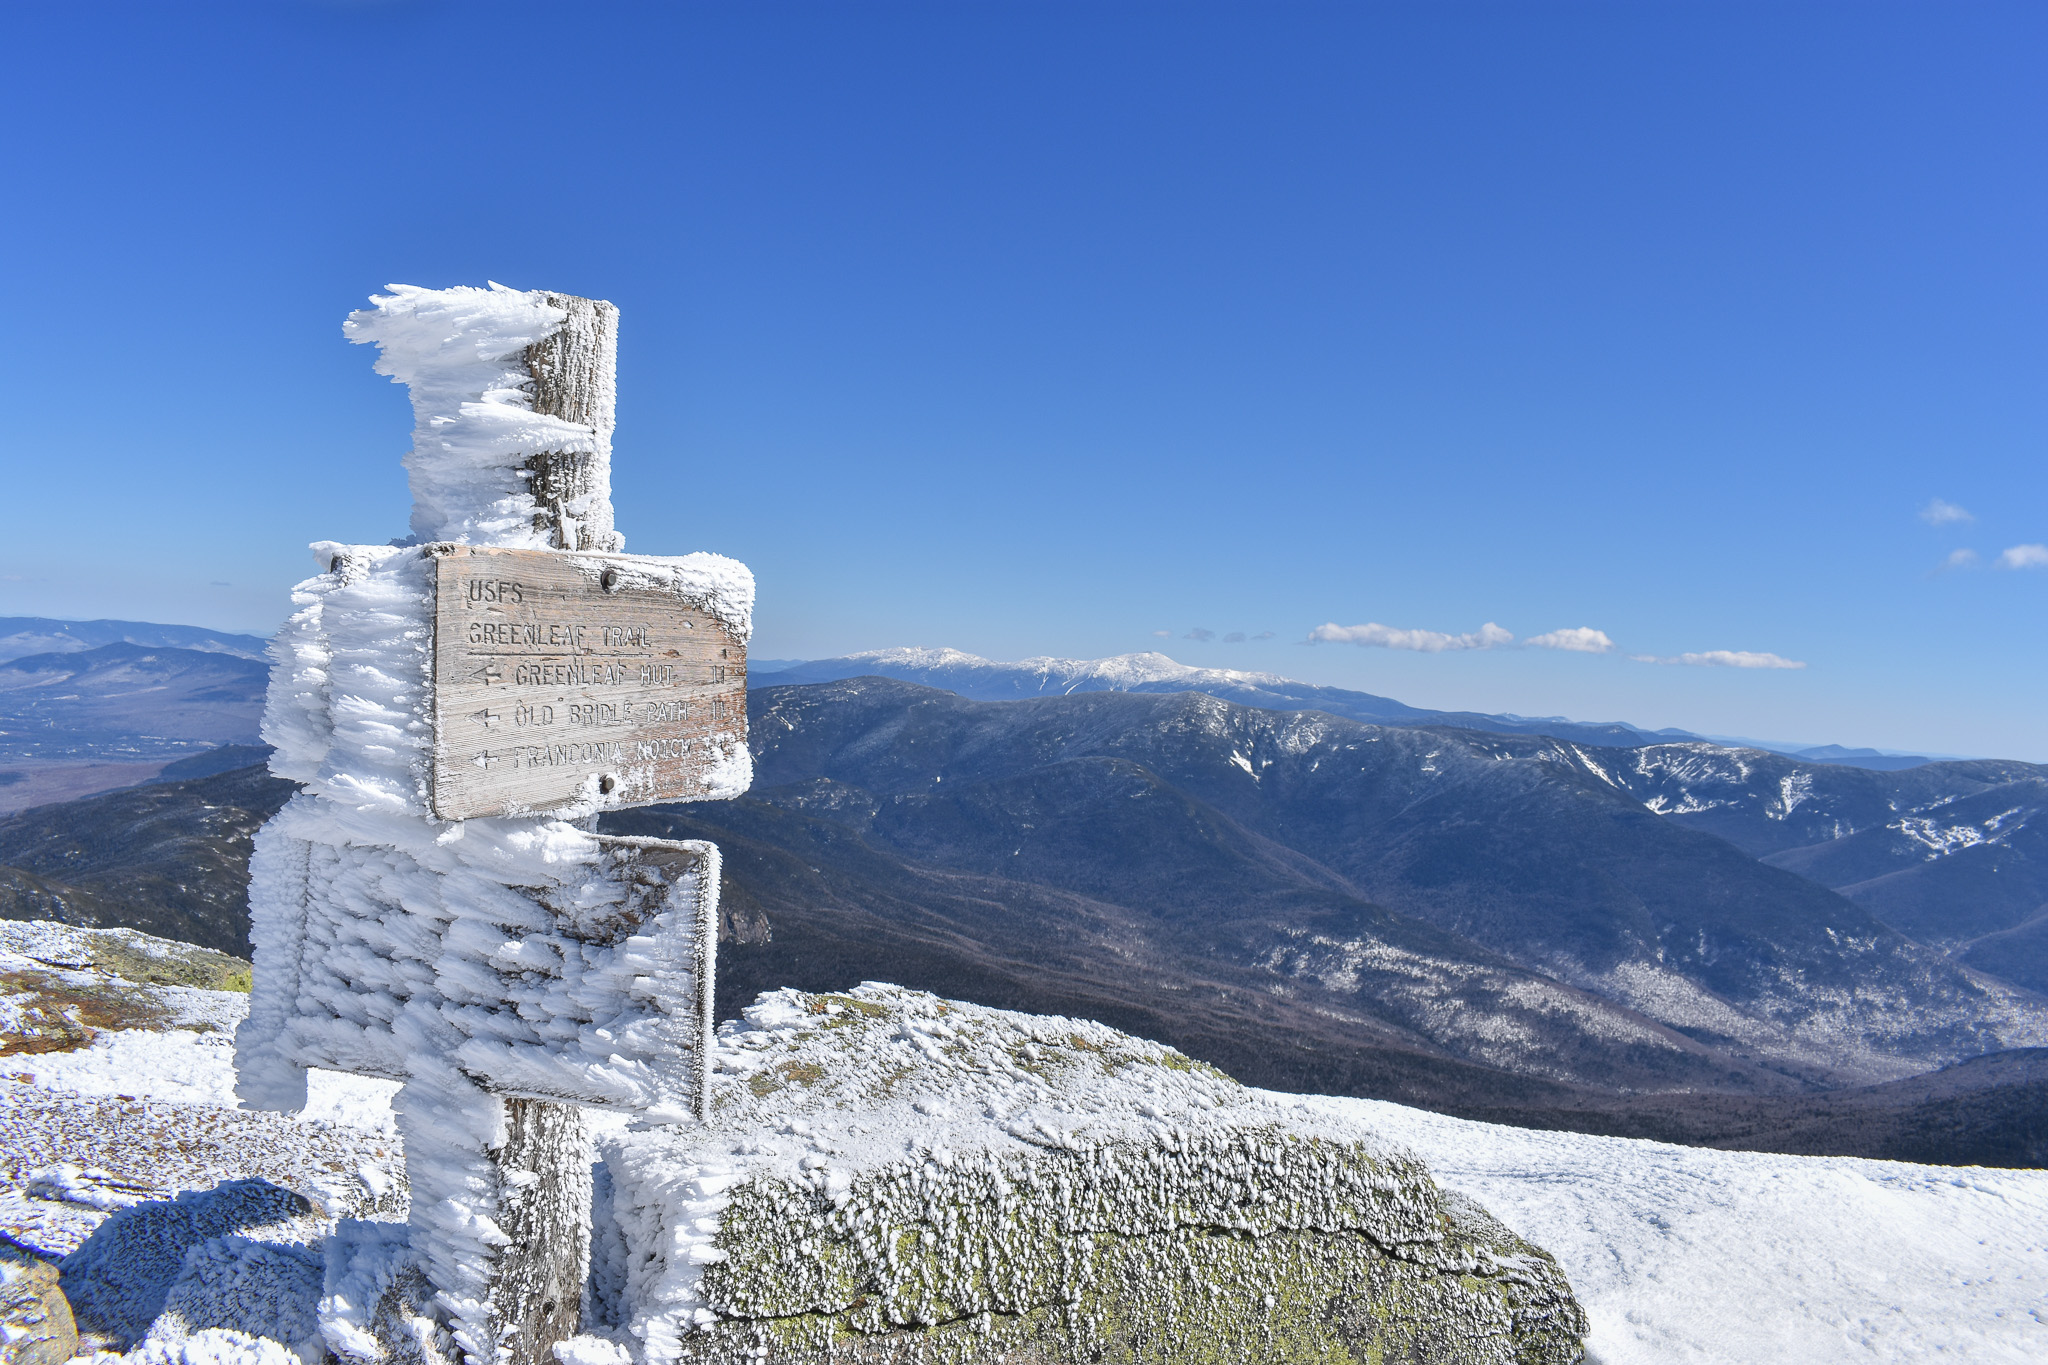
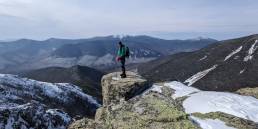
The High Point
Lafayette’s summit is well marked with both a large cairn and sign, and is quickly recognizable as it’s the region’s highest point. If the weather is good, grab a seat in one of the summit windbreaks—rock walls built to shield hikers from the elements—and soak up the views. The 4,500-foot Mount Garfield looms in the north and, on clear days, the Presidential Range is visible behind it. To the south, you can admire the distance you’ve traveled as the peaks of Mount Lincoln and Little Haystack are both visible from this vantage point.
The windbreaks are also a great place to have a quick snack but don’t de-layer just yet, as there is still some exposed trail left on the descent.
The Descent
From Lafayette’s summit, take the 1.1-mile Greenleaf Trail toward the Appalachian Mountain Club’s Greenleaf Hut. This section of trail is well defined, but the vast majority of it is above treeline and very exposed to the weather (in particular, winds blowing from the northwest).
With the hut visible most of the way, progress can feel sluggish. The slow-going is often exaggerated by the trail’s rugged nature, made even more difficult by patches of snow and ice.
As you near the Greenleaf Hut, the trail dips into the cover of trees, the first real break in exposure you’ve had for nearly 3 miles. You’re not out of the woods yet though, as the area around the hut is often very icy.
Greenleaf Hut
Unlike during the summer, there is no hot chocolate, soup, or delicious baked goods in your future—unless you brought your own—as Greenleaf Hut is closed in the winter. However, the building itself provides a good windbreak and is a logical place to stop for a snack and to de-layer.
The Old Bridle Path
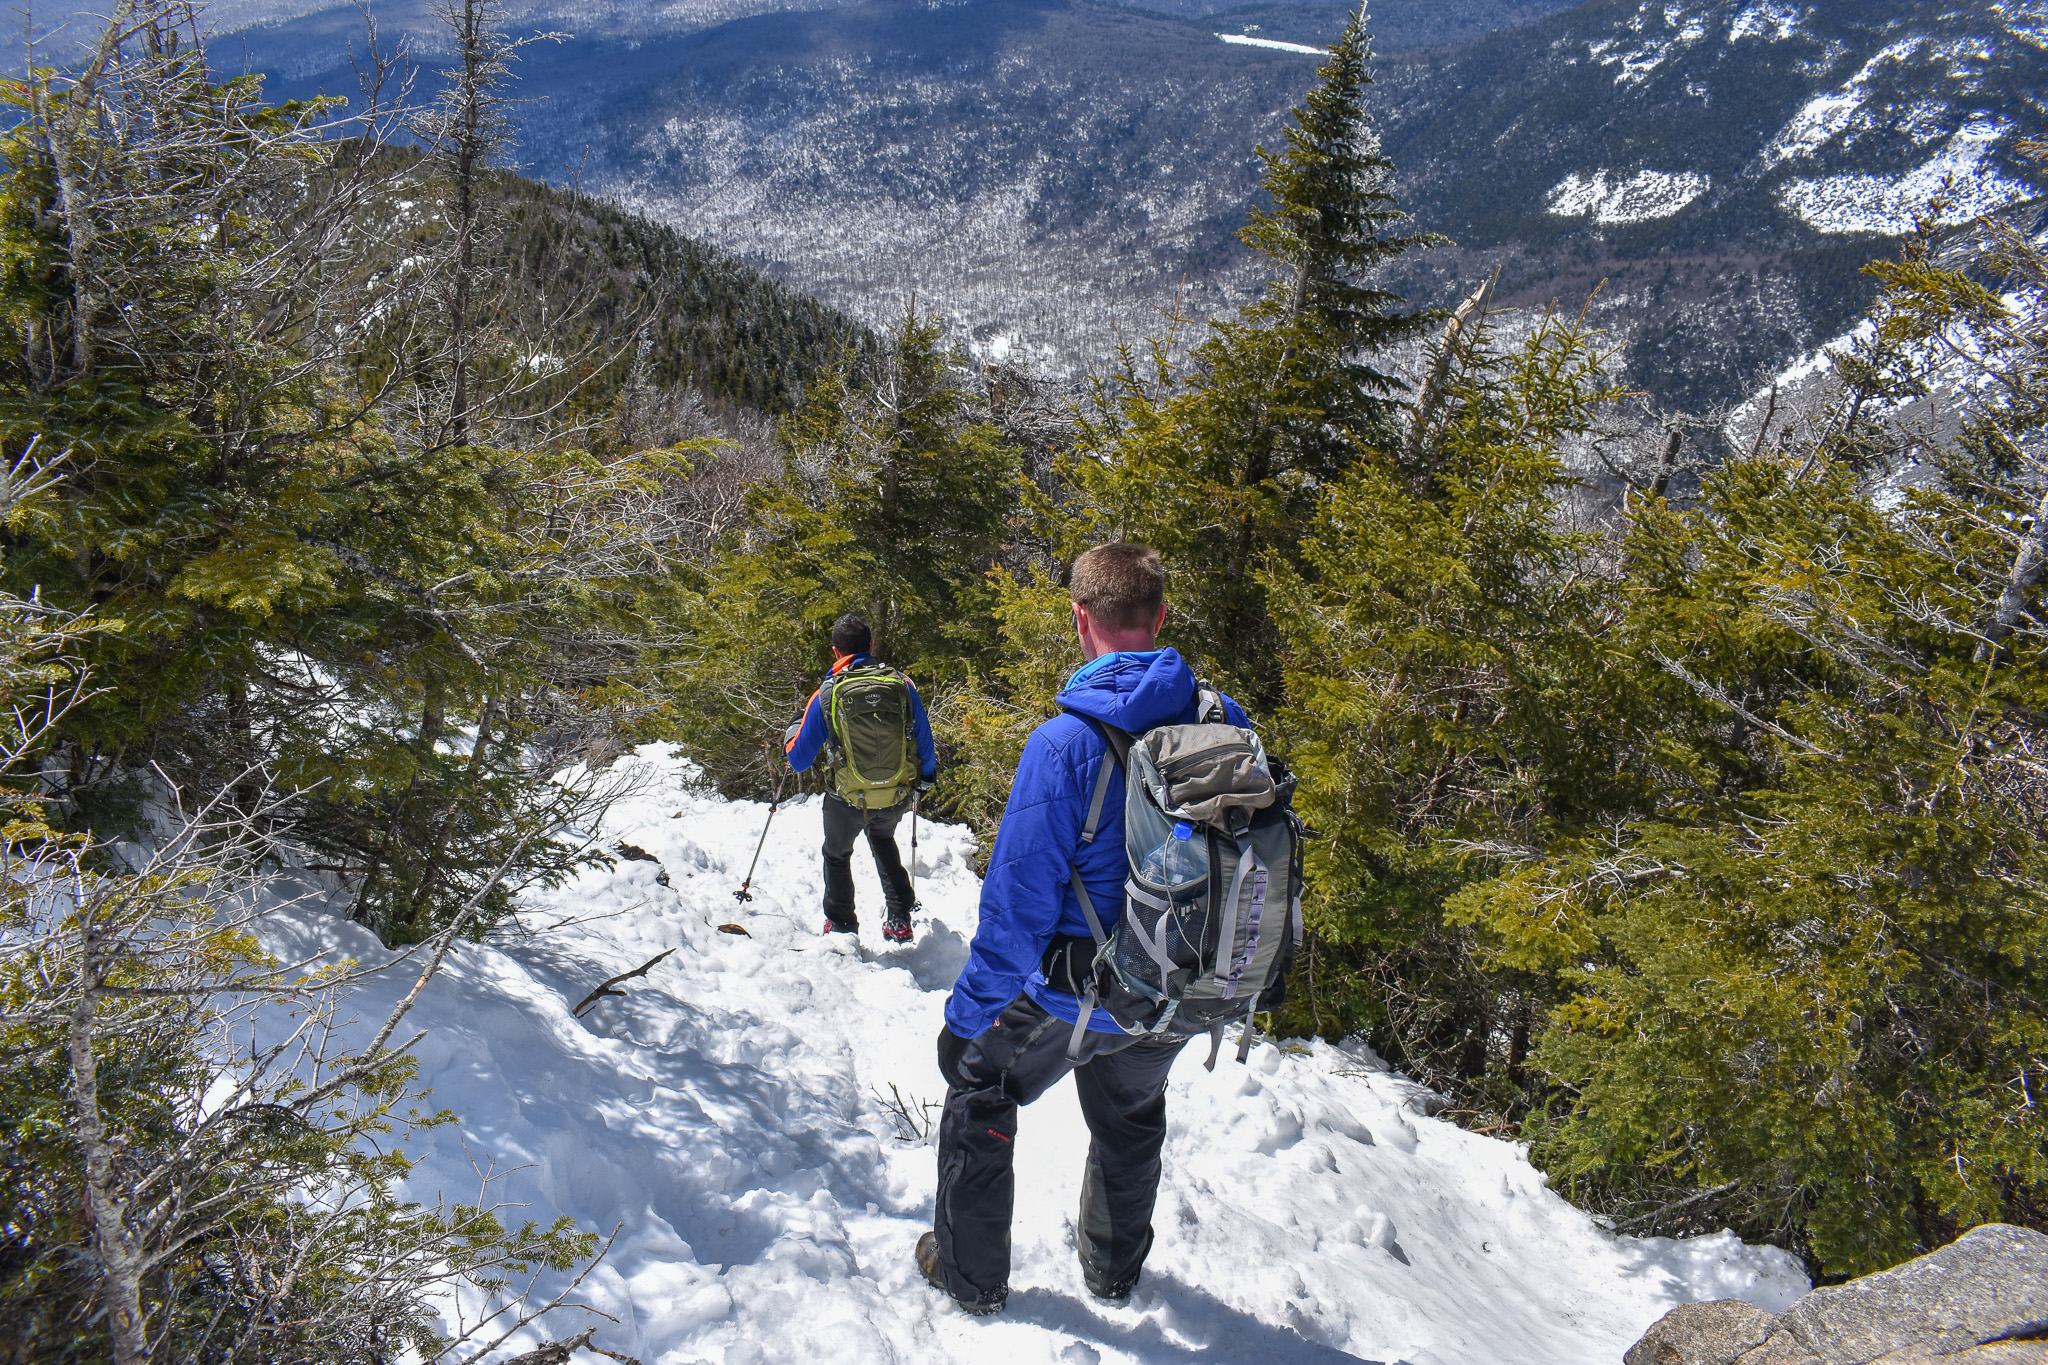
Take the Old Bridle Path for 2.7 miles from the hut to the Falling Waters Trail junction, then enjoy the short walk back to the car. Below treeline, hikers may feel that the crux of the day is behind them, but the upper third of the OBP is challenging and, in places, exposed. Use care negotiating these ledges, slabs, and steep sections.
As you descend the ledges, take a moment to look back up at the ridge. It’s nice to enjoy the relative warmth of the sun found on these protected ledges while peering up at the ridge and remembering the bone-chilling cold experienced only a short time ago.
After the ledges, the Old Bridle Path begins to mellow, getting more forested, with switchbacks becoming progressively easier. From here, it’s a straightforward, albeit longish walk back to the junction, and then the car.
The Kit for Franconia Ridge in Winter
- Trekking poles and traction devices like Kahtoola MICROspikes are essential for negotiating the icy terrain on the ascent and descent. Although the wind often blows the snow off the ridge proper, it can also get quite icy. In low snow years, consider adding crampons and an ice axe to your kit, too.
- Bring a variety of winter accessories to contend with unpredictable above-treeline winter conditions. A winter hat, balaclava, multiclava, and gloves of varying warmth are a good place to start. If there’s wind in the forecast, add goggles to your kit.
- A warm down or synthetic parka like the EMS Featherpack (men’s/women’s) is great for staying warm during rest breaks, cold traverses and descents, and emergencies.
- Because it gets dark quickly in the winter and the Old Bridle Path descent is treacherous in the dark, add a headlamp like the powerful and rechargeable Black Diamond Spot 400 to your pack.
- Snickers bars and gels are great in the summer but can freeze in frigid winter temperatures. Nature Valley bars, trail mix, and leftover pizza—just to name a few—are excellent winter food choices that won’t freeze in your pack.
Have more questions about what gear to bring? Check out What’s in Our Winter Peak-Bagging Packs. Don’t be that guy in jeans and a hoodie hiking across the ridge.
Keys to Franconia Ridge in Winter
- Looking for a good reason for an alpine start? The parking lots fill up fast! In the summer, excess traffic is parked in an overflow lot by Cannon Mountain, but the weekend hiker shuttle that runs from May to October won’t be available to ferry you to the trailhead.
- Start cold so you won’t have to stop after 10 minutes to lose a layer. More importantly, if you’re not over-layered, you’re less likely to sweat through your layers, keeping you warmer in the long run.
- Bring a thermos of something hot to drink. It’s great for warming up your core temperature and a nice morale booster when the going gets cold.
- Know when to say when. If you get above treeline and decide that it’s too windy, too cold, or you just have a bad feeling, don’t hesitate to turn around before committing to the traverse.
- Have a backup plan. If you live a few hours from the mountains like many people, it can be hard to know exactly what the weather will be doing until you get there. If the weather isn’t cooperating for a traverse, Mount Liberty and Cannon Mountain are close by and are less committing than Franconia Ridge.
- After a cold day in the mountains, warm up at One Love Brewery in Lincoln, New Hampshire. Their Farmhouse Burger features pulled pork, beer cheese sauce, and crispy onions, and is a great way to replace some of the calories you burned.
Related Posts
[…] the day’s objective. It was nice to revisit this old favorite while writing the goEast Alpha Guide: Hiking Franconia Ridge In Winter. More so, it was nice to do this hike not following a late night at the Woodstock […]