We’ve all been there: clumsily fumbling to zip up a jacket, unwrap an energy bar, or dig out an extra layer from a backpack with gloved hands. Gloves and mittens provide essential protection from wind, snow and cold during the long winter months in the mountains, yet finding a handwear system that provides adequate protection while also affording sufficient dexterity to perform tasks such as photography or adjusting snowshoes isn’t as simple as it might seem. Through several winters of experimentation while exploring and photographing the mountains of the Northeast in winter, I’ve learned some useful tips and tricks that will make your next winter adventure and/or photo outing more comfortable and productive and less frustrating.
1. Choose your gloves based on level of exertion and weather conditions.
While this may seem obvious, a common mistake of many beginner winter hikers is to get the warmest possible glove that they can and wear it all day long. While hands will be nice and toasty at the trailhead using this approach, they’ll soon turn sweaty and clammy, especially if the hike is a high exertion one, such as climbing a mountain. A better tactic is to pack multiple pairs of gloves/mittens and choose the one to wear based on current and expected exertion level and weather conditions. This, of course, will add a little extra weight to your pack, but the benefit of having warm and dry hands far outweighs this negligible weight gain.
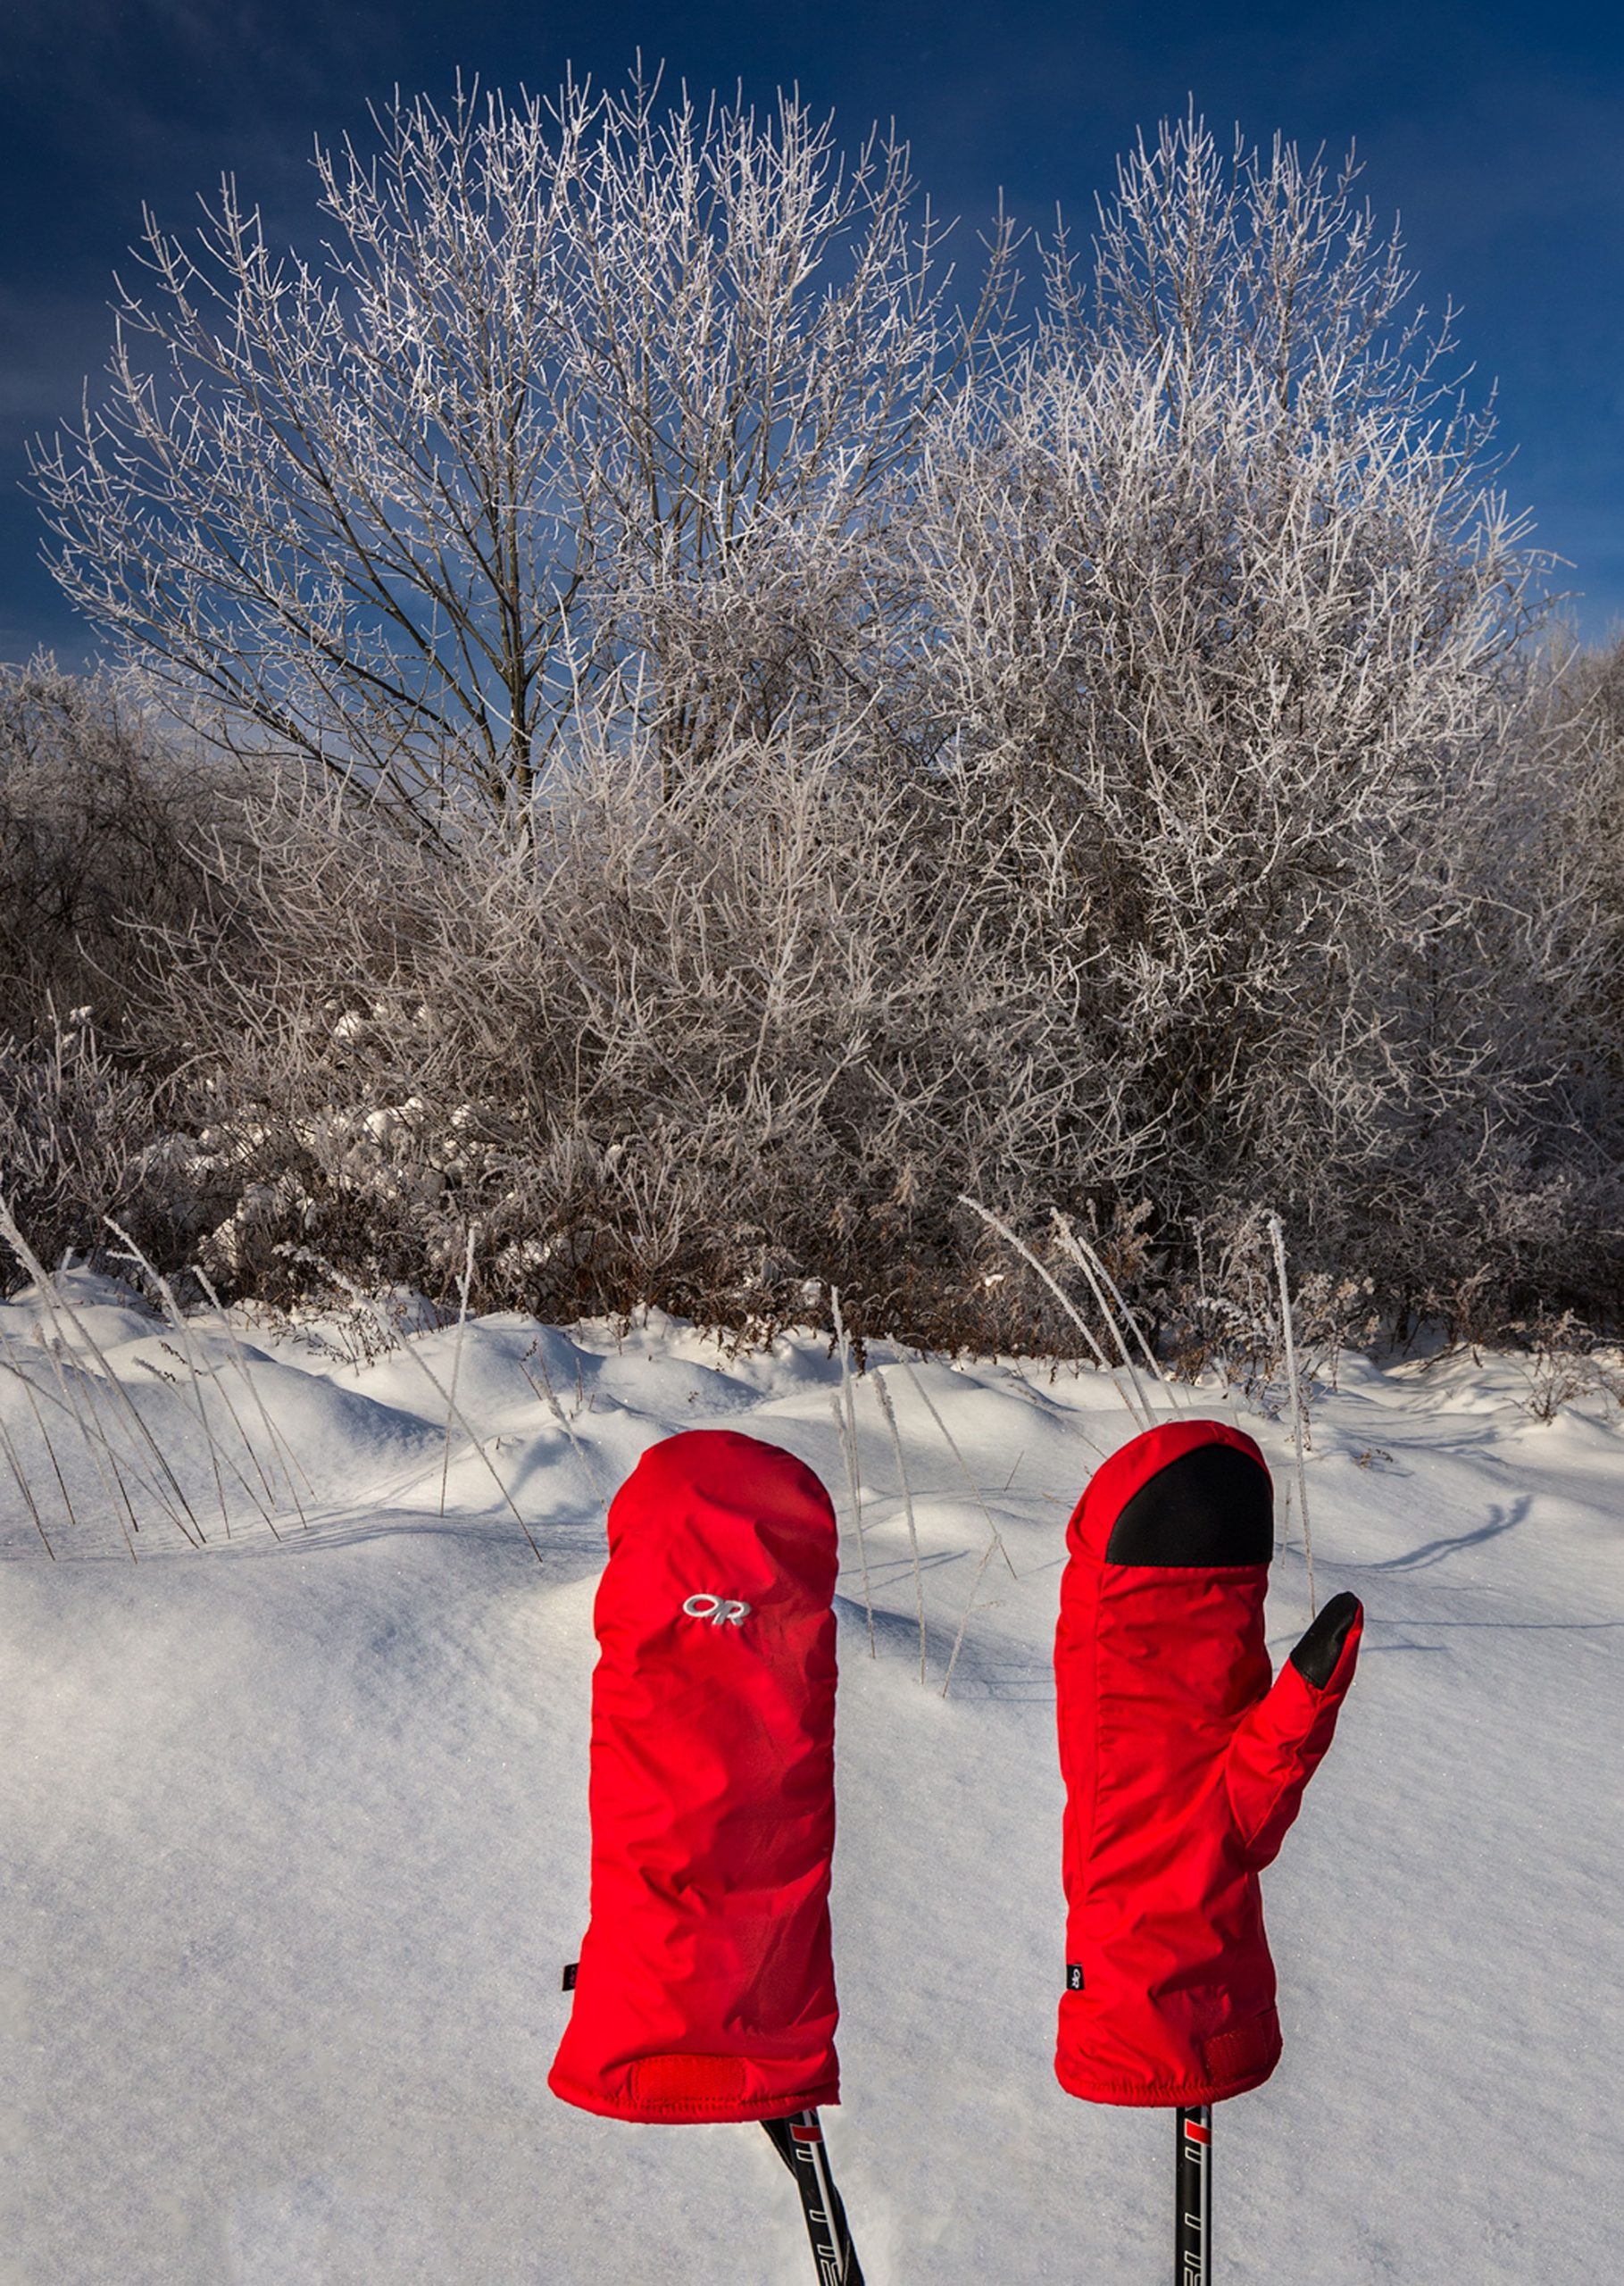
When climbing a mountain in winter, I like to break gloves into two separate categories for the different phases of the climb: the approach, and the summit. A light to mid-weight glove (approach glove) that provides just enough warmth yet is also breathable, such as the Smartwool liner glove or Outdoor Research Flurry Sensor glove is a great option on the ascent. For chillier temps, warmer choices include the Exit Sensor and the Vigor Heavyweight Sensor gloves, both from Outdoor Research. All of these options are made from wool, polyester, fleece or spandex, making them highly breathable to help prevent hands from getting sweaty. These gloves also provide the added bonuses of not hindering dexterity and being touch-screen compatible, which facilitates the use of a smartphone or a camera touch-screen. While these approach glove options aren’t fully waterproof, unless you’re hiking during a wet snow or cold winter rain, having waterproof gloves typically isn’t necessary when hiking. A good waterproof option if conditions require is the Seirus Soundtouch Xtreme All Weather Glove, which is also touch-screen compatible.
If hands cool down too much while stopping for a snack and photo break, toss a hand warmer (more on these later) into each glove or put a pair of mittens over the gloves until hands warm up. Excellent mitten options from Outdoor Research include the Highcamp Mitt (touch-screen compatible) and the bomb-proof Alti Mitt, which has a waterproof Gore-Tex shell combined with a removable PrimaLoft insulated liner that facilitates customization based on temperature and weather conditions.
2. Save a fresh pair of gloves for the summit.
If, like me, photographing the sunset from a mountain summit is one of your primary objectives on a winter day in the mountains, saving a fresh pair of gloves (summit gloves) for the top can be the difference between getting the shot or not only missing out on the shot, but also risking frostbite. Climbing a mountain is hard work, especially when breaking trail with a heavy pack full of camera gear in addition to the winter essentials on your back. Even if wearing light-weight breathable gloves on the ascent, hands and gloves can still become sweaty and damp at the conclusion of a tough climb, and having damp gloves while on a cold and windy summit is a recipe for disaster. While taking steps to prevent this from happening (such as taking breaks on the climb to minimize sweating) is the first line of defense, packing a pair of gloves specifically for the summit is ideal. This is where the delicate balance of the warmth and dexterity that a pair of gloves provides truly comes into play. Thinner gloves are more dexterous, but generally less warm, while warmer and bulkier gloves and mittens give more warmth but compromise dexterity. A good approach is to use the heaviest/warmest glove that still provides sufficient dexterity for the task at hand. Keeping your hands warm and avoiding frostbite should always be your first priority.
In addition to possessing sufficient dexterity, another attribute to look for in summit gloves is wind resistance. Unlike during the approach, breathability isn’t as much of a critical factor for summit gloves, making something less breathable but more wind resistant, like the Black Diamond Guide Glove., a better choice for the summit than the aforementioned approach gloves. The Guide Glove has several attributes that make it a great summit glove: It’s waterproof (Gore Tex), has a supple leather palm for excellent grip and dexterity, and has a removable PrimaLoft insulated liner that can be worn standalone if conditions allow for increased dexterity. The Guide Glove also comes in a “lobster-claw” mitten version where the index finger is split out from the rest of the mitten, giving the extra warmth that a mitten provides without completely sacrificing dexterity.
3. Hand warmers are worth their weight in gold.
On an exposed summit with a wind-chill well below zero, even the warmest gloves and mittens can sometimes use an extra boost. Enter the humble and incredibly versatile hand warmer. These puppies have saved my digits on more than one occasion, and as previously mentioned are particularly adept at adding some extra warmth to gloves without sacrificing dexterity.
Putting it all Together
Packing the proper handwear for a winter outing in the mountains is only half the equation; The other is developing a system to properly use each pair of gloves/mittens. While weather and snow conditions can vary wildly in the winter, an example of how to approach winter handwear on a cold day that culminates with photographing sunset from a summit would go something like this:
- Start the hike with a lightweight and breathable pair of approach gloves that possess a high level of dexterity. Such gloves should never have to be removed on the approach, as ideally they provide enough dexterity for tasks such as eating snacks, adjusting snowshoes, and taking photos. Even if fingers are cold at the start, they should warm up with exertion in short order. If they start to feel uncomfortably cold, toss some mittens (like the shell of the Alti mitts) over your gloves until hands are sufficiently warm, but be sure to take the mitts off to prevent sweating.
- The most critical part of the day with the least margin for error is the time spent in the alpine zone above treeline. Here the views are otherworldly but the conditions harsh, with bitter cold and high winds often the norm. This is no place to be fiddling with gloves and exposing bare hands, so final summit preparations should ideally be made below treeline. Stopping to fuel up with a hot drink and a snack (the digestive process warms the body) and to adjust clothing and switch to summit gloves a few minutes before treeline works well – any sooner and you’ll run the risk of overheating and sweating, which can be dangerous when combined with the wind and cold of the exposed summit. Pro tip: Placing hand warmers into summit gloves about 10 minutes before putting them on will ensure that they’re nice and toasty when you switch to them. In extreme cold, putting mittens over the summit gloves can provide additional protection until extra dexterity is needed.
- Once it’s time for summit photography, the mittens typically must come off in order to have enough dexterity to set up a camera and tripod, swap out lenses, and adjust camera settings. Once everything is set up, though, the mittens can be put back on if hands are cold and you’re waiting for the light to be just right, so having easy access to mittens (by looping to wrists, for example) is wise in case hands need to be warmed between shots.
- Once it’s time for the descent, putting mittens back on if they’re not already is typically a wise move until you get moving and get the blood pumping.
Have a different system that works for you? Share it in the comments!
Related Posts