Aside from climbing itself, adopting a regular hangboarding routine is the best way to build finger strength and, in turn, improve your climbing. If you have a hangboard at home, then you’re already familiar with its many virtues. If you don’t, then today is the day to get one—and what better way to come by a hangboard than to break out the power tools and build one yourself? It’s neither complicated nor expensive and, since you’re the one doing the building, it can be made entirely to your specifications.
The following is just one example, so feel free to mix it up based on the materials and tools you have on-hand, as well as based on your personal preferences. Anything goes when you’re doing it yourself—build the hangboard that you want to train on.
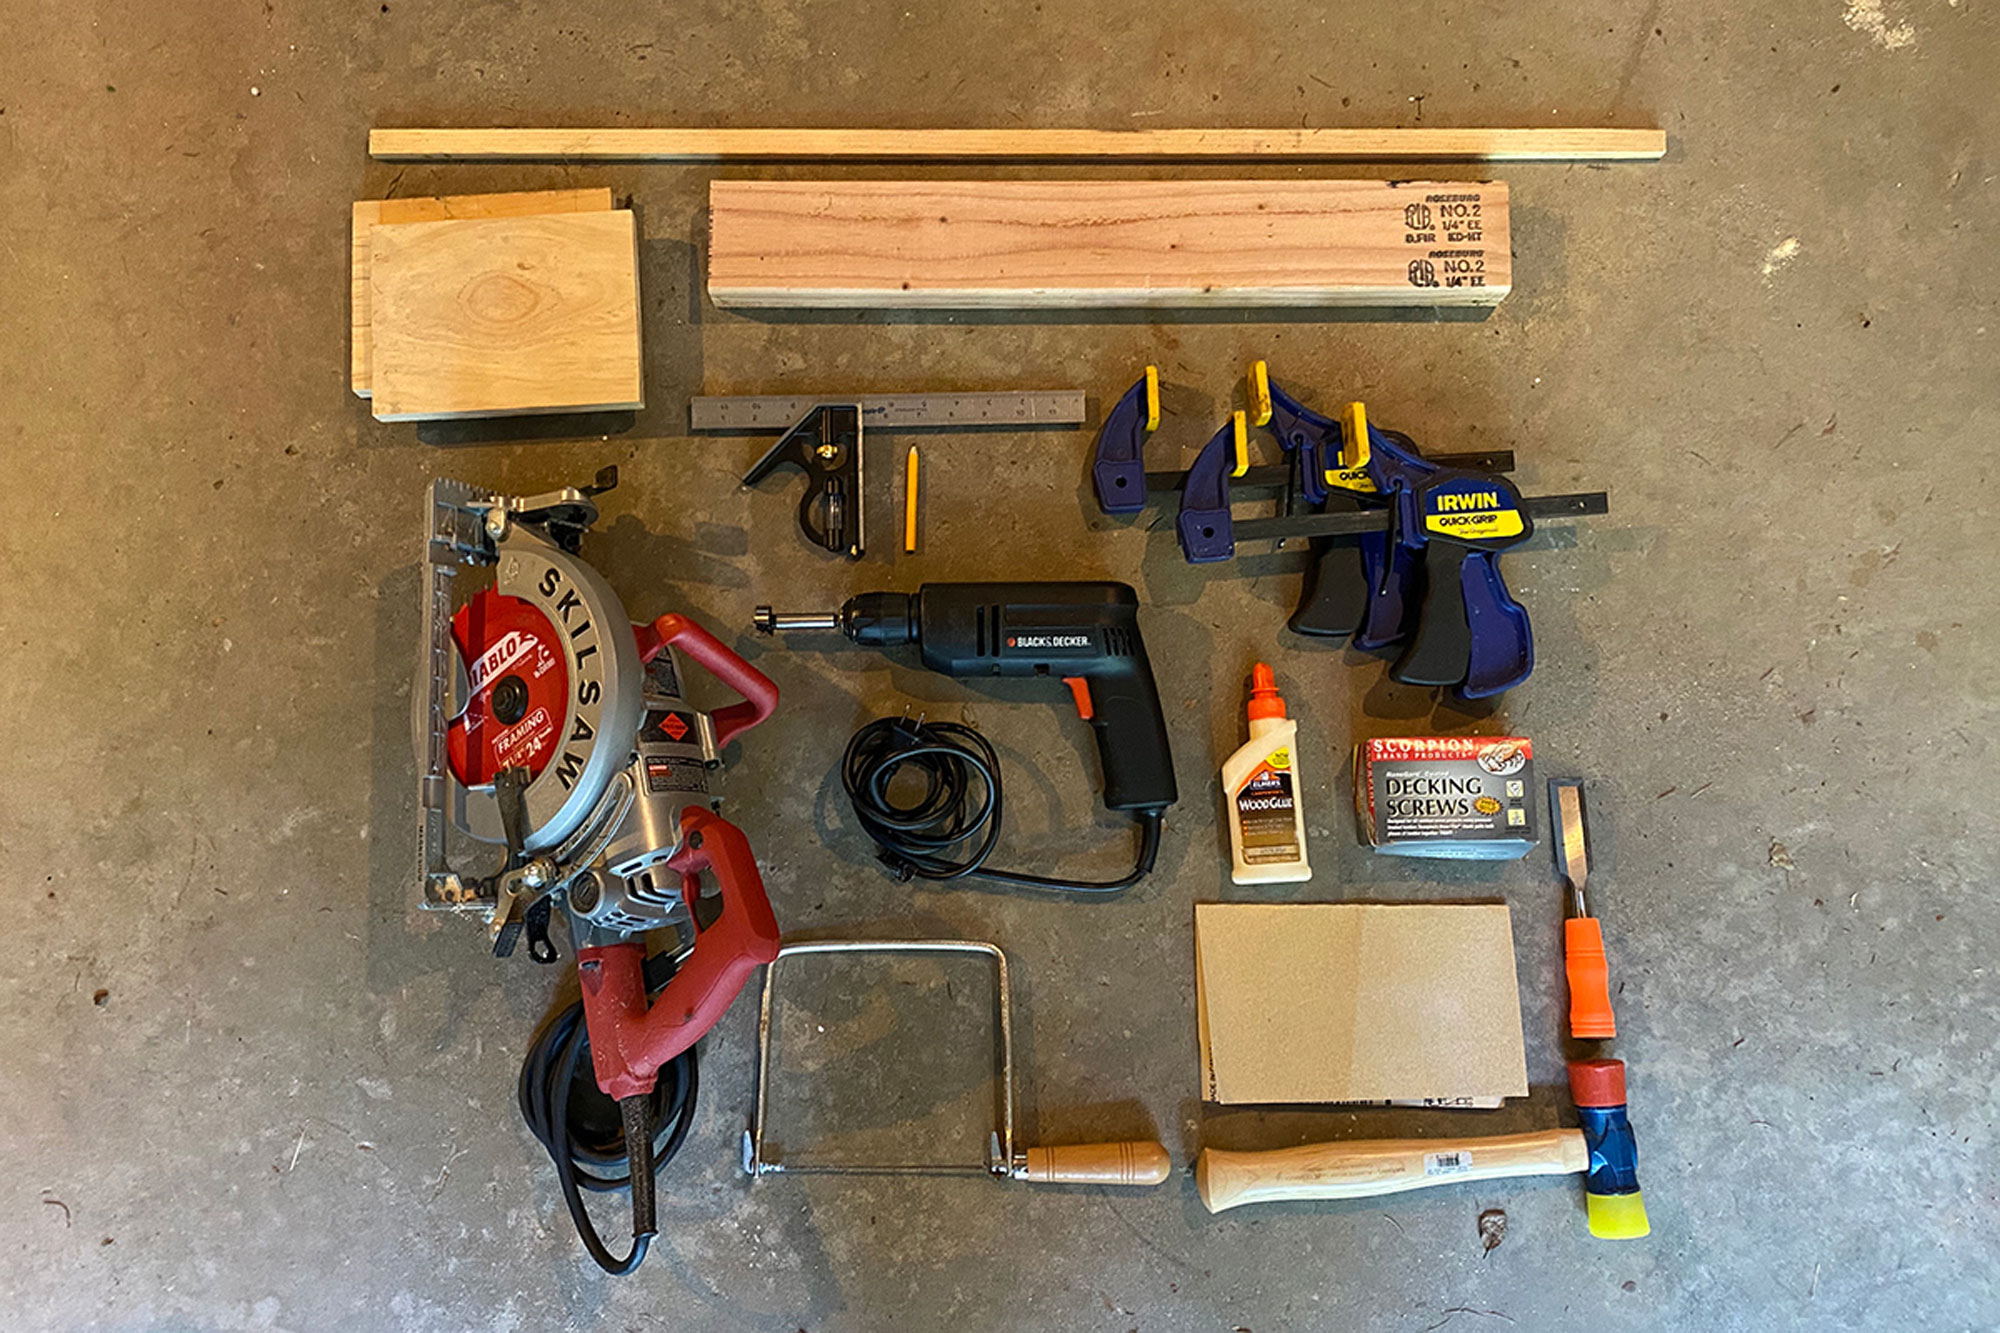
Materials and Tools
Here’s what you’ll need to get going:
Materials
- ¾” plywood cut to 24” x 9.5”
- 2” x 4” cut to 24”
- 2 8” x 6” x 1” panels
- Trim of various sizes for edge holds
- 14 1½” Screws
- 6 smaller screws for edge holds
- Wood glue
Tools
- Power drill with a 1” Forstner bit
- Circular saw
- Wood chisel
- Hammer
- Sandpaper
- Clamps
- Square
- Pencil
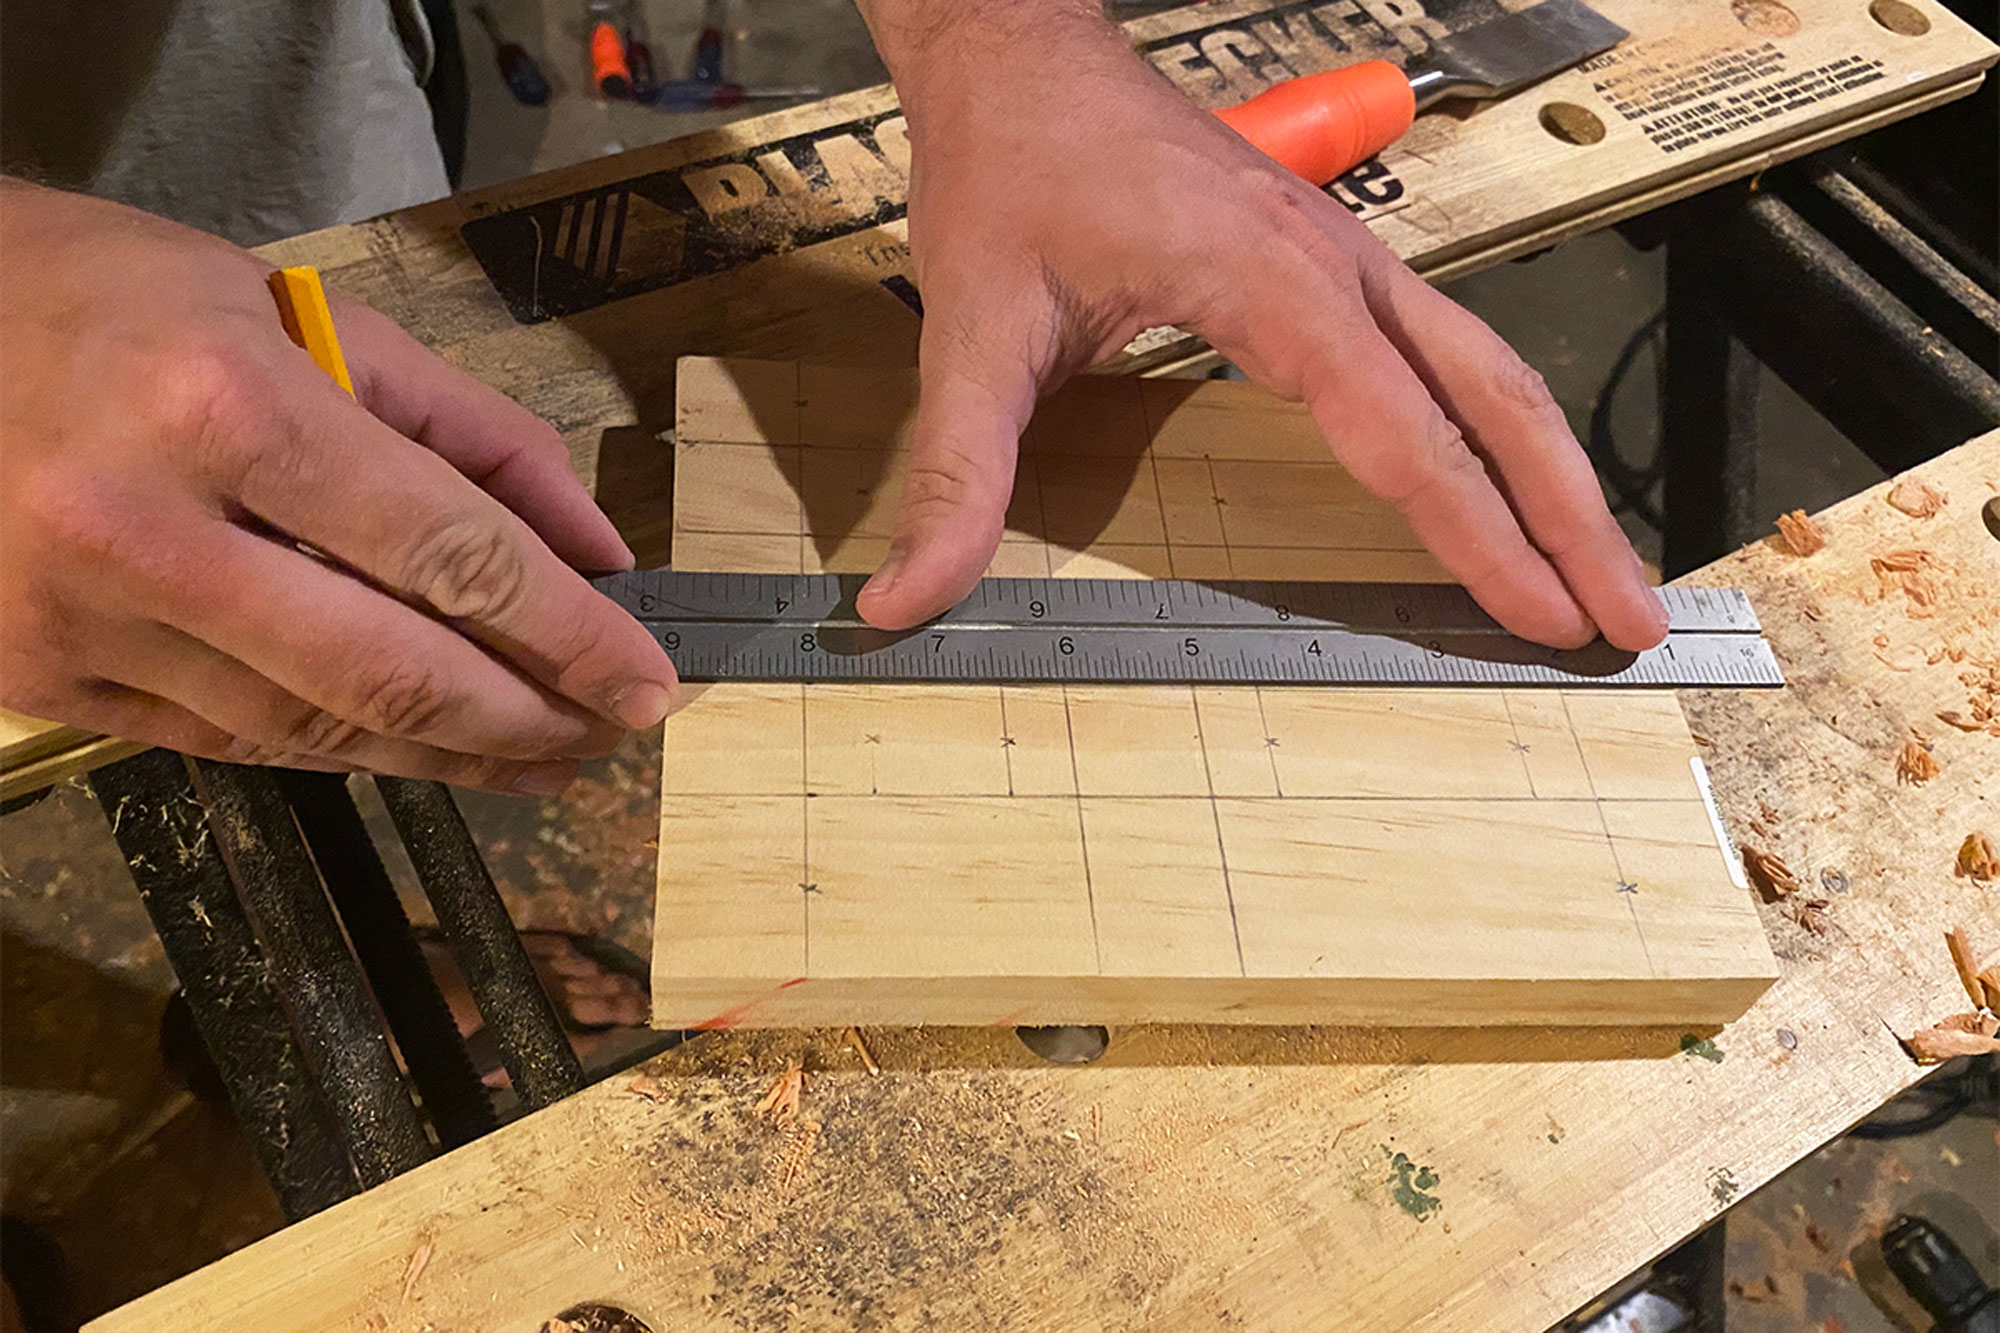
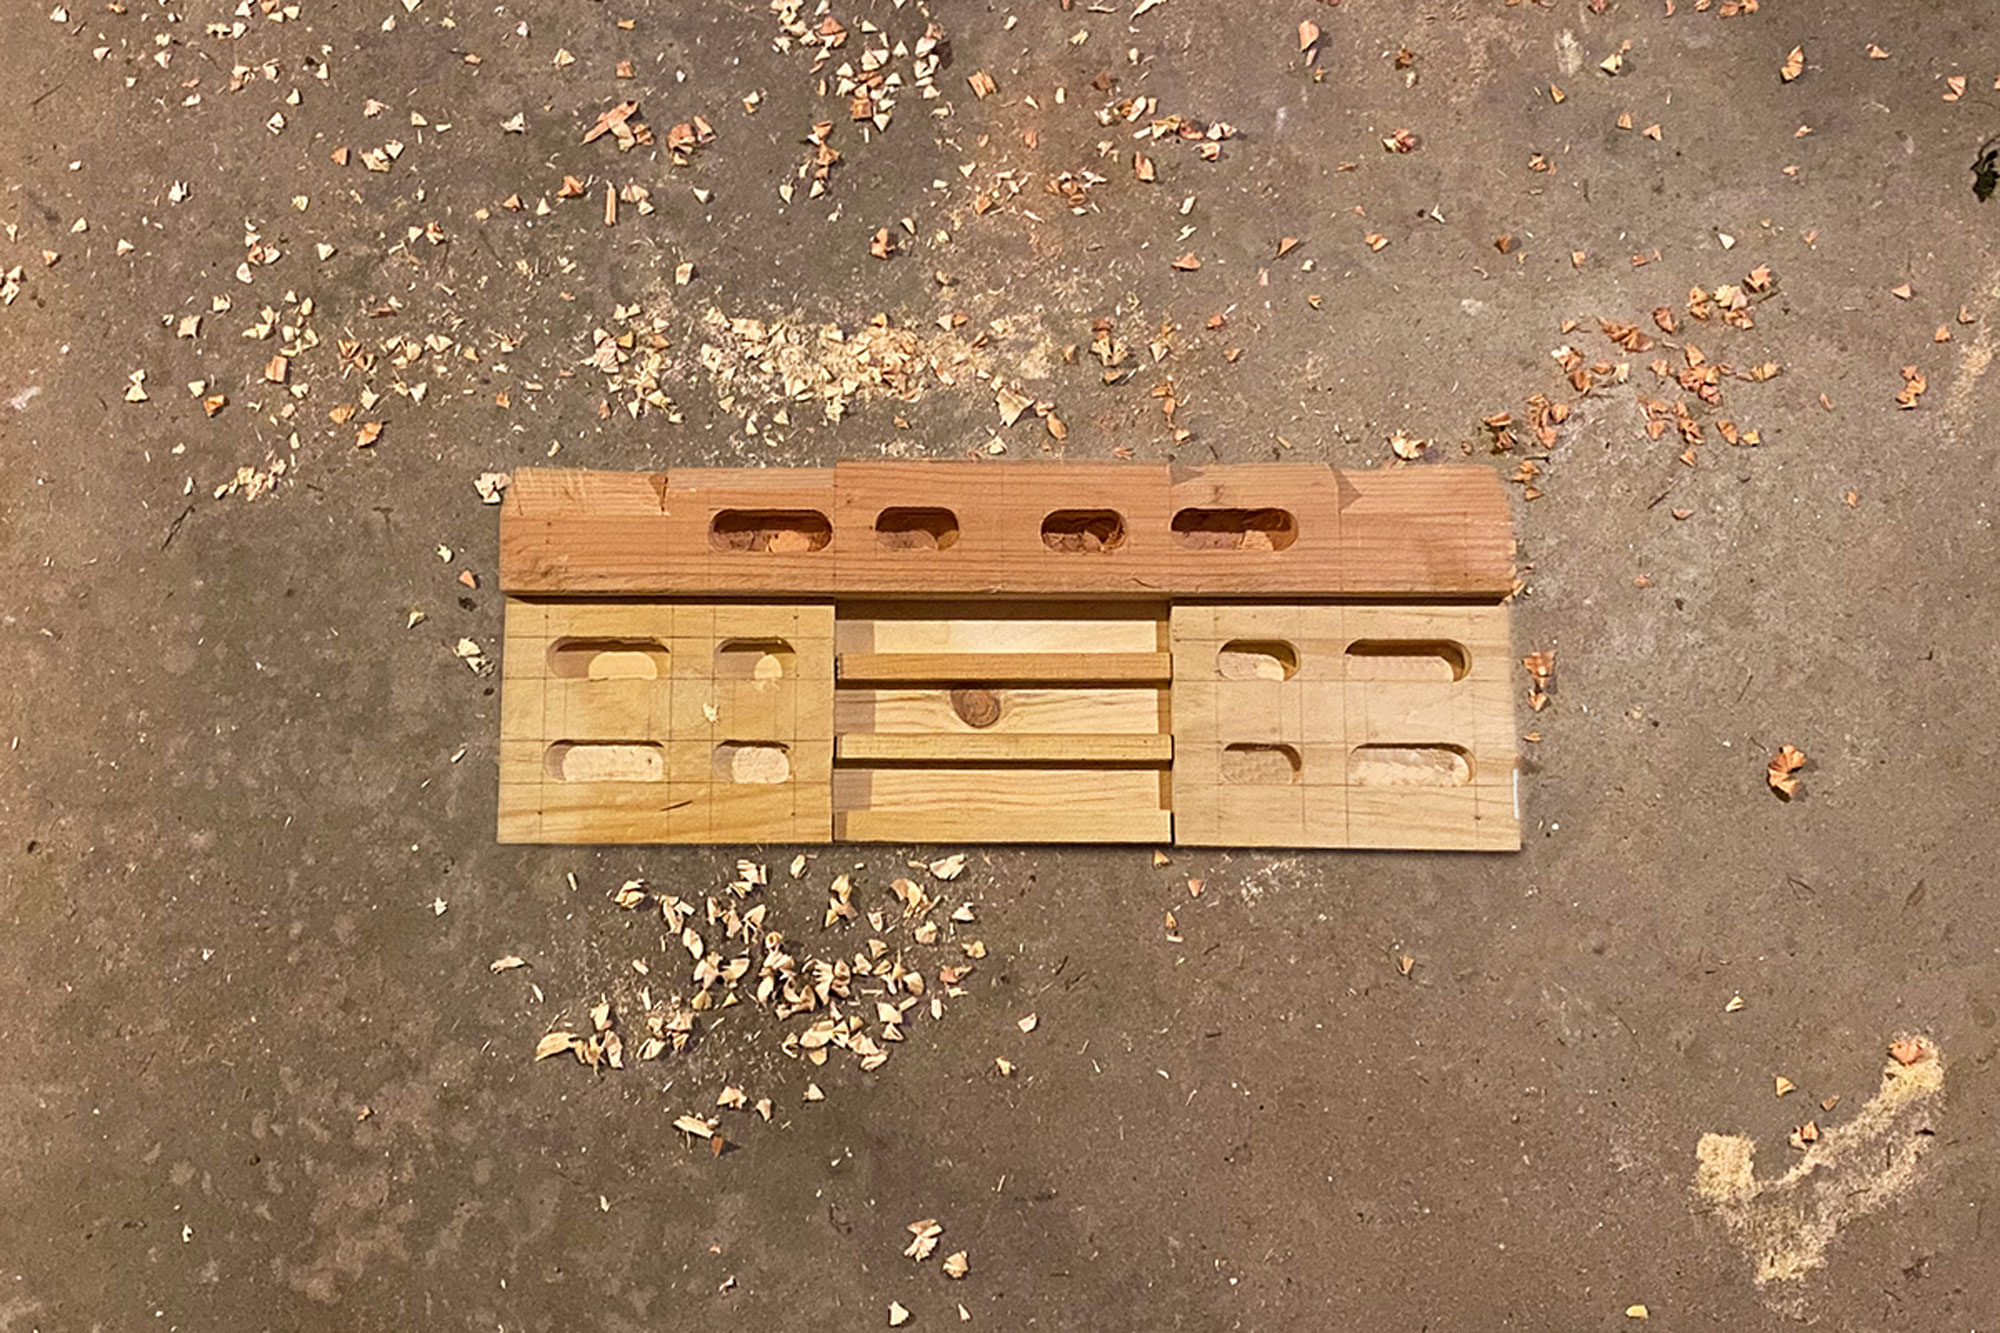
Measure Twice
Get started by laying out your holds. Using a tape measure, a square, and a pencil, draw your plan directly onto the pieces of wood you’ll be using. A compass is handy for drawing the rounded corners of the pocket holds.
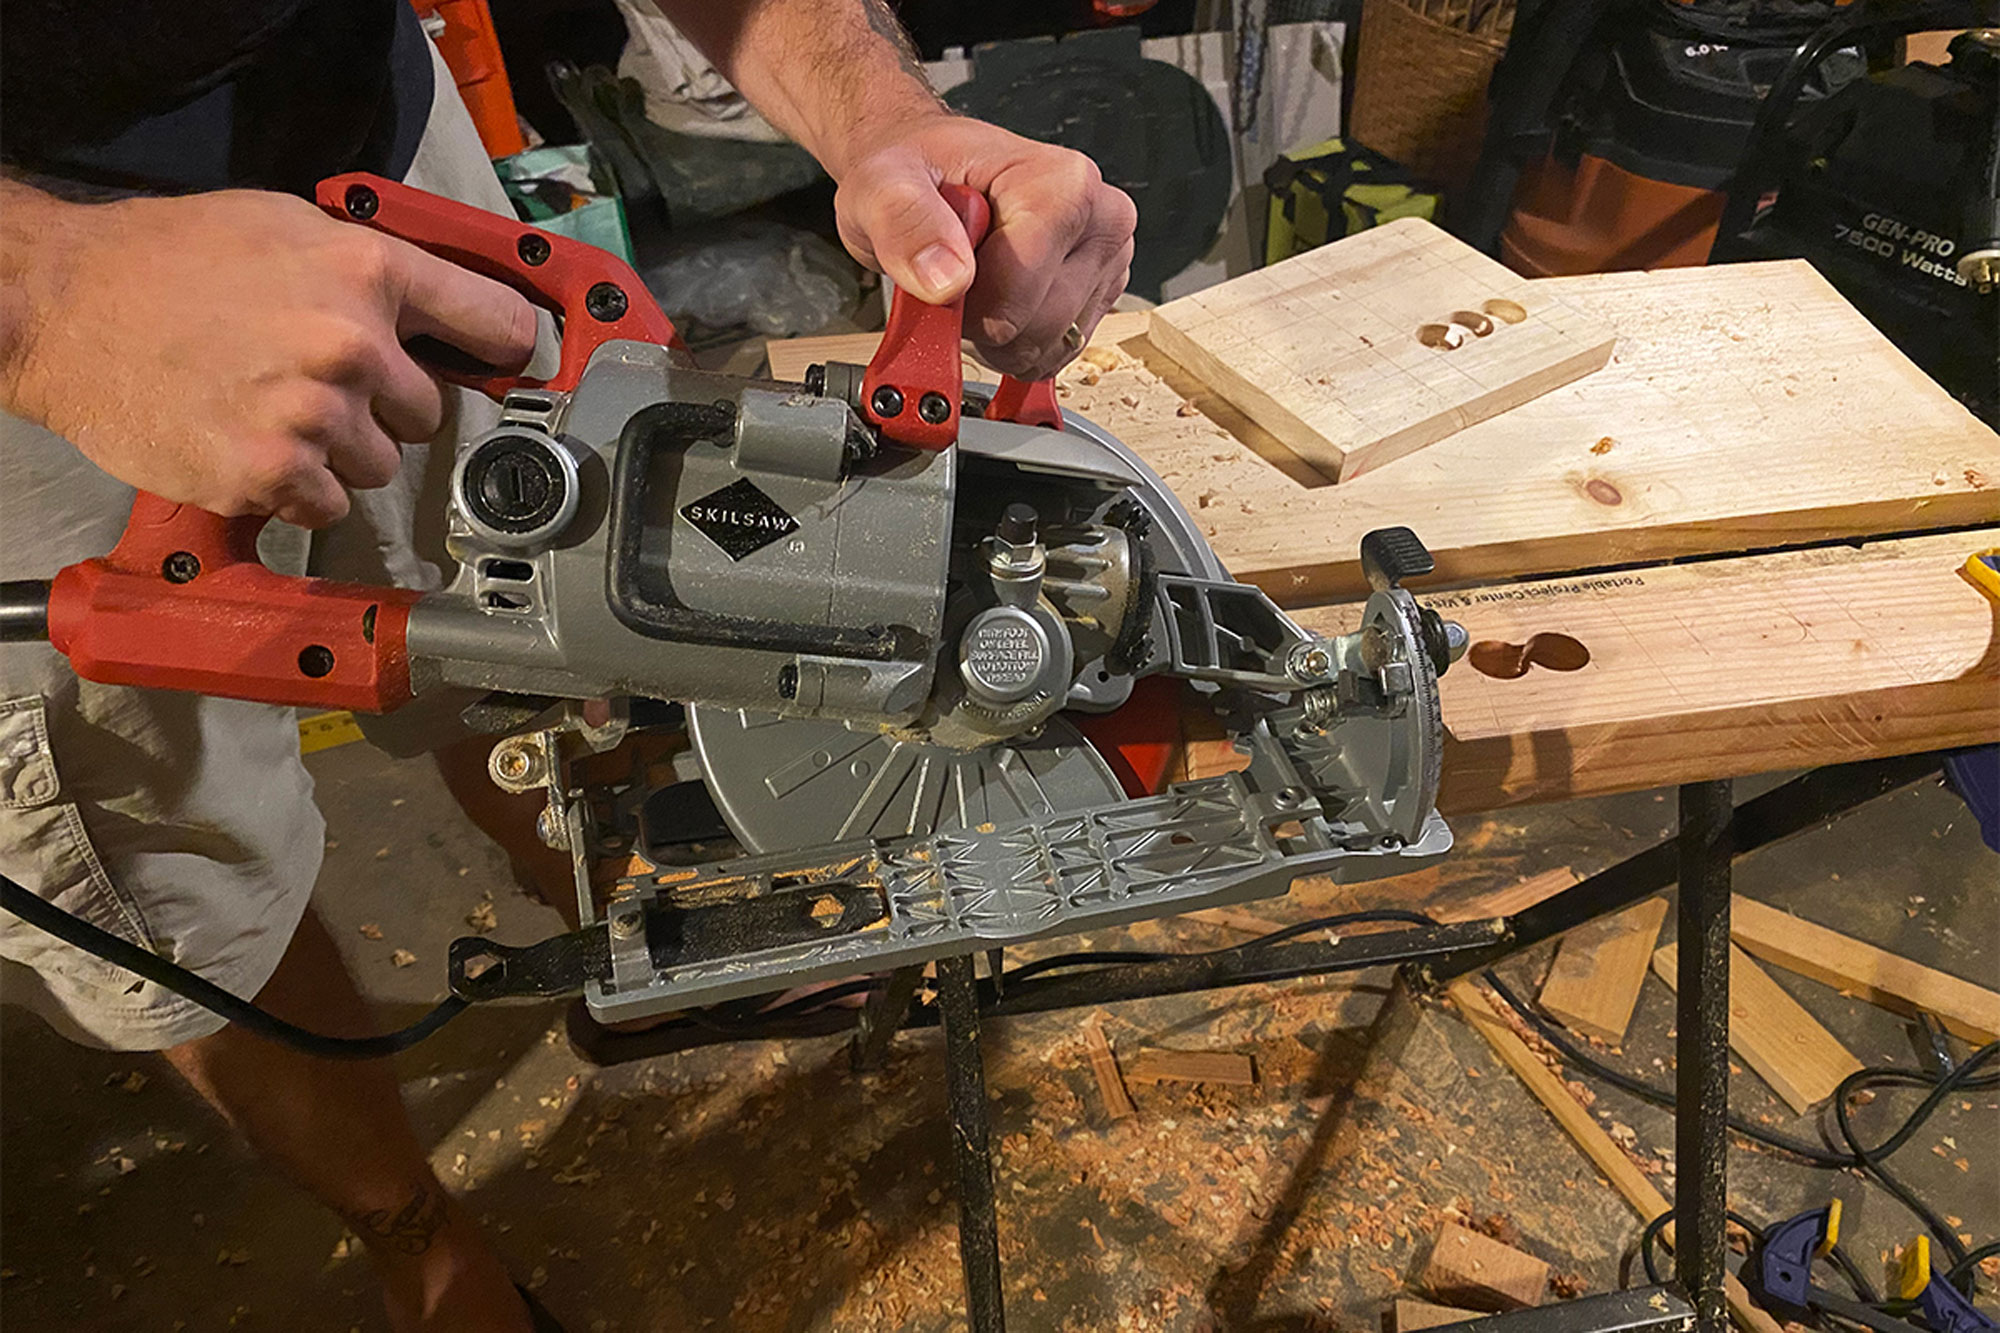
Cut Once
Using a circular saw or a miter saw, cut your wood to size. If you’d like to include slopers on your board, now’s the time to add them. Set your circular saw to the desired angle and cut along the long edge of the 2” x 4” piece.
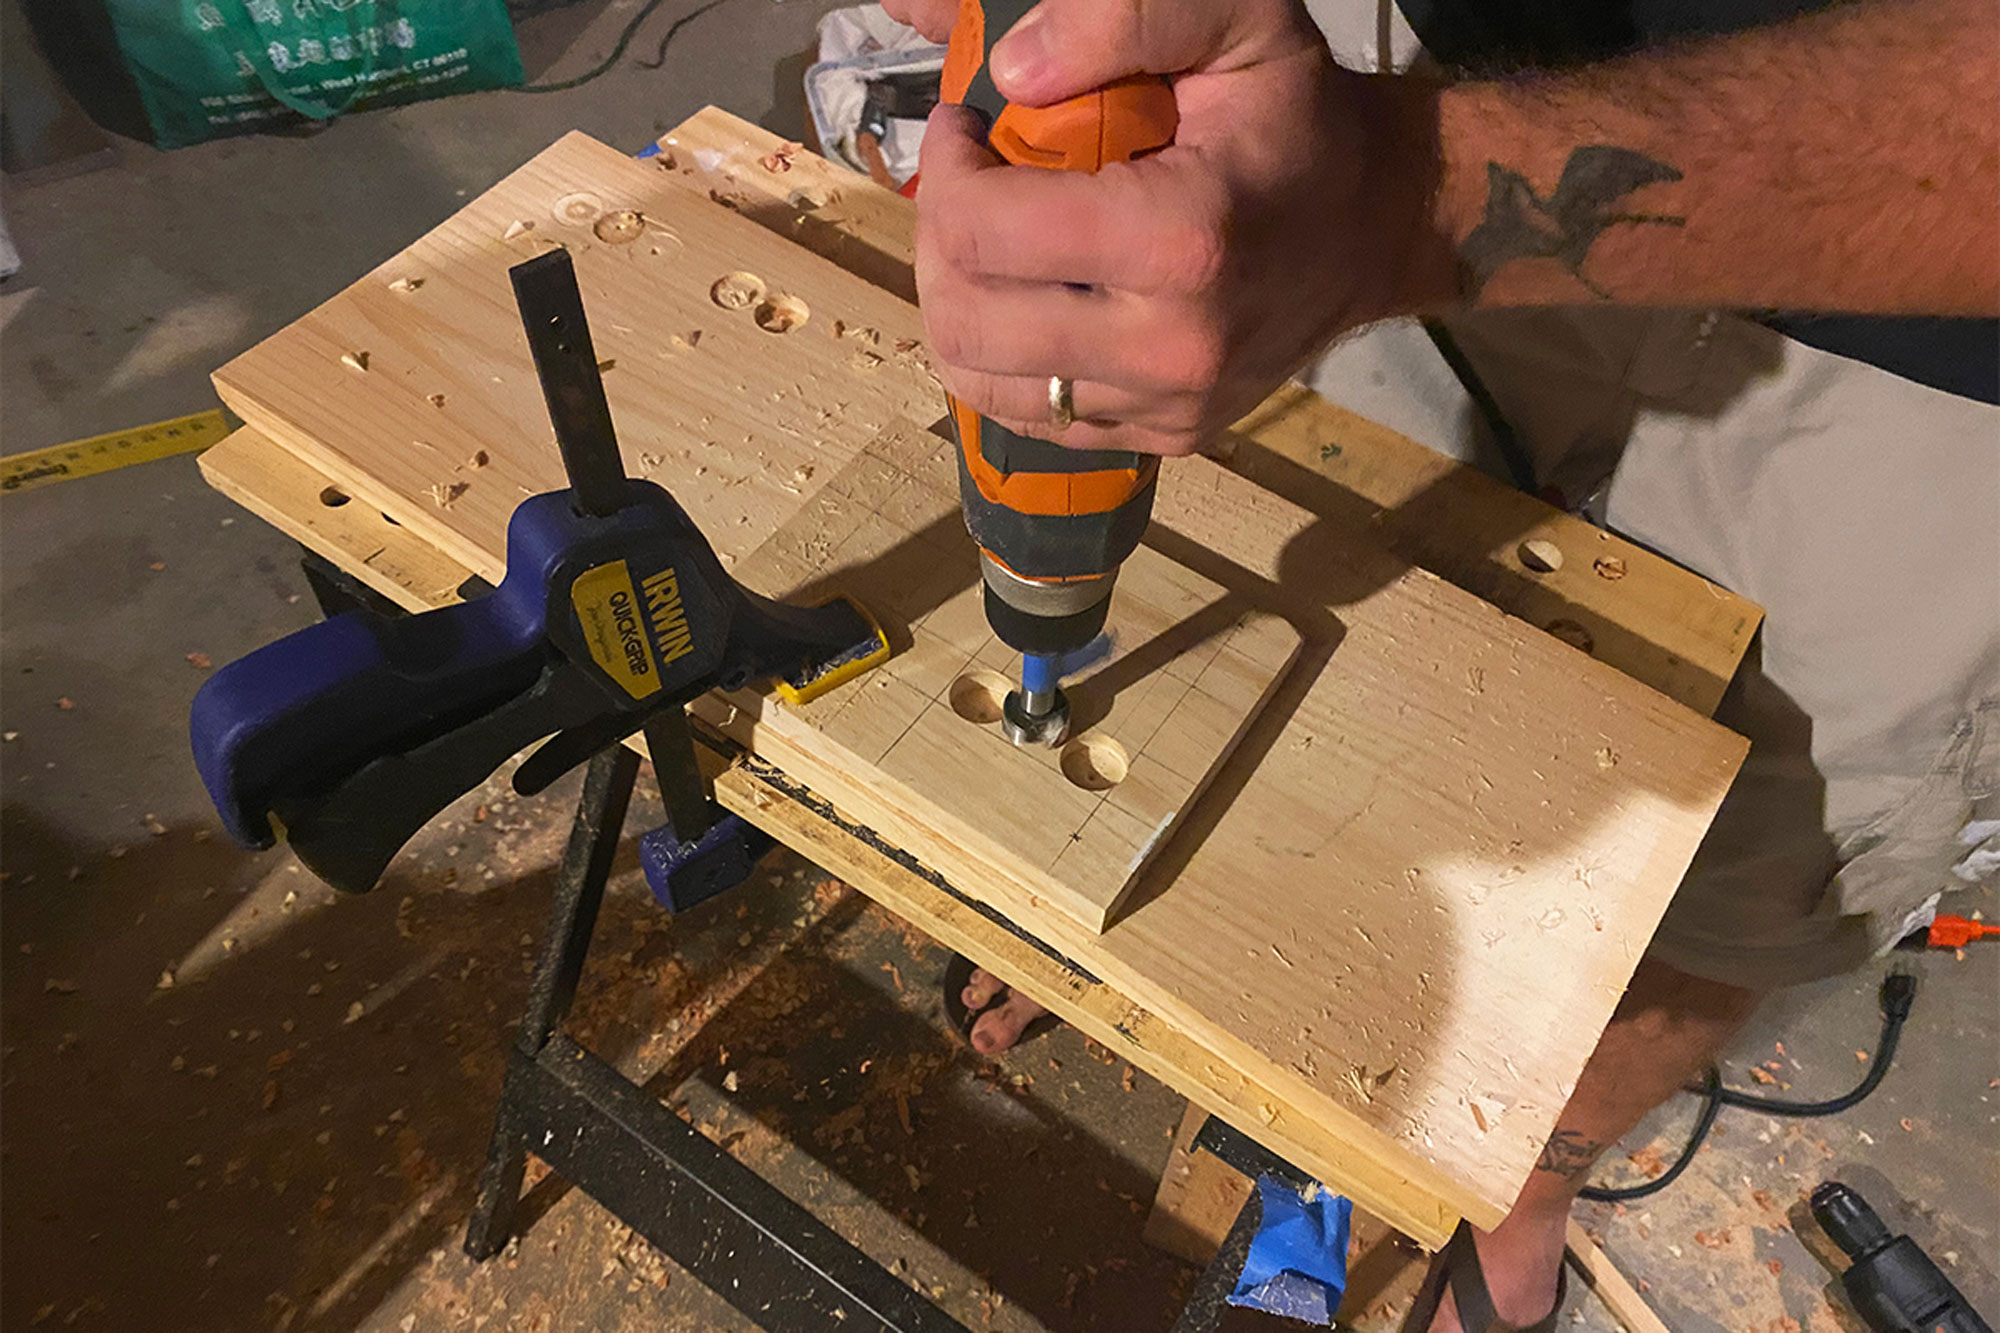
Drill Away
Using a drill with a Forstner bit, bore your pockets out of the 8” x 6” x 1” panels. Pay extra attention to the depth that you’re drilling so that it’s consistent from hold to hold. Putting a piece of tape on the drill bit itself, measured from the tip to your desired depth, is a good way to keep track and make sure you’re not going too deep.

Take the Edge Off
Once you’ve made all your cuts and have bored all your holes, the next step is to smooth the edges so you’re not destroying your fingers with splinters.
For the pockets, start with a wood chisel, taking a little bit of the edge off at a time. Finish with sandpaper. For the slopers and the edge holds, give them a good work over with sandpaper until they’re smooth to the touch.
Assemble the Pieces
Once everything is cut, bored, and smoothed to your specifications, it’s time to put it together. Attach each piece to the plywood backing with wood glue. Clamp and allow the glue time to dry.
When the glue has had sufficient time to dry, drill pilot holes at regular intervals around each piece and fix them to the plywood backing with decking screws.
Hang it Up
How you choose to mount your hangboard will be largely dependent on your set-up at home. You can drill a couple of holes and run some cord through it—cool and portable—or you can use a stud finder and some decking screws to mount it permanently to a wall. However you ultimately decide to mount it, be sure it’s securely fixed to a solid structure before you even dream of weighting it.