


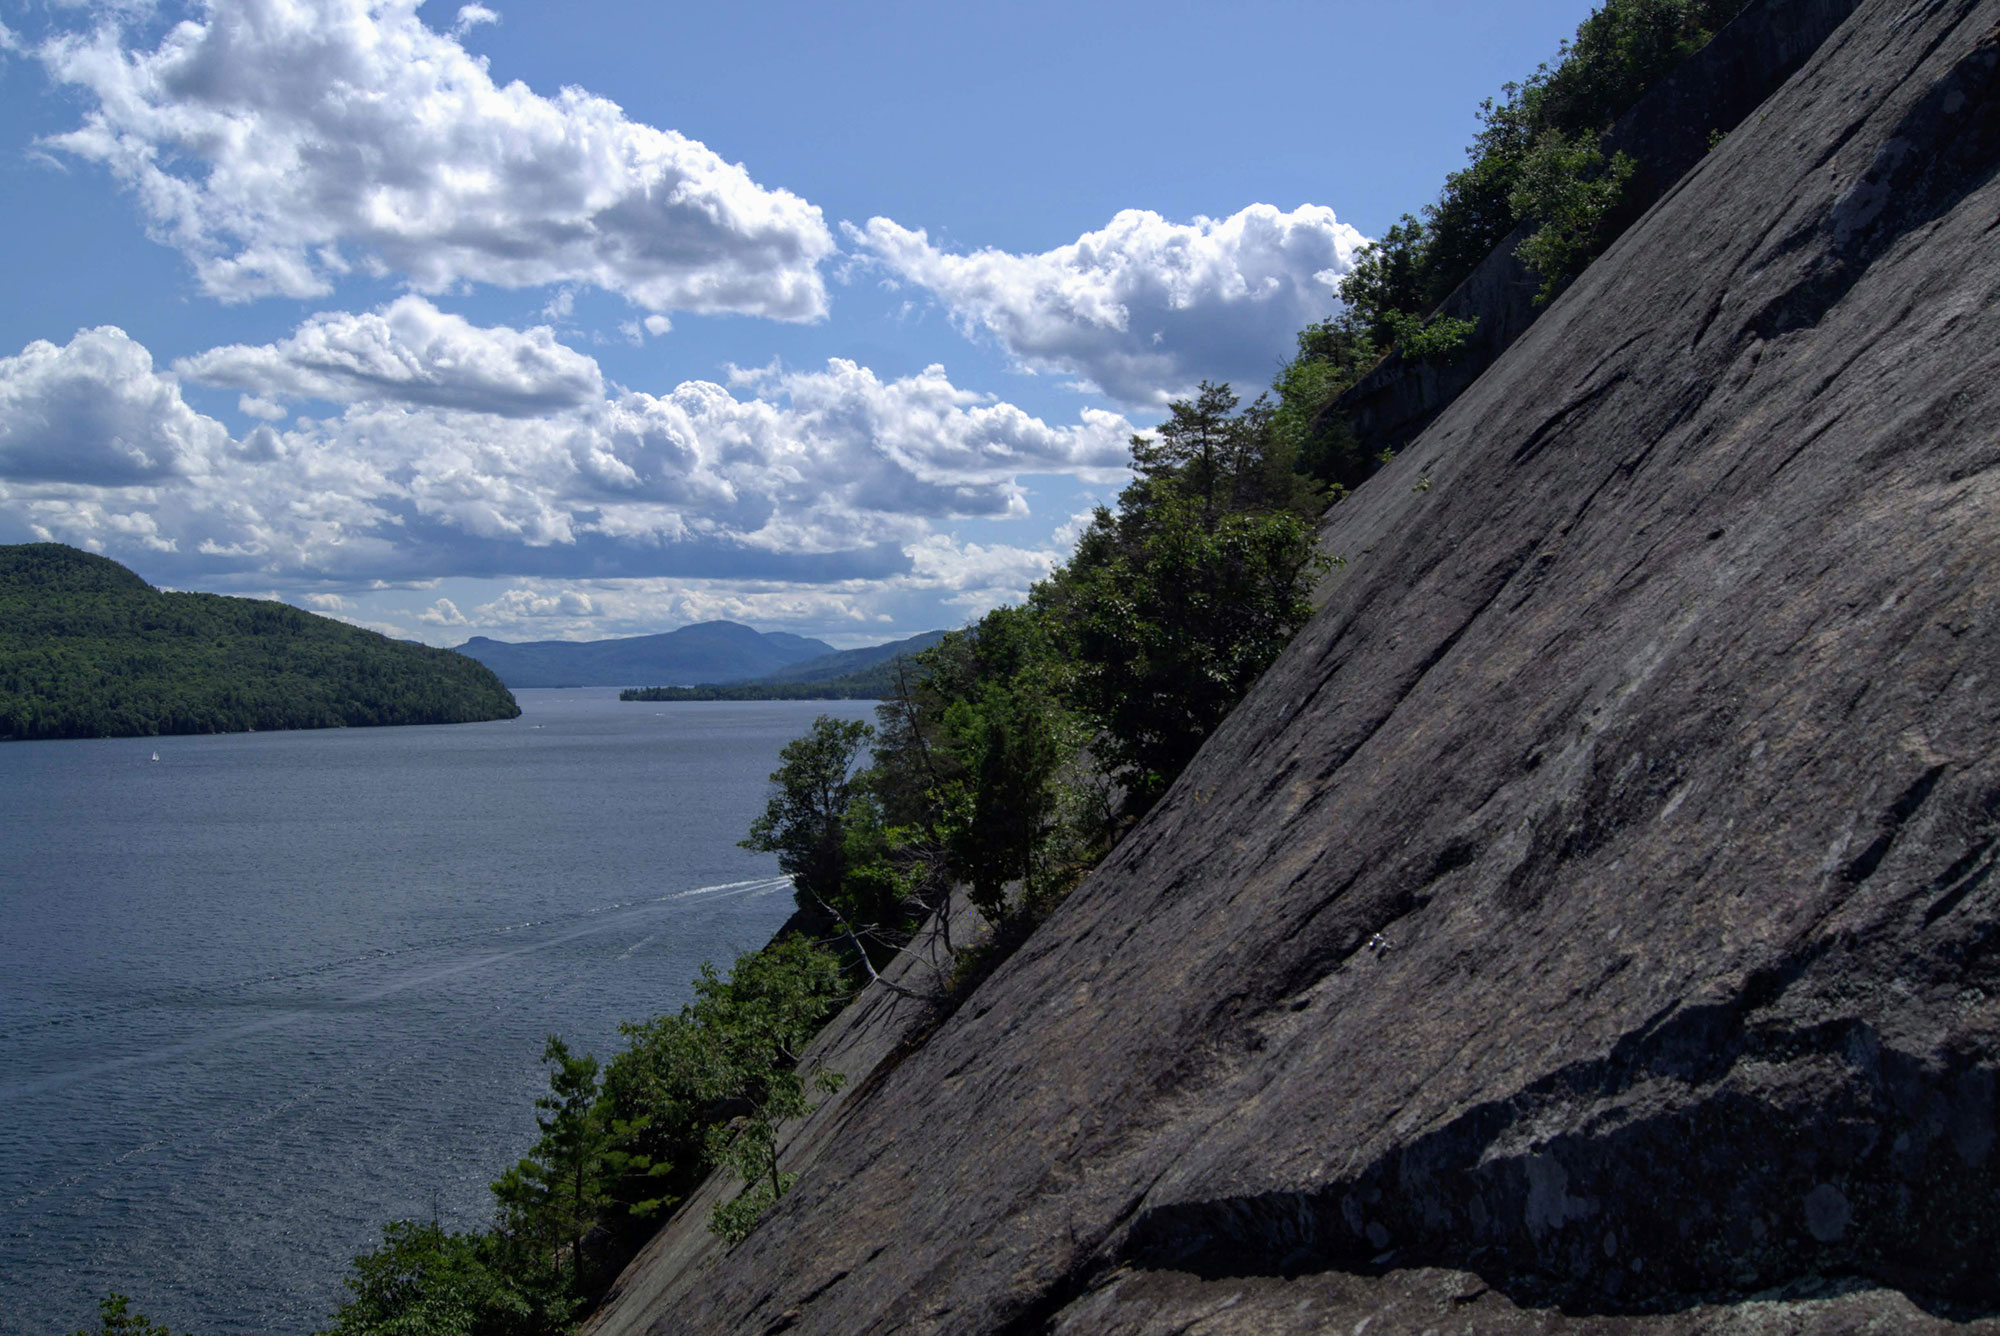
With three moderate pitches of splitter granite hanging high above Lake George, Little Finger is one of the Northeast’s most enjoyable climbs.
How many climbs in the Northeast have a paddle approach? One of the most unique climbs in the Northeast, the approach to Little Finger begins with a short paddle approach across the clear, blue water of Lake George. Once situated at the base of the route, climbers are treated to three moderately rated, easy-to-protect pitches of splitter granite climbing 500+ feet above the lake. Be sure to style the climbing—you’re likely to have an audience of captivated boaters below.
Quick Facts
Length: 3 Pitches
Time to Complete: Half-day
Difficulty: ★★★
Scenery:★★★★
Turn-By-Turn
Climbing Little Finger begins with a paddle approach from Rogers Rock Campground in Hague, New York. Located right off 9N, the campground is just six miles from Ticonderoga.
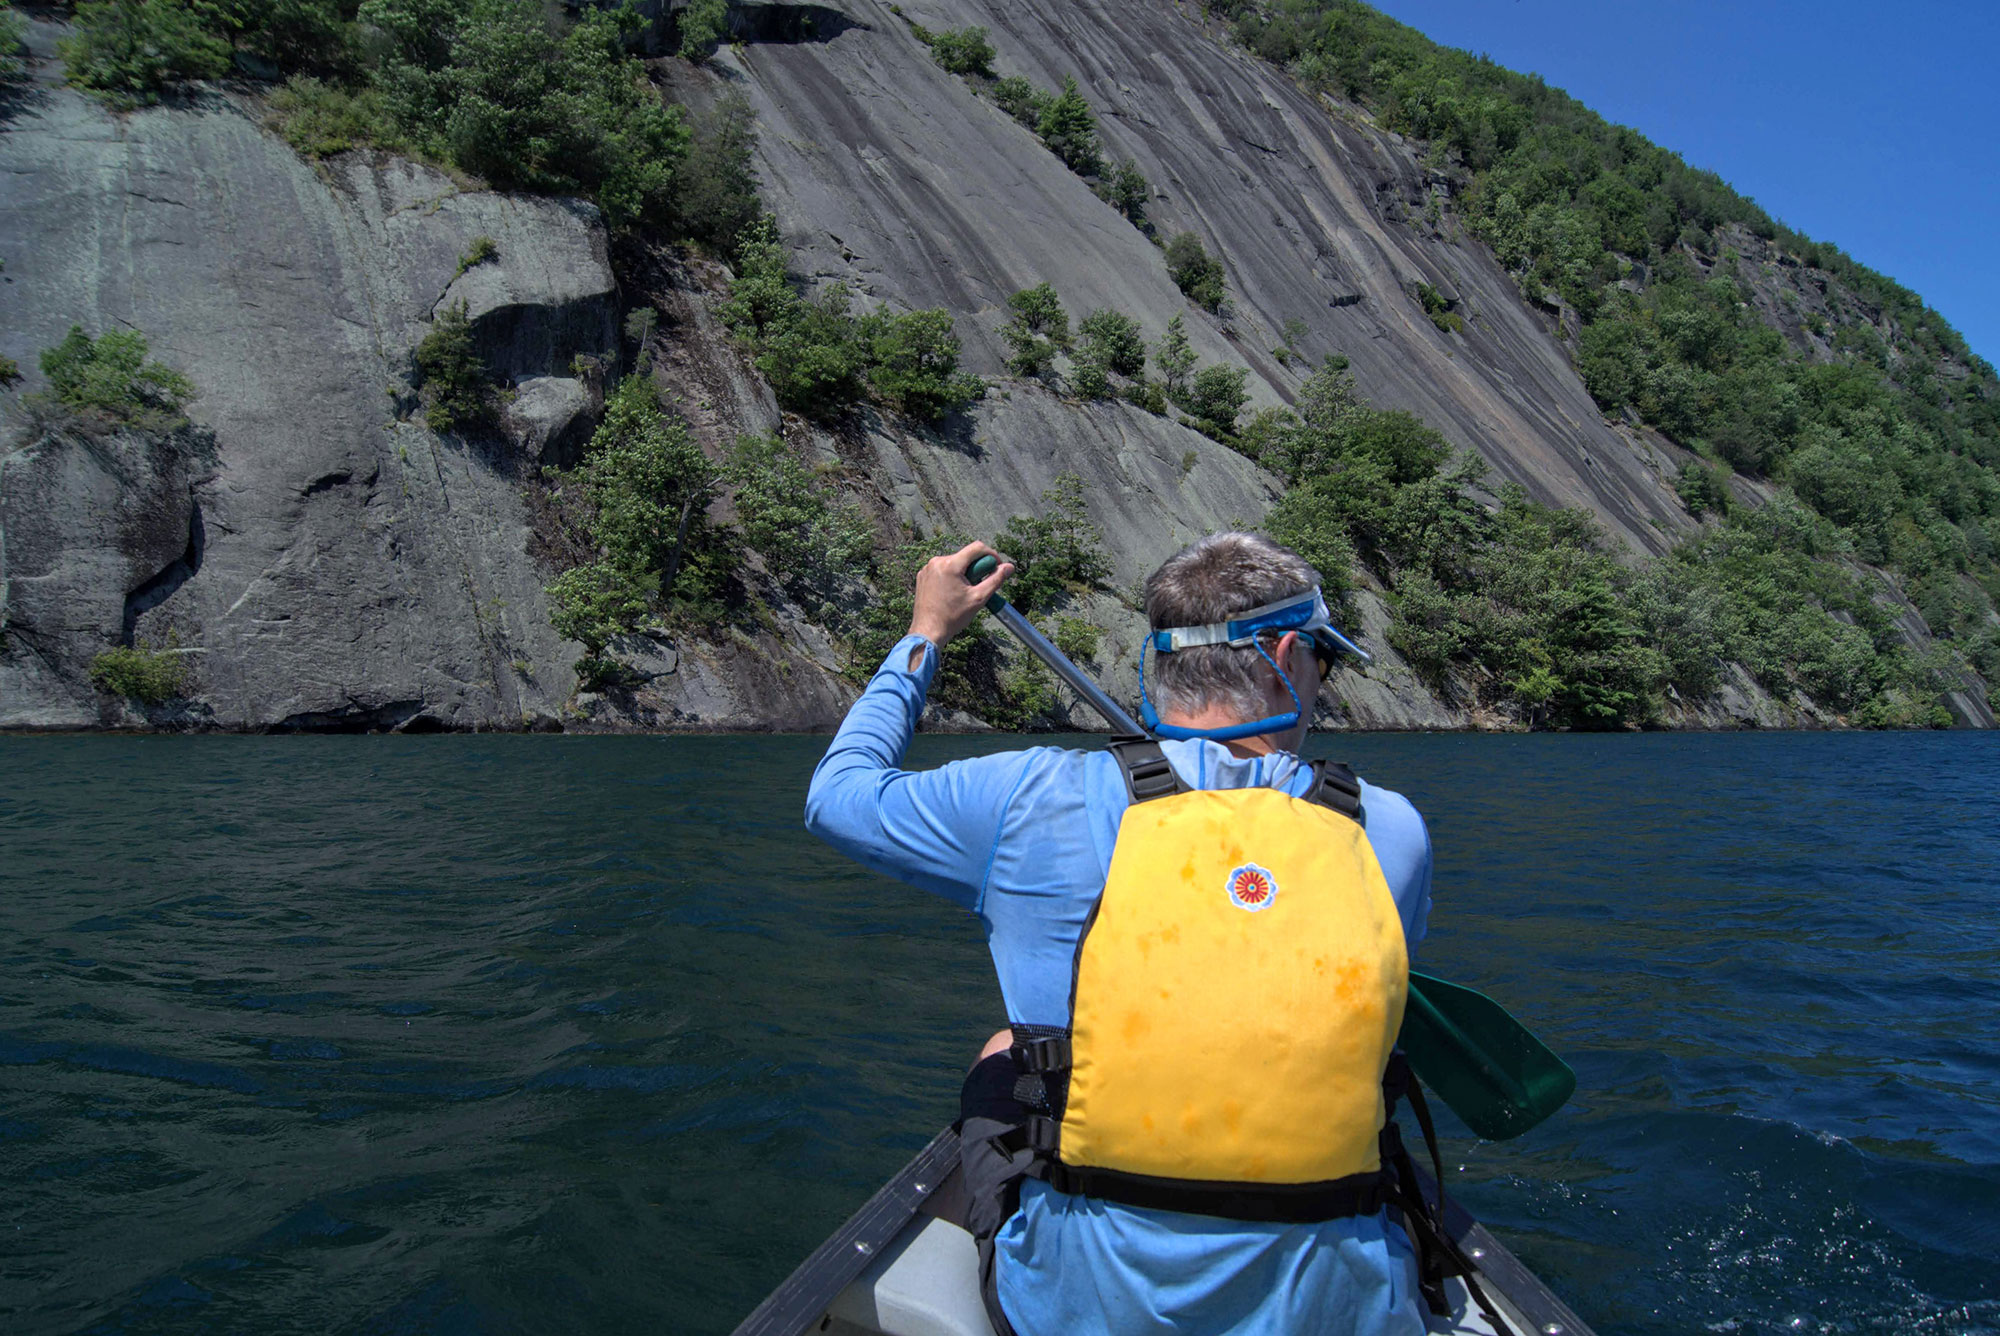
The Canoe Approach
From the boat launch, paddle left away from the swimming area (43.792904, -73.480690). Almost immediately, there’s a large cliff along the shore to your left. That’s not the climb, but it’s a good clue you’re headed in the right direction. Continue hugging the lakeside as you head for a shallow break between the shore and Juniper Island. Round the bend. After a few more minutes of paddling, the face is visible on your left. Aim for the low spot dead ahead (43.797157, -73.466560). Overall, it’s about 25 minutes of paddling.
Pro Tip: The water is deep, it’s often windy, and the waves can be big. Wear a PFD. Also, pack your gear in dry bags and secure them to your canoe, kayak, or SUP.
The Scramble
Once you’ve lugged your boat out of the water, scramble up to a sort-of-flat spot just above. This is a great place to transition from paddling to climbing. Empty the dry bags, don your climbing gear, and get ready to scramble along the base of the ledge to the start of the climb.
The scramble across is about 30 yards. It goes across, then down to the water, then up a short blocky section that you’ll want to watch less experienced climbers on. From there, it’s an easy stroll to the base of the climb, which starts at a good platform by a boulder right at the base of a vertical crack running up the entire face (43.797398, -73.466385). On the platform, there’s plenty of room to flake your ropes.
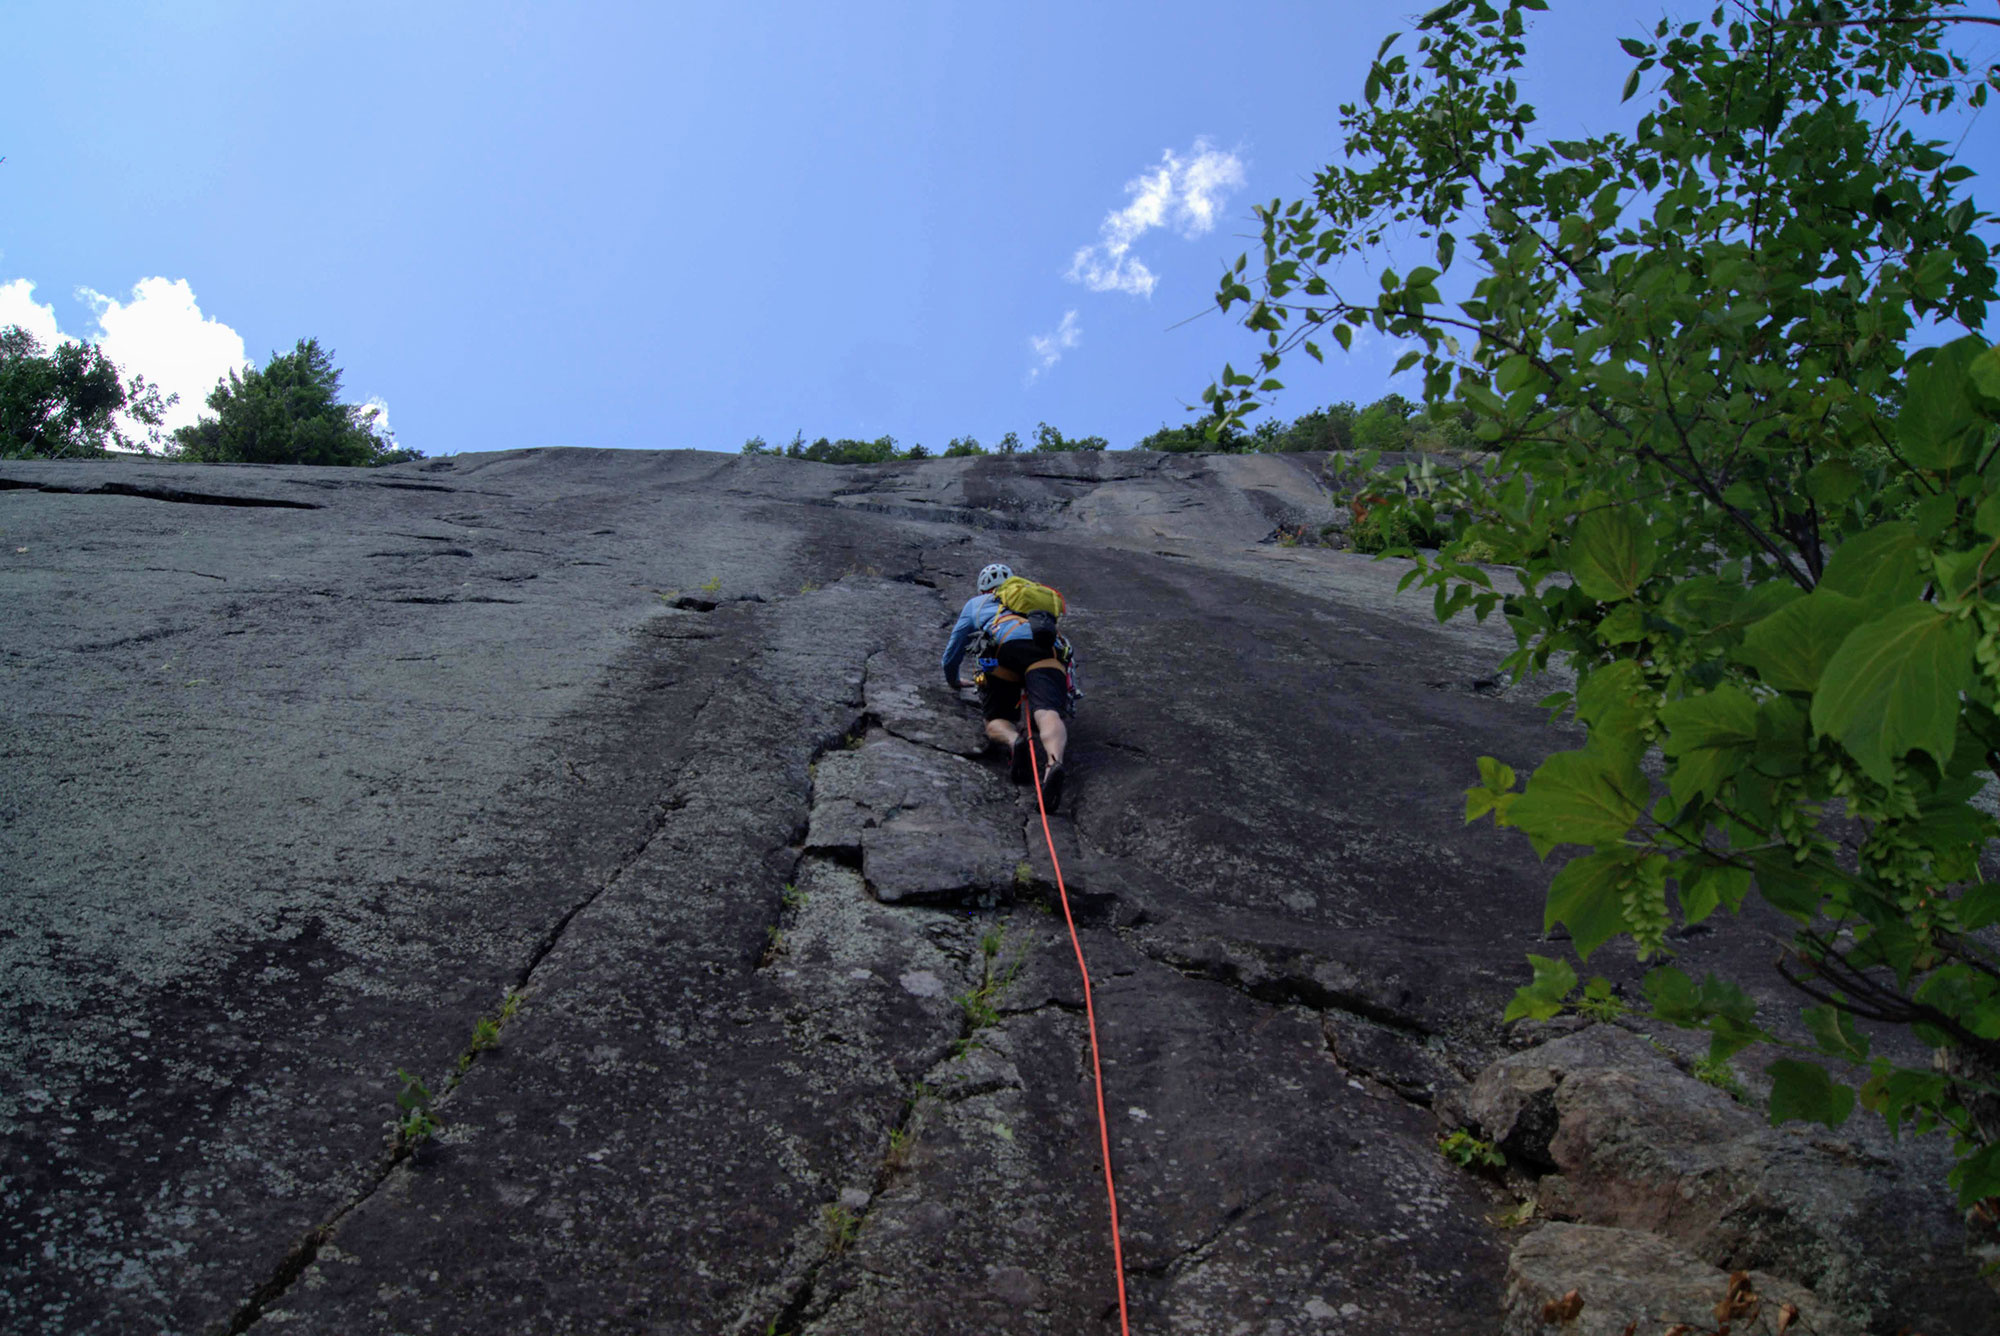
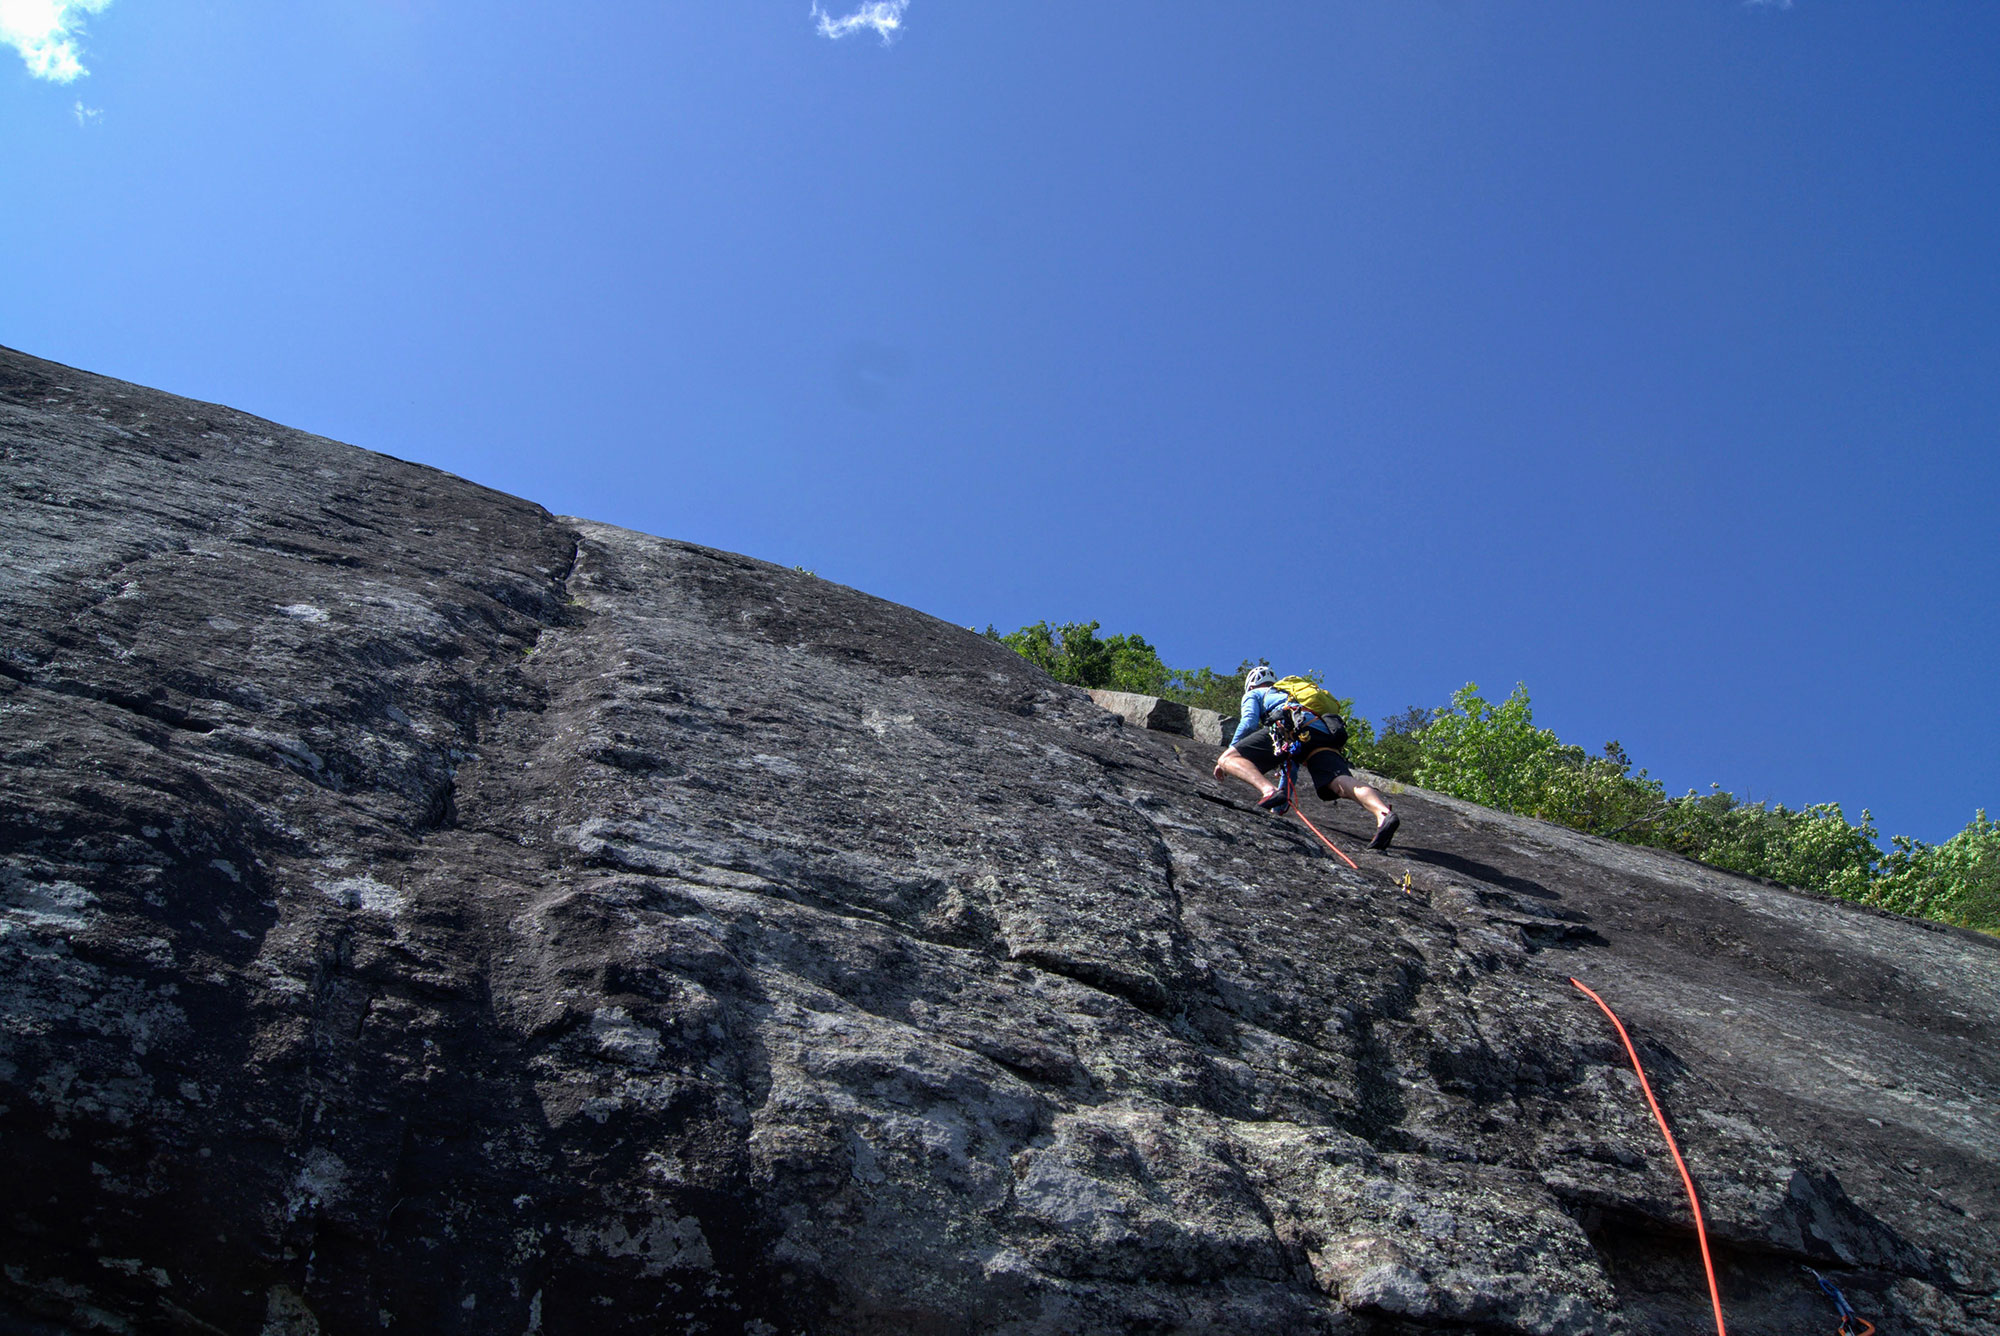
The First Pitch
The first pitch follows the obvious vertical crack for about 200 feet to a depression by a small overlap. Anchor there using, among other things, two new-ish pitons. Although the pitons are awkwardly spaced, there are opportunities to use small and mid-sized gear to build a solid three-piece anchor.
The climbing to this point is fantastic. Right off the deck is a short blocky section leading into an awesome crack that pierces the slab. The crux of the pitch is early on, in the bottom half of the crack, but it is never very hard, maxing out at 5.5.
After the initial difficulties, the pitch is a low-angle calf burner. There’s protection everywhere, with the crack eating everything from nuts to mid-sized cams. Since the pitch is long, be sure to bring a lot of gear in that range to ensure you have enough to zip it up.
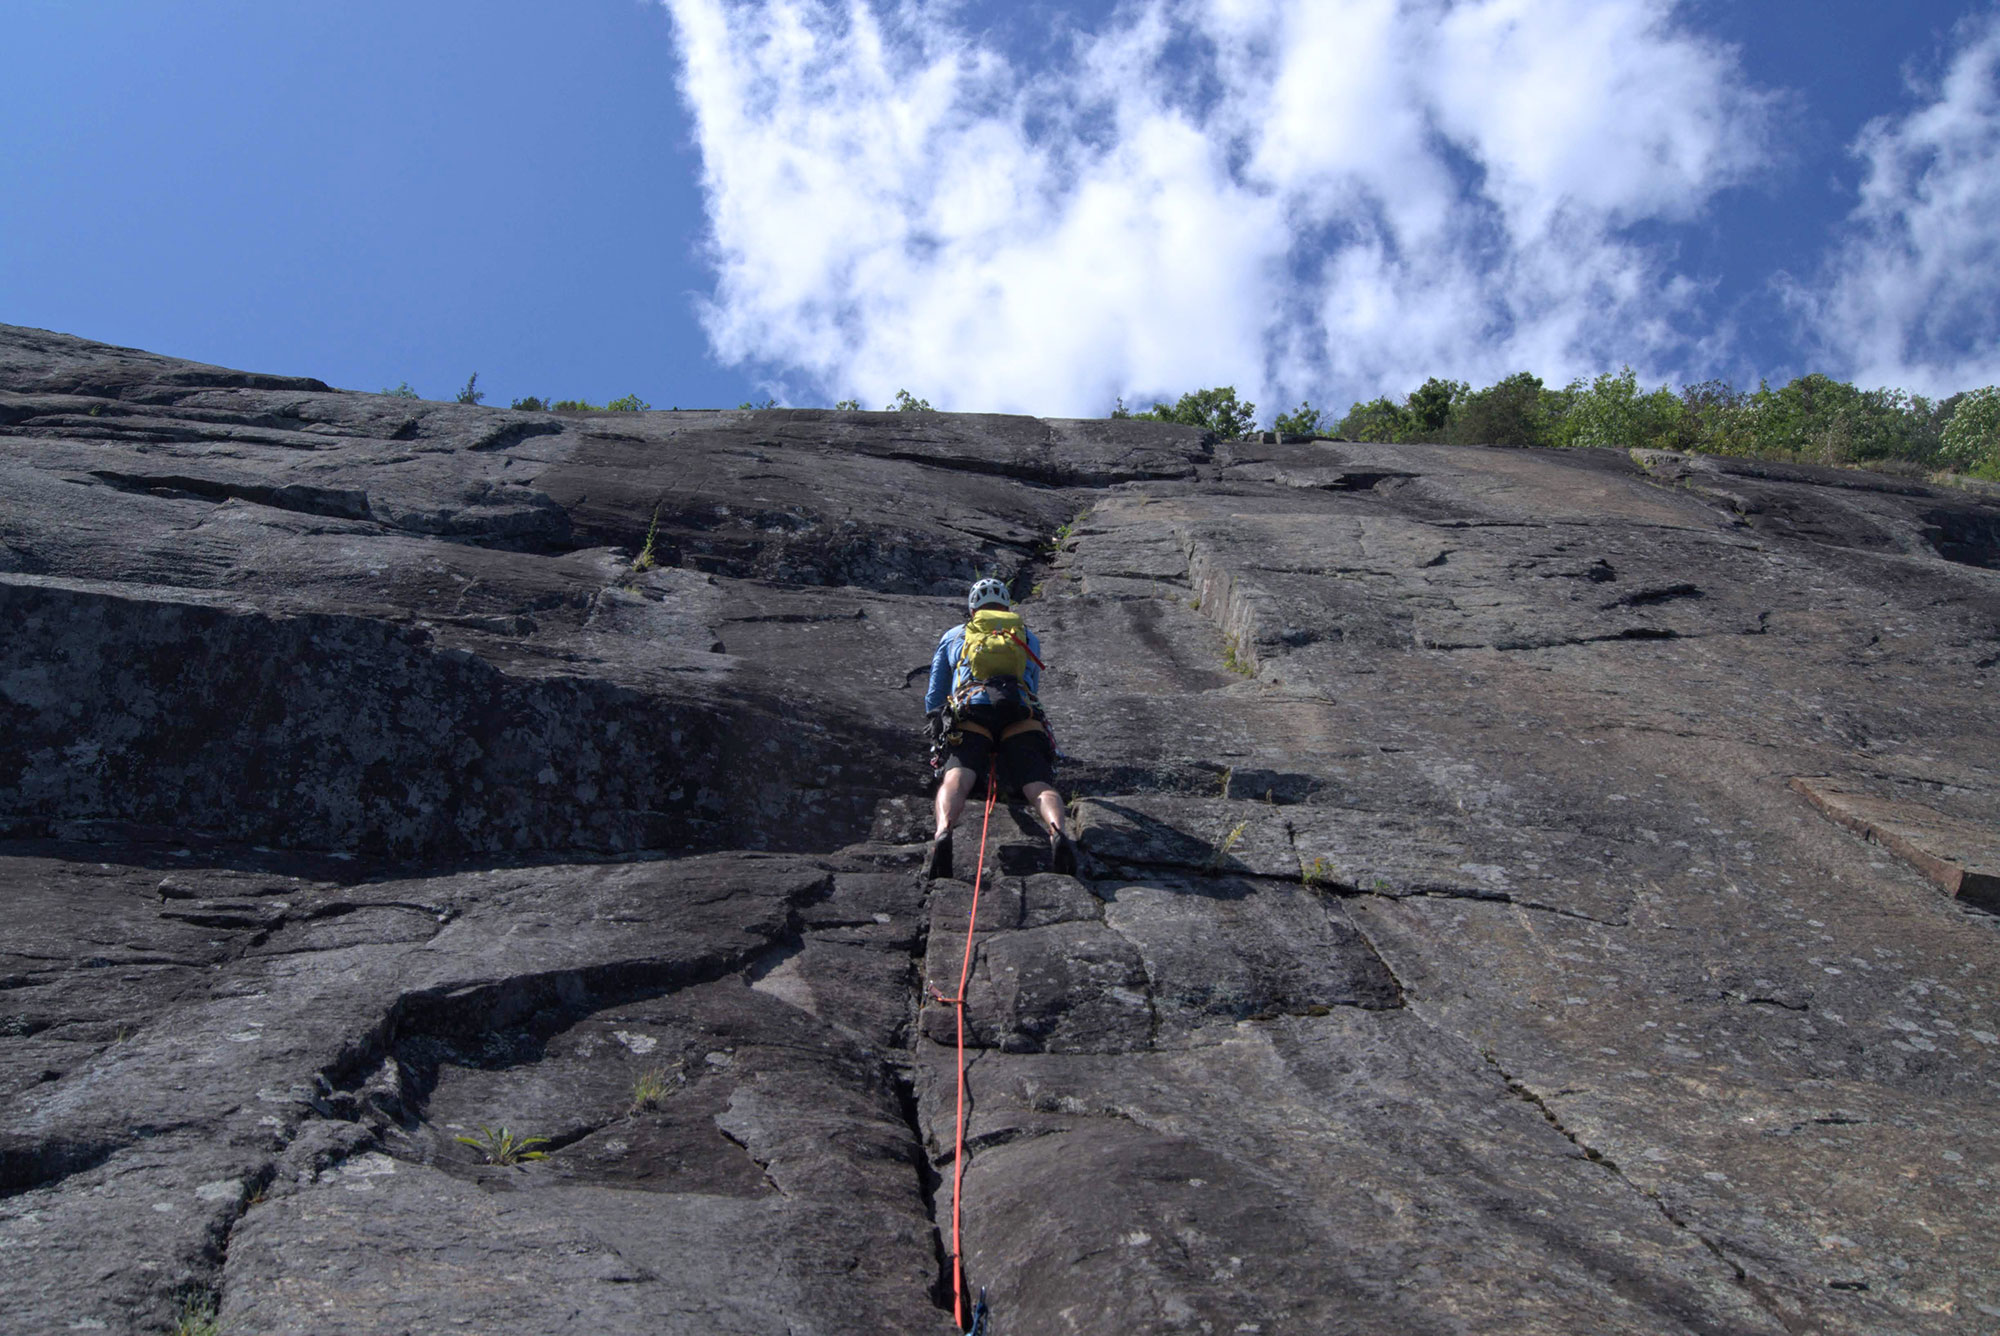
The Second Pitch
Leaving the first pitch’s belay (43.797676, -73.466774), step up and right into the crack, then charge up it to the bottom of a large roof and build a traditional anchor there. Although it doesn’t look it, the pitch is a long one, running almost 200 feet.
Again, the climbing is moderate and well protected, all in the 5.4-5.5 range. The crack eats mid-sized gear, so protecting it shouldn’t be a problem. Throughout this pitch, there’s also lots of feet, meaning there’s plenty of comfortable stances from which to place gear.
The trickiest part of the second pitch is building the anchor. Just below the roof are several hollow flakes that don’t inspire confidence and aren’t the spot to place a cam. Slightly above the flakes there’s a small slot in the crack for a mid-sized cam and a medium nut. Below the roof, at about 11 o’clock, there’s also room for another mid-sized cam and, with some finagling, a bigger nut. If all this doesn’t sound appealing, there’s a small depression just below the hollow flakes (15 feet before the roof) with lots of options in the crack for a gear anchor.

The Third Pitch
From the anchor under the overlap (43.797886, -73.467148), step up so that you can reach above the roof, then traverse right for about 10 feet to rejoin the crack. From here, the climb follows a runnel for about 175 feet toward bolted anchors, one at the top of the crack and another, with rap rings, about 25 feet off to the right.
The third pitch is well protected except for the traverse, where there’s little gear. To protect your second from a big swing, make sure to set a solid piece at the first good spot at the roof’s right end.
If you’re looking for something slightly harder than 5.5, consider the 5.7 variation that follows a thin vertical crack straight up from the belay. After a couple of difficulties, you’ll end up at the anchor just above the runnel that pitch 3 finishes on.
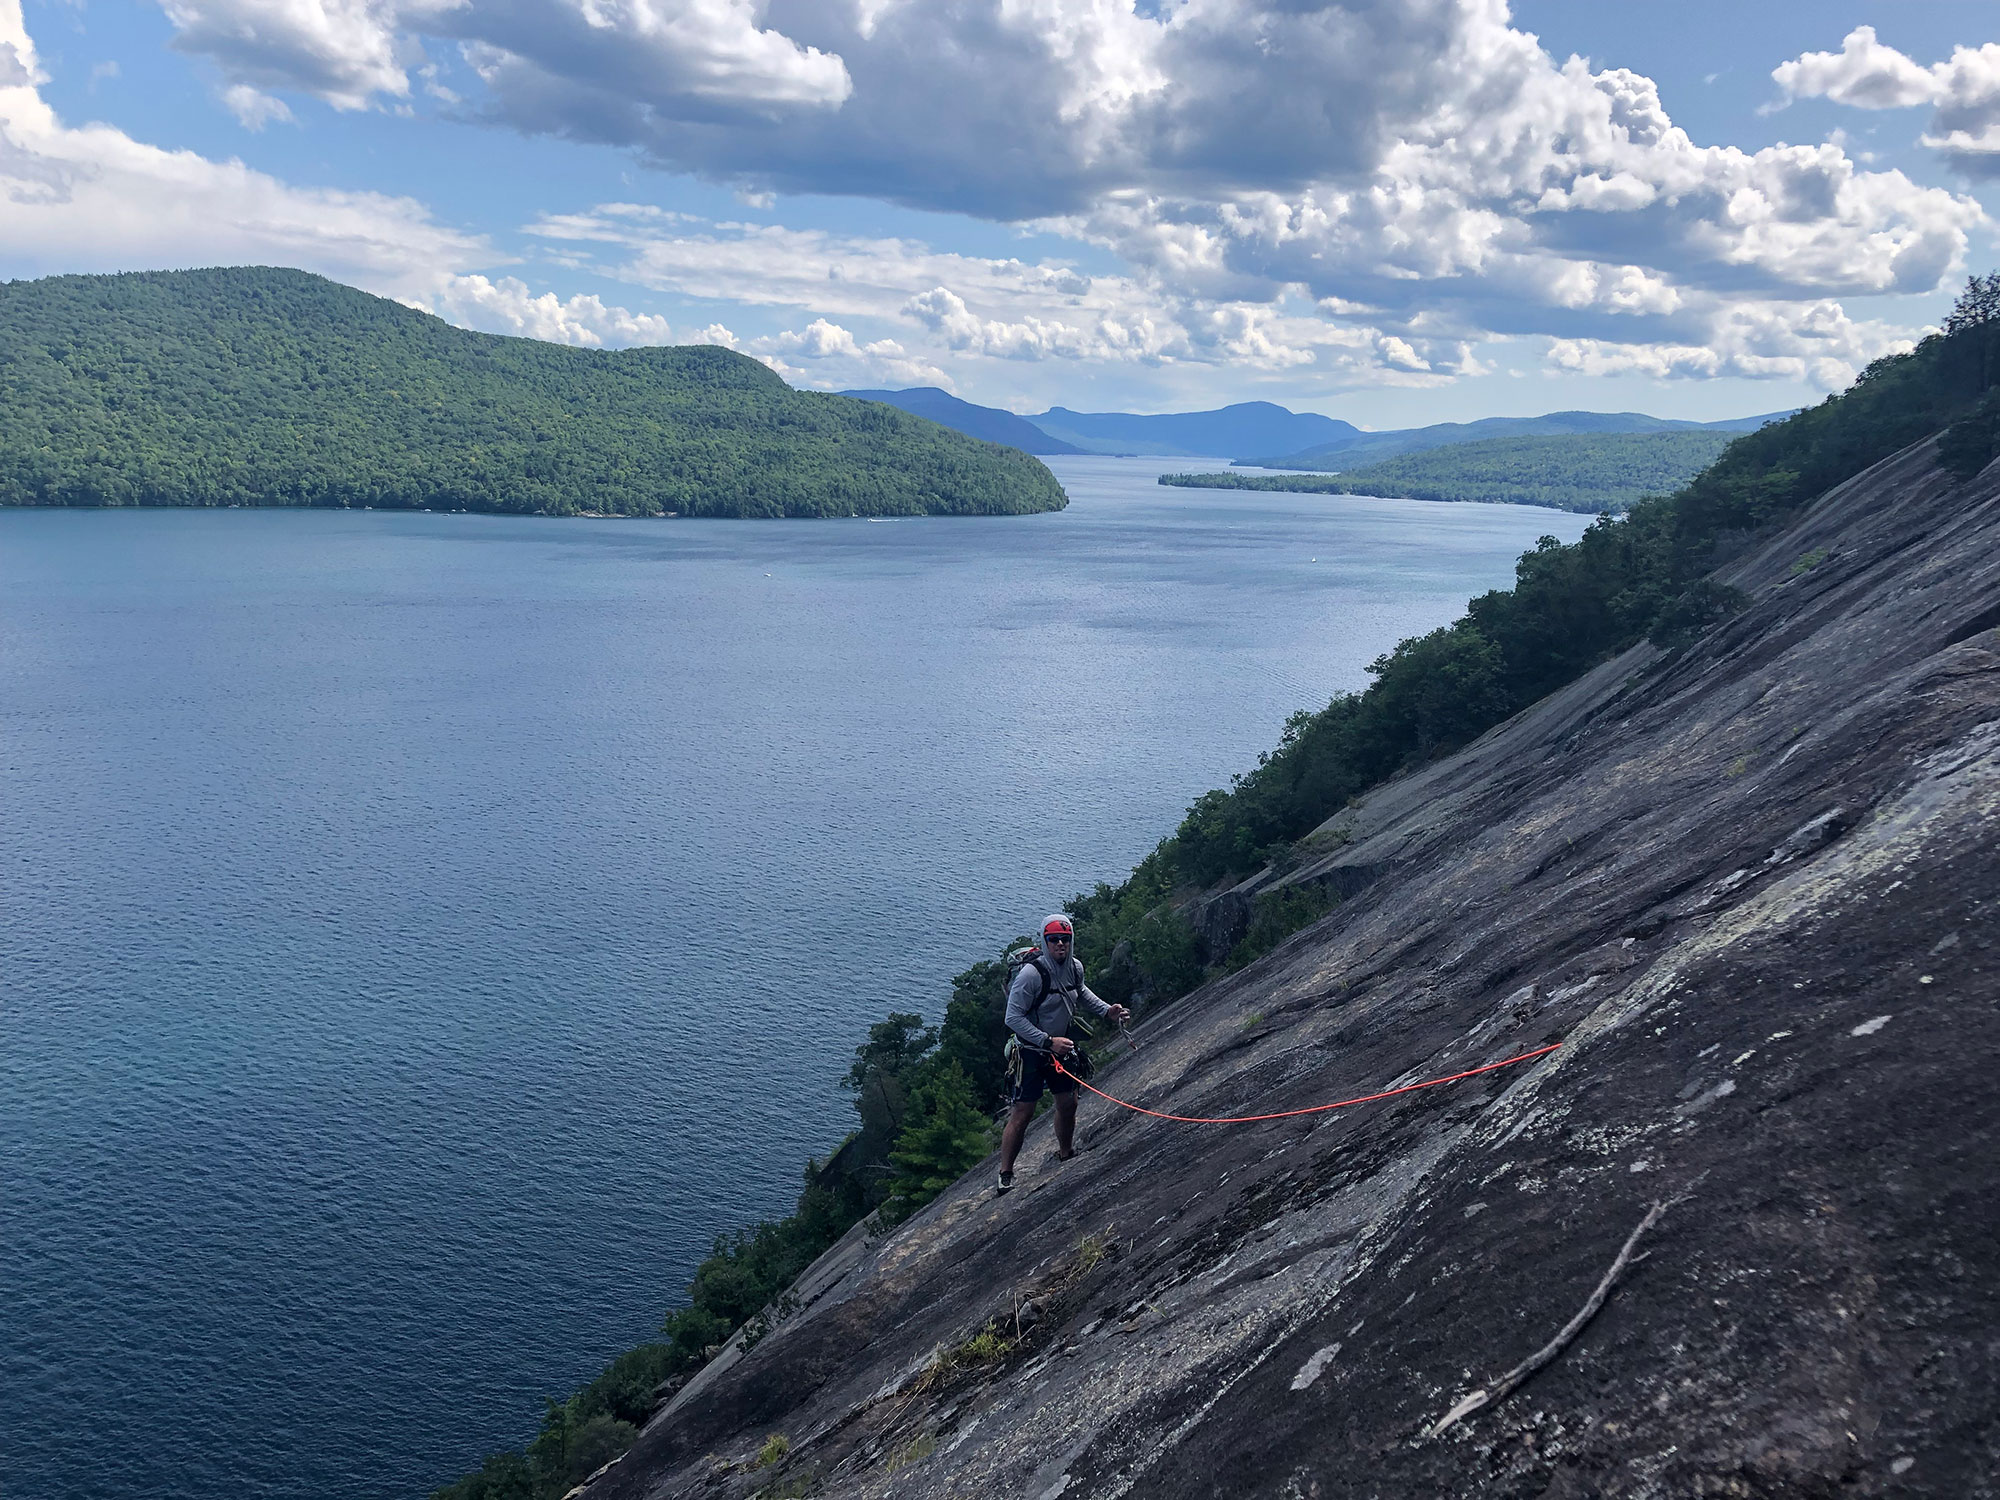
Once you’re atop the third pitch (43.798054, -73.467148), take some time—if you haven’t already—to admire the view. The climb drops away in the foreground, replaced by the deep blue of Lake George and the dark green of the mountains in the distance. It’s a fantastic setting, one you’ll be reluctant to leave.
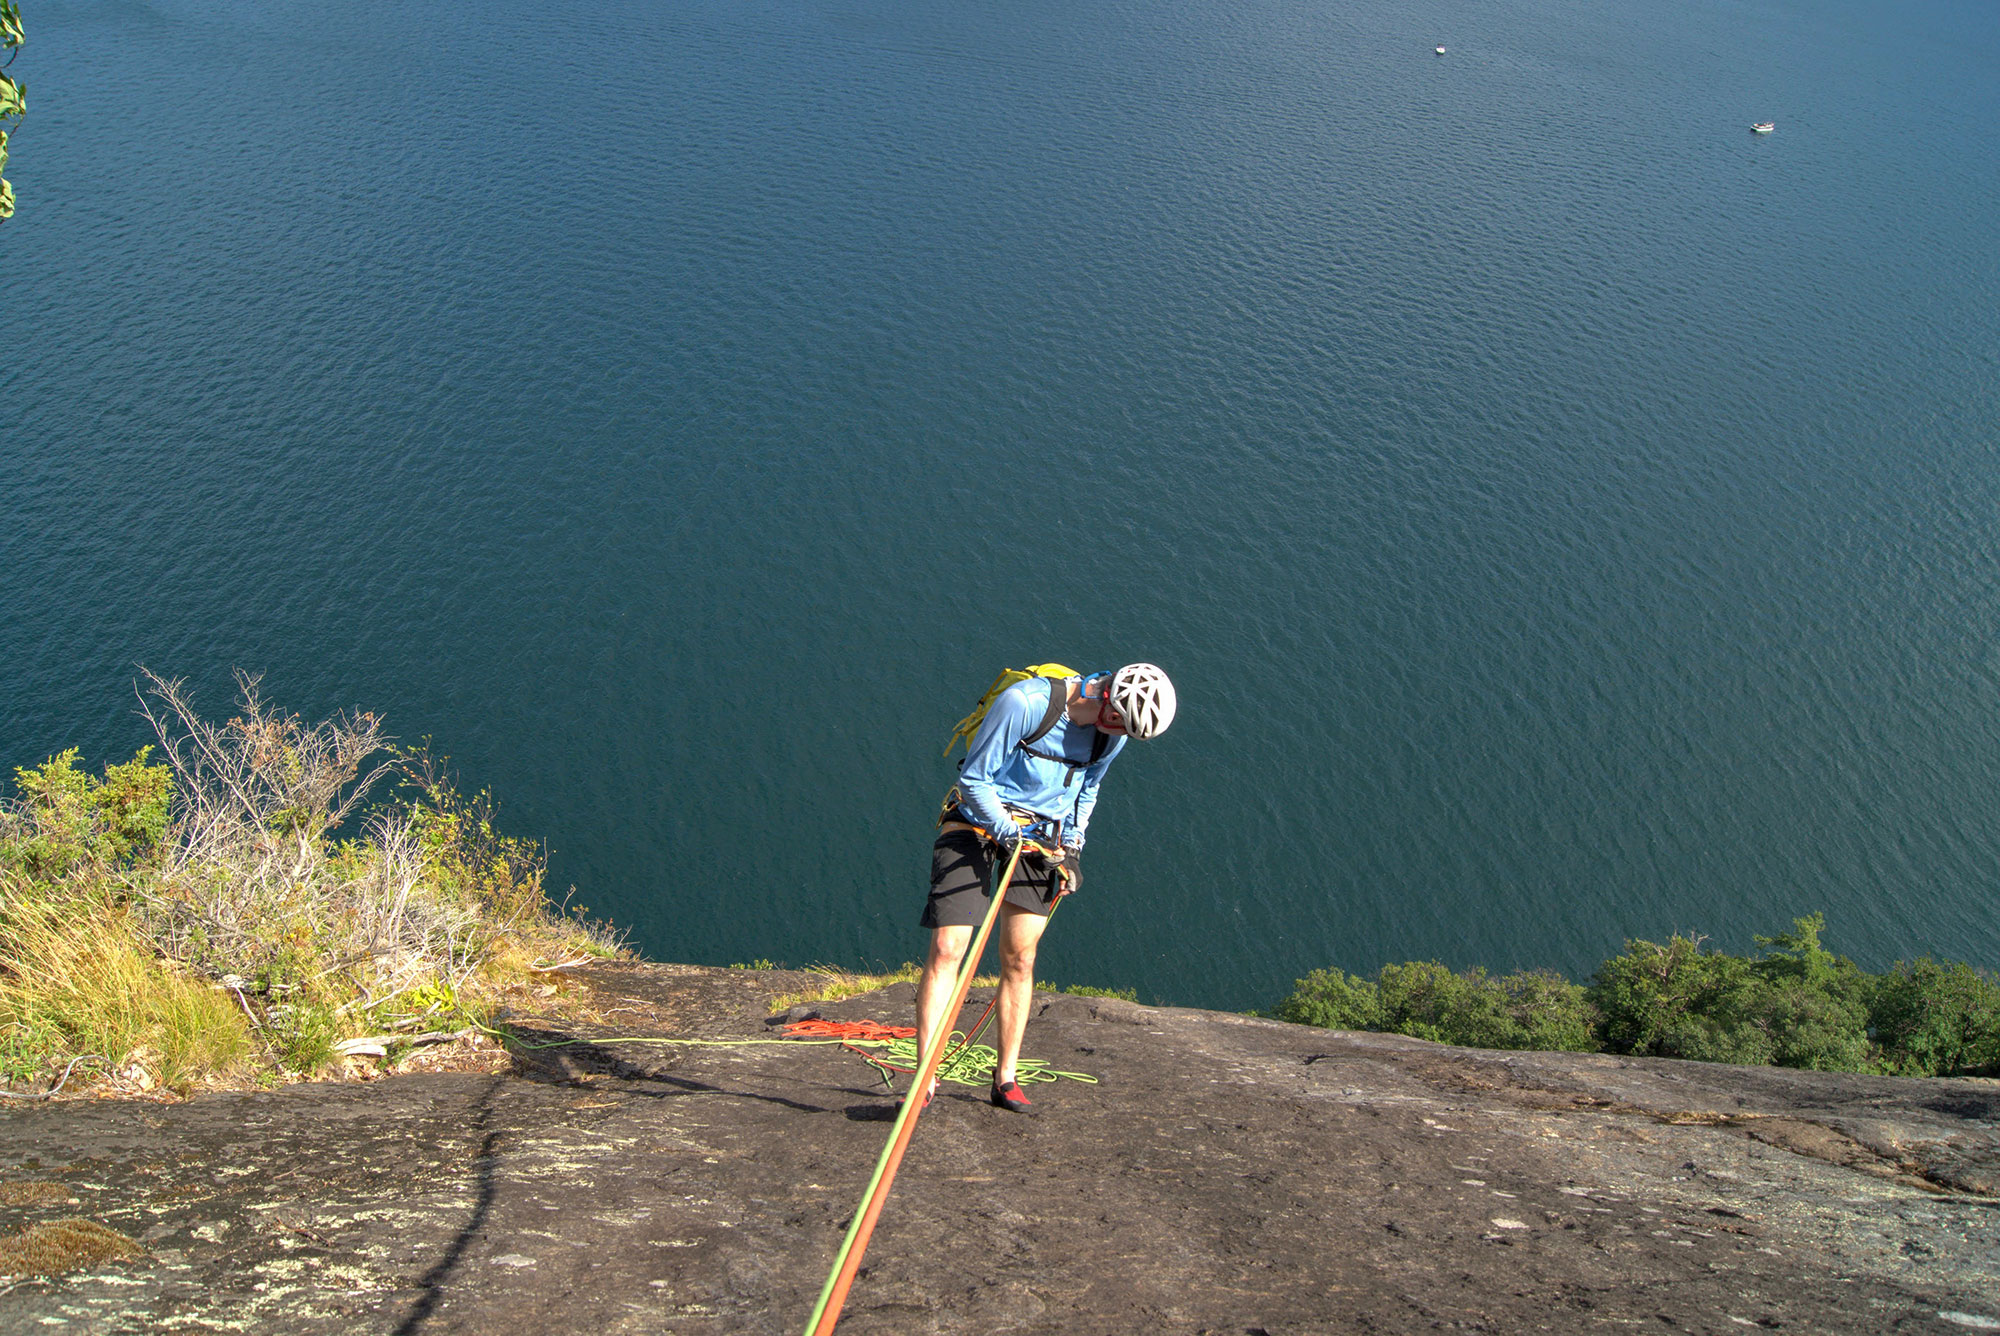
The Raps
Whenever you can break away from the view, it’s three double-rope rappels with 60m ropes back down to the ground. Each of the anchors is bolted and very easy to spot while on rappel. With true 70m ropes, you can do it in 2 rappels, but the last rap to the ground is a rope stretcher.
The last rap will leave you on a ledge a little to climbers’ right of the climb. On the ledge, coil your ropes, then scramble back to your boat. Just before the base of Little Finger, there’s an open slab that drops down into the base of the water. It’s easy to traverse, but watch less experienced folks closely as they cross; any fall would be a long (and wet) one.
The Paddle Back
Once you reach your boat, dump your gear in your dry bags, put your PFD back on, get the boat in the water, and retrace the paddle you did earlier in the day. The paddle back will likely be challenging, as it’s usually into the wind and waves. Wakes from passing motorboats can add a little spice as well.

The Kit
- Between the waves and deep water, it’s great to have dry bags to store your ropes, rack, and climbing shoes. A couple of 65L bags from Sea to Summit will hold everything with room to spare.
- The boat landing at Little Finger is rocky and slippery. Send it in style with a water shoe from NRS such as the Kicker Remix (men’s/women’s) or a river sandal like the Teva Terra Fi 4 (men’s/women’s).
- On summer days, the sun beats down on Rogers Rock until mid afternoon. Wear a sunshirt like the Black Diamond Alpenglow Hoodie (men’s/women’s) to avoid baking in the sun.
- Multi-pitch climbers on low-angle routes such as Little Finger are at risk of something either falling or getting knocked down on them. With this in mind, pack a climbing helmet like the Black Diamond Vapor.
- Two 70-meter ropes, like the Sterling Fusion Nano Dry 9.0 70m allow you to cut out a rappel.
Keys to the Trip
- Motorboat traffic can sometimes make communication between climbers difficult. Before you leave the belay, have a plan so that your second will know what to do even if he/she can’t hear you.
- You might think that climbing above the water is a great choice for sweltering summer days; However, Little Finger has a well-deserved reputation for scorching unsuspecting climbers thanks to the exposed slab and reflective water. Consequently, it’s best avoided on the sunniest summer days.
- Climb in a bathing suit because there are lots of places to swim on the way back (including the Rogers Rock Campground swimming area).
- A great way to cool off and replace the calories you burned is with soft-serve ice cream from the Wind-Chill Factory.
- If you prefer craft beer to ice cream cones, take the 30-minute drive to Battle Hill Brewing in Fort Ann, New York.
- If you loved Little Finger and are anxious for more climbing, Rogers Rock is home to a lot more routes. Get the beta for the rest of the climbs in Adirondack Rock, the routes around Lake George are found in Volume 2.
Current Conditions
Have you climbed Little Finger recently? Post your experience and the conditions (with the date of your climb) in the comments for others!
Related Posts
MKsOrb
[…]check beneath, are some entirely unrelated websites to ours, however, they’re most trustworthy sources that we use[…]